Archive for January, 2013
Foot Therapy: DIY Foot Soak
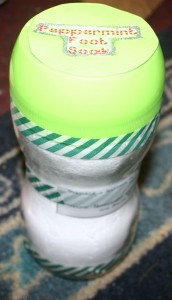
I needed a gift idea for my Mother-in-law. She’s hard to shop for because she will always tell us she doesn’t want anything! I decided to make her some peppermint foot soak. I would make some for my mom, too, but I don’t think a bag full of white powder would make it though customs, do you?
It’s really easy to make, too! I ordered all my supplies off eBay, and I have more than enough for several more batches. Buying the baking soda/bicarbonate of soda in bulk online will save you a bundle. I think I spent around £10 for the supplies, but that included essential oils for other projects, too.
You will need:
1 Cup Epsom Salts
1 Cup Baking Soda or Bicarbonate
Essentail Oil (I used peppermint and eucalyptus, but you can use whatever you want)
Mix together the Salt and Soda and add however many drops of oil you’d like (I probably used about a dozen of each). Stir or shake t distribute the oil. If you can’t smell the oil, add a few more drops.
Store in a clean jar. For gift giving, you could make a label for the jar and some instructions (sprinkle in a footbath or tub). I also included a list of ingredients so the receiver would know if they were intolerant of any of the items. I used a jar that some Stevia came in because I liked the shape of the jar and the colour of the lid.
The Eucalyptus is also great if you’ve got a cold. I just added a few drops to my bath and it helped to clear my nose!
~~*~~
The contents of this post, including images are © Rebecca J Lockley and Tim Lockley unless otherwise stated and should not be reproduced without permission. If you are not reading this on http://blog.beccajanestclair.com, my facebook page, Networked Blogs, the RSS feed(s), or through an e-mail subscription, please notify me.
[LJ readers reading this on the LJ RSS feed: Please click on the link at the top of the entry to go directly to my blog to leave a comment, as comments left on the LJ RSS do not get seen by me. Facebook users reading this from my Networked Blogs link can either comment on facebook or on my blog. If you are reading this through an e-mail subscription, you might need to go directly to my blog to view videos and images.]
For full Copyright and Disclaimer, please read http://www.blog.beccajanestclair.com/copyright/

Have Yourself a Diabetic Christmas Part 4
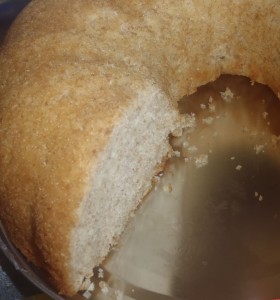
The last Christmas recipe I have to share with you all uses Carbquik. I did not make this cake for Christmas, but I made it for New Year’s Day when Tim and I ate our Christmas dinner (since we had dinner on Christmas Day with his parents). I found this recipe for Low-Carb Pound Cake on the Low Carb Friends website, where it says this contains 1g of carbs per serving. I don’t like the taste of Carbquik by itself, so I replaced part of the Carbquik. If you wanted to make this with just Carbquik, you would need 3 and a half cups of it. The way I made it has a few more carbs than that per serving, but I don’t know exact amounts.
Low Carb Pound Cake
You will need:
1 1/2 Cup Carbquik
1 Cup Wholegrain Flour
1/2 Cup Ground Almonds (or Almond Meal/Almond Flour)
1/2 Cup Coconut Flour
3/4 Cup Splenda for Baking
3/4 Cup Butter (softened)
200g Cream Cheese (one pack/8 oz)
6 eggs
1 tsp Vanilla
Pinch of Salt
-Pre-heat the oven to 175C.
-Butter the sides of a Bundt pan (I’m sure other cake pans work just as well!)
-Combine Carbquik, Flour, Ground Almonds, Coconut Flour, and salt in a small bowl
-In a larger bowl cream together Splenda for Baking, butter, and cream cheese.
-Add eggs one at a time to liquid mixture. Add vanilla.
-Slowly add dry mix to the wet until it is well blended.
-Pour the mix into the cake pan and bake for 45-60 minute or until a toothpick comes out clean.
We had this for Strawberry Shortcake with some fresh berries and cream. It’s so tasty and low-carb that you don’t feel guilty sneaking a piece for breakfast the next morning!
~~*~~
The contents of this post, including images are © Rebecca J Lockley and Tim Lockley unless otherwise stated and should not be reproduced without permission. If you are not reading this on http://blog.beccajanestclair.com, my facebook page, Networked Blogs, the RSS feed(s), or through an e-mail subscription, please notify me.
[LJ readers reading this on the LJ RSS feed: Please click on the link at the top of the entry to go directly to my blog to leave a comment, as comments left on the LJ RSS do not get seen by me. Facebook users reading this from my Networked Blogs link can either comment on facebook or on my blog. If you are reading this through an e-mail subscription, you might need to go directly to my blog to view videos and images.]
For full Copyright and Disclaimer, please read http://www.blog.beccajanestclair.com/copyright/
Have Yourself a Diabetic Christmas Part 3
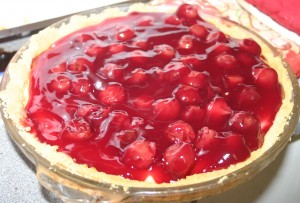
Another big part of Christmas dinner is of course, the dessert. I had already made the Christmas Pudding full of sugar and booze, so I wanted to try to make something with less sugar. I really wanted to make a cheesecake, so I searched for several sugar free versions to create mine. Unfortunately, the topping is NOT sugar free as I could not find any sugar free pie filling, but I DO have a recipe for making your own sugar free cherry topping I will try out some other time. I can justify the sugar in the topping only because you really don’t eat that much topping anyway.
For the Crust —
2 Cups Ground Almonds (sometimes called almond flour or almond meal)
4 TBS Butter, melted
2 TBS Splenda for Baking
For the Filling —
600g Cream Cheese (3 packages) – room temperature
3 Eggs
1/2 TBS Vanilla
1/2 TBS lemon juice
1 Cup Splenda for Baking
For the Topping —
1 Can pie filling, any flavour. Sugar Free if you can find it
-Preheat the oven to 200C.
-Combine the ingredients for the crust and press into bottoms and side of your pie dish.
-Bake crust for 12-15 minutes until it is firm and golden.
-Remove from oven and set crust to one side.
-Cream together cream cheese and Splenda for baking.
-Add eggs one at a time, beating well after each.
-Add lemon juice and vanilla.
-Pour filling into cooked crust and place in the oven (still at 200C)
-As soon as you shut the oven door, immediately reduce temperature to 125C. DO NOT OPEN THE OVEN WHILE BAKING THIS. Alternatively, you can use a water bath.
-Bake for 60-90 minutes. If your oven has a glass door, check by sight. The cheesecake should form a mound and look firm. You can open the door after an hour to check on the cake. A cake tester inserted should come out fairly clean, with bits of firm cheesecake clinging to it. If the cheesecake is still runny, leave it in the oven for additional time.
-Let the cheesecake cool completely before adding the topping.
~~*~~
The contents of this post, including images are © Rebecca J Lockley and Tim Lockley unless otherwise stated and should not be reproduced without permission. If you are not reading this on http://blog.beccajanestclair.com, my facebook page, Networked Blogs, the RSS feed(s), or through an e-mail subscription, please notify me.
[LJ readers reading this on the LJ RSS feed: Please click on the link at the top of the entry to go directly to my blog to leave a comment, as comments left on the LJ RSS do not get seen by me. Facebook users reading this from my Networked Blogs link can either comment on facebook or on my blog. If you are reading this through an e-mail subscription, you might need to go directly to my blog to view videos and images.]
For full Copyright and Disclaimer, please read http://www.blog.beccajanestclair.com/copyright/
Have Yourself a Diabetic Christmas Part 2
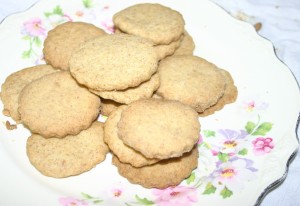
When my family bakes Christmas cookies, we always made more than one kind, so of course I wanted some variety. I am a big fan of the Scottish Shortbread you can get in the tins from Marks and Spencers, so I decided that would be my second type of cookie. I scoured the web, and I found a recipe posted by someone who calls themselves “mrsnorris”. Now, whether they intended to be a Harry Potter reference or their name really *is* Mrs Norris, the fact that it could be HP related instantly caught my attention to base my recipe off of.
You will need:
160g Butter, softened (I used Stork)
4 TBS Splenda for Baking (the original recipe calls for regular Splenda, but I find the Splenda for Baking doesn’t leave an after taste the way regular Splenda does, but feel free to use the sweetener of your choice)
100g White flour
100g Wholegrain flour (my wholegrain was also self-raising, but I don’t think this matters)
1/8 tsp Salt
-Preheat the oven to 180C and line your baking trays with parchment paper.
-Cream together butter and Splenda for Baking until fluffy.
-Slowly add flour and salt.
-Work dough into a ball.
-Flour your worktop and gently press (or roll) the dough out until it is about a half inch thick.
-Use a biscuit cutter (or shapes) to cut out the biscuits, re-rolling in between. You should be able to fit a dozen per cookie sheet. If you don’t have any cutters you could use a glass dipped in flour or just cut them into fingers with a knife. You will need to re-flour your worktop each time you re-roll the dough.
-Optional: you could brush the tops of each cookie with some egg and sprinkle a tiny bit of dyed* Splenda for Baking to imitate sprinkles, but they are just as good plain.
-Refrigerate each baking tray for 15 minutes before baking (I did this by putting the first sheet in and setting the timer. When the timer went off, they went into the oven and the next tray went into the fridge)
-Bake for 15 minutes or until golden. Keep an eye on them as if they overbake they get very crumbly (as we discovered!)
Once again, these were a big hit and no one could tell they were sugar free! Just makes sure you tell people ahead of time as some people are intolerant to artificial sweeteners.
~~*~~
The contents of this post, including images are © Rebecca J Lockley and Tim Lockley unless otherwise stated and should not be reproduced without permission. If you are not reading this on http://blog.beccajanestclair.com, my facebook page, Networked Blogs, the RSS feed(s), or through an e-mail subscription, please notify me.
[LJ readers reading this on the LJ RSS feed: Please click on the link at the top of the entry to go directly to my blog to leave a comment, as comments left on the LJ RSS do not get seen by me. Facebook users reading this from my Networked Blogs link can either comment on facebook or on my blog. If you are reading this through an e-mail subscription, you might need to go directly to my blog to view videos and images.]
For full Copyright and Disclaimer, please read http://www.blog.beccajanestclair.com/copyright/
Have Yourself a Diabetic Christmas Part 1
My first Christmas dealing with my diabetes, and I think I did okay. I had some mince pies ( but never more than one in a single day), I had a few glasses of wine (again, never more than one), Ate a few small pieces of chocolate (Tim bought me an advent calendar, but I only ate the chocolate on a few days), and I indulged in a small piece of the Christmas Pudding I had made (just to taste it as I had never even had it!). But I also only drank sugar free fizzy drinks or slim tonic water, ate low-carb, and avoided the starchy foods – no potatoes, parsnips, carrots, etc. So overall, I did pretty good.
Making Christmas Cookies are a HUGE deal to me as it’s been a family tradition since forever. Fortunately, my mom sent me some Splenda Blend for Baking and some Splenda Brown. Both these products I have been unable to locate in the UK, but you can order them through importers on eBay (though it will be pricey, it’s worth it!)
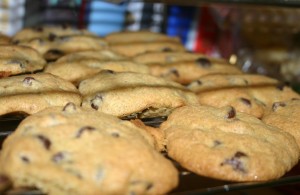
The first thing I needed to do was bake some chocolate chip cookies as those are my favourite cookie of all-time and Mom also got me some sugar free chocolate chips! However, don’t go crazy looking for them. I compared the bag of SF chips to a bag of Toll House, a container of dark chocolate chunks from Waitrose, and to some plain chocolate chips from Asda and they all contained around the same amount of sugar per 100g. After I added the bag of SF chips I decided it needed more chips anyway, so my cookies wound up with a combination of Hershey Sugar Free, Toll House Semi-Sweet, and Waitrose dark chocolate chunks. They were amazing and no one could tell they were sugar free!
(This recipe was modified off the back of the Hershey Sugar Free Chocolate Chips, so is measured using US measurements)
You will Need:
1 Cup white flour
1 Cup wholegrain flour
1 tsp baking soda (or 2 tsp Bicarb of Soda if you don’t have access to American baking soda)
1/2 tsp Salt
1 Cup butter (Soft – I used stork out of a tub)
1/3 Cup Splenda for Baking
1/3 Cup packed Splenda Brown Sugar Blend
2 tsp Vanilla extract
2 eggs
2 1/2 Cups chocolate chips or chunks (sugar free, semi-sweet, dark, or plain. Using milk chocolate will add more sugar)
-Preheat the oven to 200C and line your baking trays with parchment paper.
-Mix together the flours, baking soda, and salt in a small bowl.
-In a larger bowl, beat butter, the two Splendas, eggs, and vanilla.
-Slowly mix in the flour.
-using a wooden spoon, stir in the chocolate chips/chunks.
-Drop by teaspoons onto your baking sheets. You should be able to get 12 on a sheet.
-Bake each sheet for 9-12 minutes until cookies are golden.
-Cool on the sheet for a few minutes, then continue to cool on a baking tray.
Makes about 3 and a half dozen soft cookies, depending on how big you make them. I went through THREE batches of them this season because everyone loved them so much.
~~*~~
The contents of this post, including images are © Rebecca J Lockley and Tim Lockley unless otherwise stated and should not be reproduced without permission. If you are not reading this on http://blog.beccajanestclair.com, my facebook page, Networked Blogs, the RSS feed(s), or through an e-mail subscription, please notify me.
[LJ readers reading this on the LJ RSS feed: Please click on the link at the top of the entry to go directly to my blog to leave a comment, as comments left on the LJ RSS do not get seen by me. Facebook users reading this from my Networked Blogs link can either comment on facebook or on my blog. If you are reading this through an e-mail subscription, you might need to go directly to my blog to view videos and images.]
For full Copyright and Disclaimer, please read http://www.blog.beccajanestclair.com/copyright/