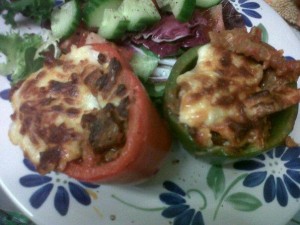
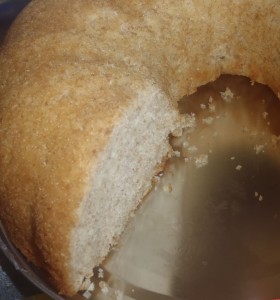
Archive for the 'Recipes, Cooking, & Food' Category
[Recipe] Black & Blue Pasta [Slimming World Friendly]
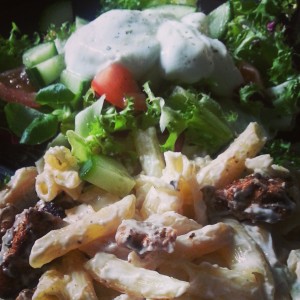 [DISCLAIMER: I do not work for Slimming World, I am not affiliated with Slimming World beyond being a paying customer/member, I get no personal benefit from writing this post other than the joy of sharing.]
A few years ago, Tim and I were planning on celebrating our birthdays (they’re only three days apart) at our favourite Italian American restaurant here in the UK. Due to Tim’s work schedule, we went out for Lunch instead of Dinner, and got the chance to order off the Lunch menu. Tim ordered something called “black and blue pasta”. He loved it and has been disappointed that it’s not a Dinner option at the restaurant. I kept saying I would try to re-create it at home, but I’m really picky about my blue cheeses and I worried it wouldn’t melt very well and it would be swimming in fat. A few weeks ago, we were talking at my local Slimming World group (Consultant Rebecca Stones!) about melting Laughing Cow wedges. Now, I had melted the regular ones to make a poor woman’s mac n cheese, but hadn’t tried it with the flavoured ones, so an experiment was conducted, and Tim tells me it tastes just as good (better!) than what we could get at Frankie and Benny’s!
I’m posting this recipe because two of my friends saw my Instagram picture on Facebook and couldn’t believe this was “diet food”!!
Black and Blue pasta (serves one)
Syn Values: FREE if counting the cheese as your HEA, otherwise one serving is 6 Syns (each triangle is 1.5 Syns)
[Please note: Syn values are based on my exact ingredients using the online calculator. Your Syn value may vary based on your ingredients and the size of your baking containers and portions, so use this number as a guide only. Syn values also frequently change, but these values are correct at the time of publication.]
You Will Need:
1 Chicken breast, cut up into bite sized pieces
1 TBS Cajun or Jerk spice (optional. Add more for extra spice!)
4 Laughing Cow Light Cheese Triangles with Blue Cheese
1 TBS Fat Free Fromage Frais
Pasta (As much as you want)
Frylight
1. Pre-heat a griddle pan (or frying pan) over high heat, sprayed with Frylight. While the pan is pre-heating, start cooking your pasta according to the package directions in a separate pot (I always pre-boil the water in the kettle to give it a head start to cut down on cooking time).
2. Toss the chicken with the spices and add to the griddle pan. Cook on high for about 5 minutes, then turn over and cook for an additional 5. continue to turn the bites of chicken until they are cooked through and browned (starting to char a little!).
3. Drain the pasta and add it back to the pot. Add the 4 blue cheese triangles and the fromage frais and mix over low heat and keep stirring until the cheese is melted and smooth.
4. Serve with a salad or vegetables of your choosing (I made a dressing with Fromage Frais and herbs).
This is so good, I want to make it again tonight…..
***
The contents of this post, including images are © Rebecca J Lockley and Tim Lockley unless otherwise stated and should not be reproduced without permission. If you are not reading this on http://blog.beccajanestclair.com, my facebook page, Networked Blogs, the RSS feed(s), or through an e-mail subscription, please notify me.
[LJ readers reading this on the LJ RSS feed: Please click on the link at the top of the entry to go directly to my blog to leave a comment, as comments left on the LJ RSS do not get seen by me. Facebook users reading this from my Networked Blogs link can either comment on facebook or on my blog. If you are reading this through an e-mail subscription, you might need to go directly to my blog to view videos and images.]
For full Copyright and Disclaimer, please read http://www.blog.beccajanestclair.com/copyright/
2 comments[Recipe] Chocolate Flapjack
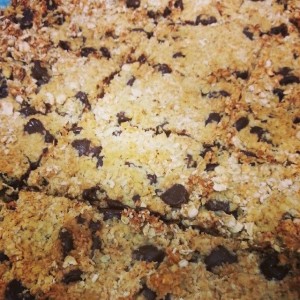 When I first moved to the UK and I would hear the word “flapjack”, I would automatically think of a pancake and I kept being confused as to why bakeries, tea shops, and coffee shops would offer a pancake with your cuppa. Well, I finally found out that a flapjack in the UK is a sweet oaty bar….kind of like a granola bar, but not quite so wholesome. The primary ingredients are oats, butter, and sugar. I did enjoy the few times I tried flapjack, but I had never tackled baking my own, until today.
And since I’m on Slimming World, I of course had to create my own version of a flapjack that come in at 4.5 Syns per square (if it’s divided into 18).
[Please note: Syn values are based on my exact ingredients using the online calculator. Your Syn value may vary based on your ingredients and the size of your baking containers and portions, so use this number as a guide only.]
You Will Need:
225g Quaker Rolled Oats
100g Flora Lightest (purple container)
40g Splenda
4 tsp The Groovy Food Company agave
100g Dr Öatker plain chocolate chips
Pre-heat your oven to 180C. I mixed these up in the same tray I baked them in, which was a small glass roasting tray. All you need to do is smoosh all the ingredients together in your dish (the girl who hates getting her hands dirty sprayed her hands with Frylight and squished it together by hand!) and bake for 25 minutes! You can score them before they go in to make it easier to cut apart, or cut them once they are cool. I made two horizontal cuts (to make three long strips of flapjack) and then cut each strip into 6 squares.
Not only is this Slimming World friendly, but it’s also safer for diabetics!
***
[DISCLAIMER: I do not work for Slimming World, I am not affiliated with Slimming World beyond being a paying customer/member, I get no personal benefit from writing this post other than the joy of sharing.]
The contents of this post, including images are © Rebecca J Lockley and Tim Lockley unless otherwise stated and should not be reproduced without permission. If you are not reading this on http://blog.beccajanestclair.com, my facebook page, Networked Blogs, the RSS feed(s), or through an e-mail subscription, please notify me.
No commentsSlimming World Fast Forward Weekly Diary
[DISCLAIMER: I do not work for Slimming World, I am not affiliated with Slimming World beyond being a paying customer/member, I get no personal benefit from writing this post other than the joy of sharing.]
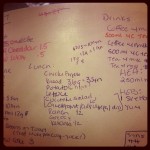
Wow, so here we go. This is a transcript of my paper journal I kept these past 7 days….
Day One
Trips to the Loo: 20
Drinks: 2L Water, 1.5L still lemonade, 2 cups coffee, 2 cups green tea
0930: Coooofffeeeeeeeee! Skim milk is gross. Sweetener. Lots of sweetener.
Hmm, I do like crumpets. Time to get out my cool drinking cup. It holds 710ML, so if I fill it at lest 2 and a bit times I’ll drink the required amount. Hmm. Gotta pee. Again. And again. and again. OMG when will I stop needing the loo?!
1145: Hungry. but it’s too early for Lunch. More water! (and peeing!)
1250: 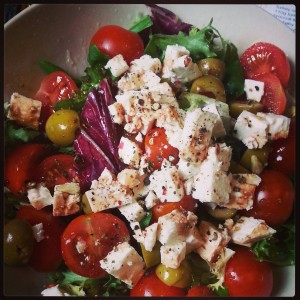
Lunch, finally.
1405: You know, a digestive biscuit never tasted so good!
1420: All that rain is making me need the loo again…..
1450: Can I start planning dinner yet? I planned on Salmon, but I’m not sure I want that. Anyway, time to do some work….
1835: OK, time for dinner. Skipping the salad and saving it for a later snack sounds like a good idea to me.
2020: 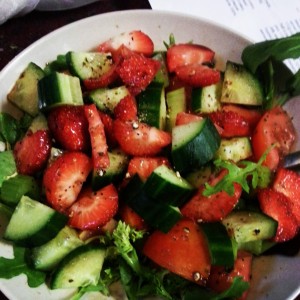
Mmmm. Adding strawberries to salad? Brilliant.
2200: Bedtime.
Day 2
I stopped tracking my trips to the loo. I only did it yesterday for giggles.
0730: Awake. Ugh. Water & an apple to keep me going for now….
0920: Gave in and made coffee. Still don’t like skim milk.
1100: Visit to the in-laws for a cuppa….black tea. Bletch.
1230: Greek salad again. I’m supposed to have variety on this plan, but the greek salad option is just so good! This eating plan isn’t so bad….yet. Although I feel like I’m eating a lot of carbs. Wholegrain bread, pita bread, crumpets….that’s a lot of carbs. But, I’m still feeling positive!
1800: Dinnertime.
1900: I still have room for some snacks. Really want some biscuits, so going to have to go shopping for some Rich Tea or Morning Coffee biscuits. I’ve never had either, but I’m willing to try them.
2020: Having a diet Root Beer for a treat. I wonder if I could freeze some natural yoghurt and make a root beer float?
2215: I wonder how a hilight mixed into a cup of coffee would taste? The answer is JUST LIKE A MOCHA. Yummmmm
Midnight: Crap. Hungry. Hmmm. Maybe some Ryvita with cream cheese will satisfy me?
Day 3
0130: It’s 1:30 in the morning, so let’s replan my week’s menu….
1030: Wow, woke up later than I had expected. Oh well, time for breakfast. Wow, that’s a lot of strawberries:
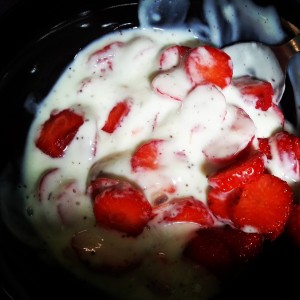
1300: Need some more food. Time for a trip to Waitrose.
1500: Why does Waitrose have to smell like bacon? 🙁 Hungry! Having a peppermint tea in the cafe before I head home. Bought some Rich Tea fingers. I wonder if anyone would notice if I sneak into my bag to open them? Nope! Hey, these are pretty good. Taste like animal crackers from when I was a kid.
1800: Dinnertime
2100: Hmm. Someone online has told me I’m not following the plan right. Well, I hate to say it, but they don’t control me. If I’m doing this wrong, Rebecca will tell me. She saw my week’s plan and didn’t say anything about it. Besides, isn’t it all about what works for you? I’m actually discovering (yes, only three days in) that I actually prefer having lots of little meals throughout the day instead of three main ones. The proof will be in my weigh-in…..
2130: Cinnamon is a spice, right? Cottage cheese, apples, and cinnamon sound like a nice bedtime snack.
Day 4
0745: Up early. Breakfast. Hope I don’t get too hungry later.
1500: Ok, today is HARD! I’m just so hungry 🙁 And tomorrow is going to be a challenge since we are spending the day out at the Butterley Garden Railway.FORWARD PLANNING….right? I’m hungry. I ate Lunch at 1400 but I’m still hungry. Wishing for some diet soda….
Day 5
We spent the day out. I had a sensible Breakfast and packed a sensible Lunch, but we wound up out much later than we had hoped and needed to stop for Dinner. I made the best of it with a jacket spud, omelette, and salad….hope that will be good enough! Tonight would have been weigh-in day, but since we were out so late, I’m going to go to a different group tomorrow.
Day 6
I had a sneaky peek on the Wii to see where I was at and it’s said I’ve lost weight — yay!
I decided to have a jacket potato with tuna for Lunch. I hated opening a whole tin of corn just for a few Tablespoons, so I hope I can use it up before it goes bad. I also added some olives for flavour.
Day 7
Well….I did it. I lost FIVE POUNDS. AAAND, I got a shiny 2.5 Stone certificate too:

I also had a look on my Wii Fit history, and from back in 2011 when we first got our Wii until now, I have lost 4 Stone. That makes me feel incredible.
Bring on Week 2 of Fast Forward…..5.5 pounds to go until I hit my interim target…..can I do it by next week?
***
The contents of this post, including images are © Rebecca J Lockley and Tim Lockley unless otherwise stated and should not be reproduced without permission. If you are not reading this on http://blog.beccajanestclair.com, my facebook page, Networked Blogs, the RSS feed(s), or through an e-mail subscription, please notify me.
[LJ readers reading this on the LJ RSS feed: Please click on the link at the top of the entry to go directly to my blog to leave a comment, as comments left on the LJ RSS do not get seen by me. Facebook users reading this from my Networked Blogs link can either comment on facebook or on my blog. If you are reading this through an e-mail subscription, you might need to go directly to my blog to view videos and images.]
For full Copyright and Disclaimer, please read http://www.blog.beccajanestclair.com/copyright/
3 commentsSlimming World Fast Forward
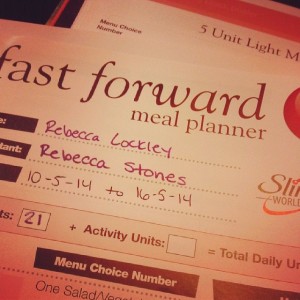 [DISCLAIMER: I do not work for Slimming World, I am not affiliated with Slimming World beyond being a paying customer/member, I get no personal benefit from writing this post other than the joy of sharing.]
Last week at Slimming World, I gained a half pound. This might not sound like much to anyone, but the week before I had lost 4 pounds, but the week before that I had GAINED 4….and going back in my weight loss chart, last Wednesday I weighed the same that I had at the beginning of March. My log looked like this:
+1
0
-2.5
-.5
+1.5
-2.5
+1.5
-.5
+4
-4
+.5
Now, in there somewhere I did have knee surgery and a very stressful few weeks of not only surgery recovery but also taking over my role as Company Secretary for the Association of 16mm Narrow Gauge Modellers (more on that in another post!) a few weeks earlier than planned. But to have not gotten anywhere after all those weeks? Gut-wrenching. I broke down in tears during Image Therapy, got a few hugs from my friends, and talked with my consultant, Rebecca Stones. Rebecca suggested that I give Fast Forward a go.
You hear horror stories about Fast Forward. A lot of people say not to do it, and it really does look scary when you first think about the fact that it’s a very restrictive eating plan, whereas the usual Slimming World plans (Extra Easy, Green, and Original/Red) are all based on eating anything you want with moderation (with loads of Free and Super Free foods you can eat unlimited quantities of depending on which plan you follow, plenty of Healthy As and Bs to choose from, and up to 15 Syns per day to spend on whatever you want). But Fast Forward has been an effective tool for people who are having a hard time keeping themselves on track, or they are really close to their goal and need an extra boost. Me, I’m in both boats. I have 10lbs to go until I hit a crucial interim goal of mine as well as flip flopping all over the place weight-wise recently. So I told Rebecca I would take a look at the packet and give it some thought, but if I really thought it wasn’t for me I wouldn’t force myself to do it. She didn’t have the packet on her as another member had it, so I had to wait for it to be sent to me (the fast forward packet is on loan from your consultant while you’re on it).
Because the fast forward plan is so restrictive, you are only allowed to be on it for a maximum of two weeks at a time (though I’m not sure how many weeks in between going on it you are allowed) and you must give the packet back to your consultant when you are done. This plan is not publicized on their website, and we are asked not to share it. So this blog post will not discuss the details on how to follow Fast Forward, just my experience on it. Consultants have a booklet that helps them calculate how many “units” you are allowed to eat per day based on your weight. I was given 21 units. The booklet has a page full of meals that are worth 5 units, a page of meals that are 8, a page of 1 unit snacks, and a page of 2 unit snacks. That’s it. You also have to drink at least 500ml of water three times per day (1.5L total), eat at least 1 salad (or other listed veggie) each day in addition to your units, and you can have unlimited black tea & coffee, sugar free squash, low-calorie soda, and certain condiments. You also have to pre-plan your week’s menu (though mine changed several times!) and send it off to your consultant so they can make sure you understand the plan. I spent all day Thursday working on my menu plan trying to get it just right, and then out shopping on Friday. I had a LOOOONG shopping list, so I went to Lidl, where I managed to get nearly everything I needed for under £35. (I still needed to top up with Tesco (and my husband needed food!), but we only spent £30. If I had ordered everything from Tesco, the bill would have been over £80. I checked. Every little helps!)
While I was figuring out my meals for the week, some of the items really struck me as funny. Crumpets? Olives? Biscuits? Ice Lollies? These are only a few of the choices you can make while on Fast Forward. As I said, some of them do feel a little weird, since crumpets are 4 Syns, Olives have Syns, Biscuits have Syns, Ice Lollies have Syns….but then it eliminates unlimited pasta, potatoes, rice, meat, veggies, and fruits. Some days I think I might have gone over 15 Syns if I was following Extra Easy, but because this is Fast Forward, it was okay. I had to tell myself to forget about thinking about the Syn values of items and just eat to my plan. Stick to my plan was my mantra.
I kept a paper day-by-day journal, which I will share with you all tomorrow.
Until then….
***
The contents of this post, including images are © Rebecca J Lockley and Tim Lockley unless otherwise stated and should not be reproduced without permission. If you are not reading this on http://blog.beccajanestclair.com, my facebook page, Networked Blogs, the RSS feed(s), or through an e-mail subscription, please notify me.
[LJ readers reading this on the LJ RSS feed: Please click on the link at the top of the entry to go directly to my blog to leave a comment, as comments left on the LJ RSS do not get seen by me. Facebook users reading this from my Networked Blogs link can either comment on facebook or on my blog. If you are reading this through an e-mail subscription, you might need to go directly to my blog to view videos and images.]
For full Copyright and Disclaimer, please read http://www.blog.beccajanestclair.com/copyright/
1 comment[Recipe] Slimming World Fakeaway Fried Chicken
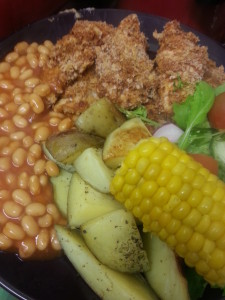 When the Fakeaway book came out I honestly wasn’t sure if I was going to get it. It seemed silly, when there are loads of changes you can make to existing recipes to make them Slimming World friendly, but at the same time I thought it might be useful for some new ideas. Last week, I bought it, and the first thing I did was tab off all the recipes I wanted to try….and I tabbed 24 of them!
So this week, I plan on trying FIVE new recipes out of the Fakeaway book. Of course, I always have to add my own flair to the recipes and I never use things as written in the books, so if I modify a recipe enough that it is different from the recipe in the cookbook, I will share them with you all.
Flipping through the book, one of the first things that caught my eye was the fake KFC. My husband likes KFC, but it’s so greasy I swear it leaves a lump in your stomach. Fortunately, the crew at Slimming World have developed a non-greasy, SW friendly version, so here is my version of KFC style chicken fingers. If you make the full dozen, each finger is 1/2 Syn.
[Please note: Syn values are based on my exact ingredients using the online calculator. Your Syn value may vary based on your ingredients and the size of your baking containers and portions, so use this number as a guide only.]
You will need:
150ml Passata
2 tsp chilli powder
2 tsp celery salt
1 TBS mixed herbs
pepper grinder (I used rainbow pepper)
1 egg, separated and yolk discarded (save it for an omelette!)
60g wholegrain bread (2-3 slices. It’s best to measure this out to make sure you don’t go over or under 60g), blitzed into breadcrumbs
12 chicken breast mini fillets
Fry Light
1 – Preheat oven to 200C and line a baking sheet with foil or parchment (or just spray with Fry Light)
2 – beat the egg white separately until it forms stiff peaks
3 – in a separate bowl (big enough to dip your chicken in) combine passata, chilli powder, celery salt, herbs, and a few grinds of the pepper mill. Fold in the egg white.
4 – Dip chicken fillets in tomato/egg mixture and then dredge in breadcrumbs. Spray tops with Fry Light
5 – bake 30-35 minutes.
If you start preparing your potato wedges/chips while the oven is pre-heating, you should be able to put both chips and chicken in at the same time and if you’ve pre-boiled the potatoes, they will take about the same amount of time as the chicken. I took the chicken out and raised the temperature on the chips for 5-10 minutes to crisp them up.
UK KFC is different from the KFC in the USA. There are no biscuits or mashed potatoes and gravy. Instead, you can get your chicken served with baked beans, chips (fries), and corn on the cob. Beans, potatoes, and corn are all FREE on Extra Easy (and on Green too, I think). For a dipping sauce, I took some Fromage Frais (also FREE) and added some dried chives (FREE) to make a mock sour cream & chives, or you could make Slimming World BBQ sauce.
My dinner tonight cost me 3 Syns, and that was including the ketchup for my chips! Quite tasty, and my husband said it did taste similar to KFC.
***
The contents of this post, including images are © Rebecca J Lockley and Tim Lockley unless otherwise stated and should not be reproduced without permission. If you are not reading this on http://blog.beccajanestclair.com, my facebook page, Networked Blogs, the RSS feed(s), or through an e-mail subscription, please notify me.
[LJ readers reading this on the LJ RSS feed: Please click on the link at the top of the entry to go directly to my blog to leave a comment, as comments left on the LJ RSS do not get seen by me. Facebook users reading this from my Networked Blogs link can either comment on facebook or on my blog. If you are reading this through an e-mail subscription, you might need to go directly to my blog to view videos and images.]
For full Copyright and Disclaimer, please read http://www.blog.beccajanestclair.com/copyright/
1 commentSlimming World: A Week in the Life
 Last night I got my 2 Stone Award!!
A few of my friends have asked me what I eat since I tend to have consistent weight loss, and when I do have a wobble, I usually know what the cause was. I lose on average 1 1/2 – 2 1/2 pounds per week, which for me isn’t bad! So since I decided to start tracking my food again this week, I thought I would post a typical week. I’ll add recipes at the bottom.
For those of you not on Slimming World, Slimming World has 5 categories for food. Free and Super Free (mostly fruit, vegetables, and other food that fill you up – things like pasta, rice, lean meats, etc.), Syns, Healthy Extra As (something with calcium), and Healthy Extra Bs (something with Fiber). Additional As and Bs can be had, but you count them as Syns. The booklet you get when you join has hundreds of Syn values, and you can find the values for everything else online (or with the ap). If the Syns aren’t listed, you can use the Syn calculator. If an item has Syns, the number is indicated in parenthesis. Slimming World has three eating plans, Original, Green, and Extra Easy. I tend to follow Extra Easy. Unless otherwise stated, the coffee I drink is fresh brewed, sweetened with saccharine tablets and my tea is Tetley “best of both” blend. Mayonnaise used is Hellman’s Lightest, Ketchup is always Heinz Reduced Sugar and Salt, Bread is usually from a 400g loaf of Warburton’s, Squash is no added sugar Robinsons.
Day 1
HEA: 250ml semi-skimmed milk measured out and used in tea/coffee
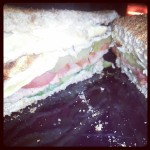
Breakfast – BLTEP(*) wrap in a Weight Watcher’s Tortilla (5 Syns) with Mayonnaise (.5 Syns), banana, coffee with milk.
Morning Snack – grapes, a pear, 500ml squash, and a cup of tea with milk
Lunch – Leftover Stew(**), 60g sliced wholemeal bread (HEB) with Flora spread (.5 Syns), 500ml no added sugar lemon squash, cup of tea with milk
Afternoon Snack – WW mini cake (3 Syns), apple, cup of tea with milk
Dinner/Tea – Vegetarian Chilli(***), 500ml diet iced tea
Evening Snack – RitterSport chocolate (6 Syns), cup of tea with milk
Total Syns: 15
Day 2
HEA: 250ml semi-skimmed milk measured out and used in tea/coffee
Breakfast – 3 egg omelette with 10g Reduced Fat Cheddar cheese (1.5 Syns), tomatoes, mushrooms, and 1 TBS Reduced Sugar and Salt Heinz Ketchup (.5 Syn), banana, coffee with milk, tea with milk
Morning Snack – Grapes and a plum, tea with milk, 500ml squash
Lunch – 3 Chicken Fingers(^) (3 Syns), seasoned potato wedges, cucumber salad(^^), Ranch dressing dip (made with powder and Greek yogurt) (.5 Syn), 1 TBS Reduced Sugar and Salt Heinz Ketchup (.5 Syn), 500ml diet iced tea
Afternoon Snack – apple and a pear with a cup of tea with milk
Dinner/Tea – I tried making mushy pea curry, but I didn’t like it, so I wound up with beans on toast (HEB), salad, and 500ml squash
Evening Snack – WW cake (3 Syns), tea with milk
Total Syns: 9
Day 3
Breakfast – BLTEP sandwich on wholegrain bread (HEB) with 1 TBS Lightest Mayo (.5 Syn), banana, Coffee with milk (.5 Syn)
Morning Snack – 500ml squash, tea with milk (.5 Syn), beans on toast (5 Syn)
Lunch – Pasta with Lightest Philadelphia Cream Cheese (HEA) stirred in and one Chicken finger(^) cut up (1 Syn), Cucumber salad(^^), apple, 500ml squash, tea with milk (.5)
Afternoon Snack – Pink N White (2.5 Syns), pear, tea with milk (.5)
Dinner/Tea – Pork steaks with mustard and agave(^^^) (1 Syn), sauteed potatoes, sprouts, salad, muller light yogurt, 500ml diet iced tea
Evening Snack – Options hot chocolate (2.5 Syns)
Total Syns: 14.5
Day 4
Breakfast – BLTEP* on wholegrain toast (HEB) with mayo (.5 Syn), coffee with milk (.5 syn), tea with milk (.5 syn), plum
Morning Snack – ASDA Vitality cereal bar (3.5 Syns), apple, coffee with milk (.5 Syn)
Lunch – Jacket Potato with reduced fat Cheddar cheese (HEA), Tuna mayo (1 Syn), and ketchup (.5 Syn), salad, pear, green tea, 500ml squash
Afternoon Snack – Pink N White (2.5 Syns), tea with milk (.5 syn), 500ml squash
Dinner/Tea – Fish and Chips(+) (2.5 Syns), mushy peas, salad, ketchup (.5 Syn), 500ml squash
Evening Snack – green tea
Total Syns: 13
Day 5
HEA: 250ml semi-skimmed milk used in coffee and tea
Breakfast – BLETP on toast (HEB) with mayo (.5 Syn), coffee with milk, tea with milk
Morning Snack – 500ml diet iced tea (++) (.5 Syn), plum
Lunch – (I wasn’t feeling well) Scrambled eggs, 10g cheddar (1.5 Syns), wholegrain toast (rest of HEB), green tea
Afternoon Snack – Atkins Endulge Chocolate Coconut bar (6.5 Syns), 500ml diet iced tea (.5 Syn)
Dinner/Tea – Roast chicken, roast potatoes, mushy peas, sprouts, ketchup (.5 Syn), tea with milk
Evening Snack – Options Hot Chocolate (2.5 Syn) made up with water and the rest of my HEA milk
Total Syns: 12.5
Day 6
HEA: 250ml semi-skimmed milk used in coffee and tea
Breakfast – Eggs over easy, Toast (HEB), lettuce, tomato, mayonnaise (.5 Syn), Apple, coffee with milk
Morning Snack – ASDA Vitality cereal bar (3.5 Syn), Pear, coffee with milk, 500ml squash
Lunch – Salad – lettuce, tomato, cucumber, chicken, corn, pasta, and dressing(^^), mullerlight yogurt, banana, 500ml squash
Afternoon Snack – 2 cups of tea with milk, no food as we were going out to dinner….
Dinner/Tea – Dinner out at the Fox and Hounds pub — baked sea bass with parsley, boiled new potatoes, salad, and cole slaw (counting 1 Syn for the mayo in the slaw), and then because I had some Syns left and I looked up on the Slimming World App that a basic Lemon Meringue was 8.5, I had that for desert, and 500ml sparkling water
Evening Snack – cup of green tea
Total Syns: I counted today at 15 since we went out to dinner. If the desert was 8.5, I had 14 Syns, but I am counting it as 15 to be safe, though I might have gone over 15 for the day, depending on how “naughty” the desert was!
Day 7 – Weigh In Day!
HEA: 250ml semi-skimmed milk used in coffee and tea+++
Breakfast – Scrambled eggs, baked beans, grilled tomato, apple, coffee with milk
Morning Snack – pear, mullerlight, coffee with milk
Lunch – We went to Morrison’s Cafe since we had a meeting in town. I had a Jacket potato with beans and a salad (no dressing), a mullerlight, and 2 cups of peppermint tea (all free!)
Afternoon Snack – apple, 500ml squash and a cup of peppermint green tea
Dinner/Tea – Eggs over easy, Toast (HEB), lettuce, tomato, mayonnaise (.5 Syn), RitterSport (5 Syn), tea with milk
Evening Snack – 2 Pink N Whites (5 Syn), tea with milk
Total Syns: 10.5
And this week I lost 2.5lbs to finally get my 2 stone award!
Some days I ate lots of food, some days I didn’t eat as much, but the idea is to eat if you are hungry — ie, don’t starve yourself and always eat until you are full. Some days all I really needed to feel full was some eggs and toast. Some days I needed more. Most days I ate salad at least once, maybe twice. I know it’s not the season for it, but a small pile of leaves and tomato with cucumber on the side is manageable.
~~*~~
* – BLTEP wrap or sandwich is a lean bacon, lettuce, tomato, egg, and pickle (gherkin) wrap/sandwich. I usually use 1TBS of Lightest mayonaise for 1/2 Syn, and either my HEB bread choice or I Syn a wrap. This became my go-to breakfast all week!
** – I made this in the crock pot on Wednesday and had the leftovers for lunch the following day. Combine diced chicken breasts, mushrooms, carrots, parsnips, potatoes, peas, and tinned tomato in your crock pot with 2 Knorr stock pots, mixed herbs, and 3 bay leaves. If you are using frozen chicken and vegetables, you don’t need to add any water. If using fresh, add a mugful of water. Cook on low for 6-8 hours. To thicken the stew, take a ladleful of the vegetables and blitz with a stick blender, then stir back in.
*** – See Slimming World Friendly Chilli
^ – I used a bag of 10 frozen chicken fillets from iceland and coated them with a beaten egg and then crumbs made from 2 slices of Hovis bread (10 syns for the bread), so I calculated these at 1 Syn per strip)
^^ – Super easy and free dressing made from 2TBS greek yogurt, 1TBS apple cider vinegar, and 1tsp dill, added to diced cucumbers and tomatoes on a bed of lettuce
^^^ – I coated pork steaks with 1TBS Tesco Whole Grain Mustard (1/2 Syn) and 1TBS Agave syrup (1/2 Syn) in a hot oven for 10 minutes on each side.
+ – I coated the fish with an egg wash and crumbs made from 1 slice of wholegrain bread
++ – Some of the iced tea I was drinking has 0 calories, so it is free, but another brand has 5 calories per serving, so 1L is 20 calories or 1 Syn.
+++ – I always measure out 250ml of milk in the morning and then keep track of my cups of tea/coffee. If I decide to have cheese later in the day, I change the tea/coffee to 1/2 Syn per splash of milk. If I have any milk leftover at the end of the day, I will either drink it straight or have an Options hot chocolate made up with water and topped up with the last bit of milk.
The contents of this post, including images are © Rebecca J Lockley and Tim Lockley unless otherwise stated and should not be reproduced without permission. If you are not reading this on http://blog.beccajanestclair.com, my facebook page, Networked Blogs, the RSS feed(s), or through an e-mail subscription, please notify me.
[LJ readers reading this on the LJ RSS feed: Please click on the link at the top of the entry to go directly to my blog to leave a comment, as comments left on the LJ RSS do not get seen by me. Facebook users reading this from my Networked Blogs link can either comment on facebook or on my blog. If you are reading this through an e-mail subscription, you might need to go directly to my blog to view videos and images.]
For full Copyright and Disclaimer, please read http://www.blog.beccajanestclair.com/copyright/
No comments[Recipe] Slimming World Friendly Chilli
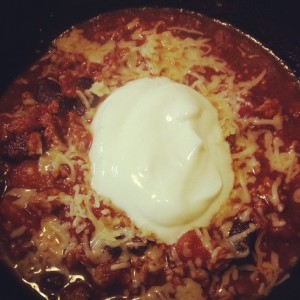 I made this for dinner tonight and put this photo on Facebook. My friend Jess asked for the recipe, so I thought I would share it here too.
This makes a mild, sweet vegetarian* chilli and it’s FREE.
[Please note: Syn values are based on my exact ingredients using the online calculator. Your Syn value may vary based on your ingredients and the size of your baking containers and portions, so use this number as a guide only.]
You Will Need:
300g Quorn Mince
500g/ml (one carton) Passata
1 tin chopped tomatoes
1 tin kidney beans
dash of Worcester sauce
1 tsp chilli powder
2 tsp cinnamon
pinch of red pepper flakes
pinch of Splenda or other sweetener
To serve:
fat free Fromage Frais or fat free Greek yoghurt
grated reduced fat cheddar cheese**
Simply combine all ingredients in a heavy pot with a lid (I used my Le Creuset) and heat on high until it boils, then put the lid on and simmer it for 30-45 minutes. OR, you could put all the ingredients in a crock pot and cook on low. The longer this cooks, the better the flavours get.
Then just dish it up and add a sprinkle of cheese and a dollop of fromage frais or Greek yoghurt. Yum.
~~*~~
*You could use Turkey mince or lean beef mince instead of Quorn, just remember it has to have less than 5% fat to be considered free.
**If you do not use the cheese as your HEA, you will need to look up the Syn value for your cheese.
The contents of this post, including images are © Rebecca J Lockley and Tim Lockley unless otherwise stated and should not be reproduced without permission. If you are not reading this on http://blog.beccajanestclair.com, my facebook page, Networked Blogs, the RSS feed(s), or through an e-mail subscription, please notify me.
[LJ readers reading this on the LJ RSS feed: Please click on the link at the top of the entry to go directly to my blog to leave a comment, as comments left on the LJ RSS do not get seen by me. Facebook users reading this from my Networked Blogs link can either comment on facebook or on my blog. If you are reading this through an e-mail subscription, you might need to go directly to my blog to view videos and images.]
For full Copyright and Disclaimer, please read http://www.blog.beccajanestclair.com/copyright/
1 comment[Recipe] Slimming World Syn Free Barbecue
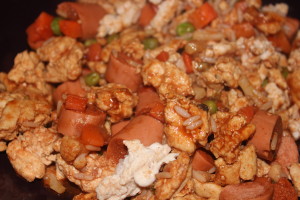 Barbecue sauce is a fantastic condiment/sauce that you don’t really think much of when you use it. You just grab a bottle and squirt, or grab a bottle and dump the whole thing in your crock pot with some meat. But bottled barbecue sauce is full of sugar and it can be a detriment to your weight loss. Fortunately, someone has come up with a Syn Free version of barbecue sauce! Below you will find the recipe for the barbecue sauce as well as a few recipe ideas for using it.
[Please note: Syn values are based on my exact ingredients using the online calculator. Your Syn value may vary based on your ingredients and the size of your baking containers and portions, so use this number as a guide only.]
You will need:
500g Passata (one carton)
4 TBS Balsamic Vinegar
1 TBS Worcestershire Sauce
1/2 tsp powdered mustard (Colmans)
3 TBS Splenda
1+ tsp mild chili powder
pinch of red pepper flakes (optional)
All you need to do is combine the ingredients in a pan over a medium heat and cook until it thickens. You can use as much mild chili powder as you want until you get it as hot as you prefer, and you can even add some dried flakes or use hot powder. If you’re balking at the price of Balsamic Vinegar, I found a large bottle for 99p at Lidl.
When it’s cooked, it’s ready to be stored it in the fridge for about a week.
Alternately, if you are going to use in in a recipe, you can put all the ingredients into a bottle and give it a shake.
Total Syns = 0
It goes fantastic with my family’s Kitchen Barbecue recipe, modified for Slimming World!
You will need:
500g lean turkey mince (or Quorn mince)
2 packs Quorn hot dogs, sliced into small rounds*
2 bags Uncle Ben’s boil in bag rice
200g frozen peas (or mixed veg)
1 Knorr Stock pot or stock cube (either chicken or vegetarian)
250ml hot water
one batch of Slimming World barbecue sauce
1. Cook Uncle Ben’s rice for half the time listed on the package (I think it says boil for 10 minutes, so only boil for 5)
2. Spray a wok or large frying pan with fry light and brown turkey mince.
3. Mix stock pot/cube with 250ml hot water and add to the mince along with the half-cooked rice.
4. Stir in the frozen peas or mixed vegetables. Cover, and let cook 5-10 minutes.
5. Stir in the barbecue sauce
6. Add the hot dog pieces, cover, and cook for 10 minutes or until hot dogs are warmed through, the vegetables are cooked, and sauce is bubbling.
Total Syns = 0
Or, you could use the barbecue sauce to make a SW friendly Hunter’s Chicken with chicken breasts, bacon medalions (with the fat cut off), and your HEA cheese option (or Syn the cheese).
Another idea might be to toss the sauce into a crock pot with a piece of pork for shredded pork.
The possibilities are endless as you can use this sauce exactly like you would barbecue sauce from a bottle!
~~*~~
*If you’re not following Slimming World, you can use regular deli hot dogs (not the tinned ones) or you can Syn the hot dogs.
The contents of this post, including images are © Rebecca J Lockley and Tim Lockley unless otherwise stated and should not be reproduced without permission. If you are not reading this on http://blog.beccajanestclair.com, my facebook page, Networked Blogs, the RSS feed(s), or through an e-mail subscription, please notify me.
[LJ readers reading this on the LJ RSS feed: Please click on the link at the top of the entry to go directly to my blog to leave a comment, as comments left on the LJ RSS do not get seen by me. Facebook users reading this from my Networked Blogs link can either comment on facebook or on my blog. If you are reading this through an e-mail subscription, you might need to go directly to my blog to view videos and images.]
For full Copyright and Disclaimer, please read http://www.blog.beccajanestclair.com/copyright/
1 commentMaking A Recipe Slimming World Friendly
In February 2012, I blogged a Hairy Biker’s recipe for Sausage and Bean Pie. Tim and I both loved it, but the recipe went out of rotation when I started eating low-carb in March 2012, and never made it back into the rotation until today. I was cold and I wanted some good, warm, comfort food. Since beans and potatoes are free with Slimming World, I thought I would try my hand at modifying the recipe.
So, let’s take a look at the original recipe:
You will need:
750g Maris Piper potatoes
3 TBS cooking oil
8 sausages (I used Tesco half-fat)
2 x 415g tins of baked beans
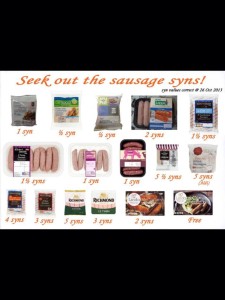
So right away, I see a swap I can make. Instead of cooking oil, I will use Fry Light. And instead of any sausage, I will pick a low-syn or free sausage. Fortunately, there’s this nifty little graphic floating around Pinterest to help:
I chose to use Quorn sausages, which also makes this recipe vegetarian. The ones I had in our freezer were 1/2 Syn per sausage, so that makes the total Syns for the dish so far 4 Syns.
Beans and potatoes are free, so those can stay.
Now, we’ll look at the instructions:
1. Pre-heat the oven to 200C. Quarter the potatoes and put in a pan of boiling water. Bring to the boil and simmer for 10 minutes or until soft.
2. Meanwhile, fry the sausages in 1 TBS oil until browned. (or grill them)
3. Put the sausage in the bottom of a shallow casserole dish and cover with beans. Set aside.
4. Drain and roughly cut the potatoes into chunks. Don’t worry about the skins. Some of the skins will fall off after boiling, some won’t.
5 – Fry the potato chunks in the remaining oil for 2-3 minutes. Pour potatoes on top of sausage and beans
6 – Bake at 200C 15-20 minutes until potatoes are crisp on top and the beans are hot.
Right away, I spot the word fry. Instead of frying the sausages, I could grill them as that doesn’t add any syns. And the potatoes that need to be fried can be done with Fry Light, which is free. Or, I could Syn the oil, but I want this dish to be as low Syn as possible. I’m also going to take my advice from my previous post and add poached eggs to the meal to help fill us up more. Other than that, it looks pretty straight forward. So my new and improved Sausage and Bean Casserole now looks like this:
You will need:
750g potatoes
8 low or no Syn sausages
2 x 415g tins of baked beans
Fry Light
2 eggs per person
1. Pre-heat the oven to 200C. Quarter the potatoes and put in a pan of boiling water. Bring to the boil and simmer for 10 minutes or until soft.
2. Meanwhile, grill the sausages as per package instructions,
3. Put the sausage in the bottom of a shallow casserole dish and cover with beans. Set aside.
4. Drain and roughly cut the potatoes into chunks. Don’t worry about the skins. Some of the skins will fall off after boiling, some won’t.
5 – Fry the potato chunks in Fry Light for 2-3 minutes. Pour potatoes on top of sausage and beans.
6 – Bake at 200C 15-20 minutes until potatoes are crisp on top and the beans are hot.
7 – While casserole is cooking, bring a pan of water to the boil. Carefully drop in two eggs per person, reduce the heat to a simmer and cook 2-4 minutes, depending on how soft you want your eggs.
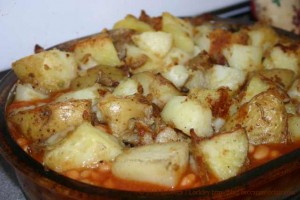
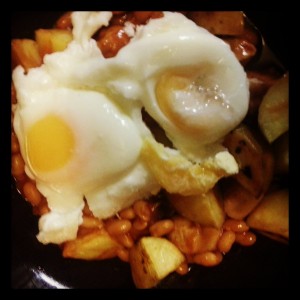
The result? This:
Total Syns for the whole dish? 4. So take the number of portions and divide to get your Syns. We each ate plenty, plus I have some to save for breakfast in the morning, so dinner tonight was 1 1/2 Syns.
~~*~~
The contents of this post, including images are © Rebecca J Lockley and Tim Lockley unless otherwise stated and should not be reproduced without permission. If you are not reading this on http://blog.beccajanestclair.com, my facebook page, Networked Blogs, the RSS feed(s), or through an e-mail subscription, please notify me.
[LJ readers reading this on the LJ RSS feed: Please click on the link at the top of the entry to go directly to my blog to leave a comment, as comments left on the LJ RSS do not get seen by me. Facebook users reading this from my Networked Blogs link can either comment on facebook or on my blog. If you are reading this through an e-mail subscription, you might need to go directly to my blog to view videos and images.]
For full Copyright and Disclaimer, please read http://www.blog.beccajanestclair.com/copyright/
No comments[Recipe] Slimming World Friendly Weetabix Muffins
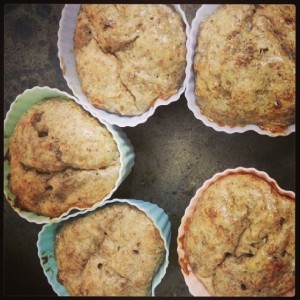
 I sometimes struggle to eat my Healthy Extra A and B each day, particularly the B choice, as I got myself out of eating carbs the year I followed a low-carb diet. Fortunately, I found this recipe for Weetabix Muffins on facebook that makes eating my Healthy B easy and spreads it out through the day (or makes a night evening snack). Since I also needed my Healthy A, I frosted the muffins with cream cheese.
[Please note: Syn values are based on my exact ingredients using the online calculator. Your Syn value may vary based on your ingredients and the size of your baking containers and portions, so use this number as a guide only.]
You will need:
for the muffins:
-2 crushed Weetabix biscuits
-2 eggs, beaten
-1/2 of a container of any flavour müllerlight yogurt (I used 3 desertspoonfuls of the Cranberry & Raspberry flavour)
-2 tsp Splenda
-1tsp vanilla essence
Silicone muffin cases
for the “frosting”:
-70g Philadelphia Lightest
-1-2 tsp Splenda
-1/2 tsp vanilla essence
1) Pre-heat the oven to 180C
2) combine Weetabix, eggs, yogurt, Splenda, and vanilla and spoon into muffin cases. you should fill the cups to nearly the top. I made 5 using my heart-shaped cups from Lakeland, but I think it would have made only 4 in regular sized ones. If you don’t have silicone cases, you could use paper liners in a cupcake pan.
3) bake 20-25 minutes, until the edges pull away slightly and they are springy.
4) If making “frosting”, combine cream cheese, vanilla, and 1 tsp Splenda. Give it a quick taste test and if it’s not sweet enough for you, add some more Splenda.
5) Spread on top of slightly cooled muffins for your HEA and HEB in one go!
Since I used a pink coloured yogurt, mine had a slight pink tinge to them and a vague taste of berry. They were slightly on the sweet side, so I might use less Splenda the next time and also try them with just vanilla yogurt.
If you have already had your A and B for the day, you would need to calculate the Syns. Philadelphia Lightest is 1.5 Syns per 25g on all plans, and Weetabix are 6.5 Syns on all plans. I would round up the cream cheese in the frosting to 75g, making the icing 4.5 Syns and the muffins 6.5, or 11 Syns total for all the muffins with frosting. Obviously, you could then divide this into your per muffin Syn value. If you made this into 5 muffins, they would be just over 2 Syns each.
~~*~~
The contents of this post, including images are © Rebecca J Lockley and Tim Lockley unless otherwise stated and should not be reproduced without permission. If you are not reading this on http://blog.beccajanestclair.com, my facebook page, Networked Blogs, the RSS feed(s), or through an e-mail subscription, please notify me.
[LJ readers reading this on the LJ RSS feed: Please click on the link at the top of the entry to go directly to my blog to leave a comment, as comments left on the LJ RSS do not get seen by me. Facebook users reading this from my Networked Blogs link can either comment on facebook or on my blog. If you are reading this through an e-mail subscription, you might need to go directly to my blog to view videos and images.]
For full Copyright and Disclaimer, please read http://www.blog.beccajanestclair.com/copyright/
No comments[Recipe] Slimming World Individual Crustless Quiche – NO SYNS
 My mom and I had a Christmas tradition that we would always make a breakfast casserole in the crock pot since the oven usually had the turkey in it at breakfast time (my family always ate around 1PM). Tim and I don’t have our Christmas dinner until later in the day, so that leaves my oven free. Last year, I made a crustless quiche that was lovely and low-carb….but also full of fat. And it made tons. So this year, I decided to make individual quiches and to make sure I got in my Healthy Extra A for the day, I added 40G of low-fat cheese.
[Please note: Syn values are based on my exact ingredients using the online calculator. Your Syn value may vary based on your ingredients and the size of your baking containers and portions, so use this number as a guide only.]
This recipe is PER PERSON. If you are making this for more than 3 people, my suggestion would be to just make it in a regular full-size quiche dish.
You will need (PER PERSON)
3 Eggs
4 TBS fat free Fromage Frais
A handful of fresh spinach
2 bacon medallions (or rashers of bacon with all the fat trimmed off), grilled and chopped (optional. or use grilled and chopped Quorn sausages*! Or both!)
3-4 button mushrooms, quartered
5 cherry tomatoes, quartered (or half of a regular tomato diced)
40g reduced fat Cheddar cheese**
Pepper
individual pie/quiche/flan dishes (I got ours at IKEA for £2 each. Or you could use individual casserole dishes)
Fry light
1 – Pre-heat the oven to 180C.
2 – Spray the bottom and sides of your dish with Fry Light. Beat the eggs and Fromage Frais and a sprinkle of pepper. Stir in half the cheese.
3 – Scatter the spinach leaves on the bottom of the dish and sprinkle on the mushrooms, tomatoes, and bacon.
4 – Pour on the egg mixture and top with remaining cheese.
5 – Repeat steps 2-4 for each person.
6 – Bake on a baking tray (in case of spillage) for 20-30 minutes, or until eggs have risen and are cooked through. If you are making this in a full-sized dish, it might take up to 45 minutes.
This is quite tasty on its own, or with some wholegrain toast (as your Healthy Extra B!). A teaspoon of Reduced Sugar and Salt Heinz Ketchup will only add 1/2 Syn and gives it a little extra kick.
The beauty of this recipe is that you also can add whatever vegetables you want. Some chopped up green, red, yellow, or orange pepper would add some flavour, too. Or try experimenting and eliminate the Cheddar Cheese and use fat free cottage cheese instead of the fromage frais! Or add some diced potato and turn it into a Frittata!
~~*~~
*Quorn sausages are 1 Syn each. If you use any other brand, you will need to calculate the syns.
**Assuming you use the cheese as your Healthy Extra A. If you are not, you will need to calculate the syn value of your cheese. You can use any other cheese at the Healthy Extra A amount in this if you don’t have Cheddar.
The contents of this post, including images are © Rebecca J Lockley and Tim Lockley unless otherwise stated and should not be reproduced without permission. If you are not reading this on http://blog.beccajanestclair.com, my facebook page, Networked Blogs, the RSS feed(s), or through an e-mail subscription, please notify me.
[LJ readers reading this on the LJ RSS feed: Please click on the link at the top of the entry to go directly to my blog to leave a comment, as comments left on the LJ RSS do not get seen by me. Facebook users reading this from my Networked Blogs link can either comment on facebook or on my blog. If you are reading this through an e-mail subscription, you might need to go directly to my blog to view videos and images.]
For full Copyright and Disclaimer, please read http://www.blog.beccajanestclair.com/copyright/
No comments[Recipe] Slimming World Devilled Eggs – NO SYNS!
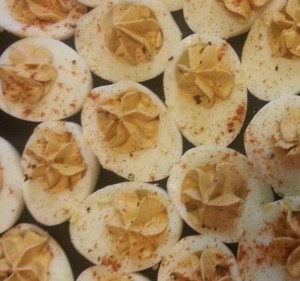 A week before Christmas, our Slimming World group had a tasting night where we all got to bring in Slimming World friendly snacks for a party, and I decided to figure out how to make Devilled Eggs completly free. They were such a hit, I made them again for our family’s Boxing Day Buffet!
[Please note: Syn values are based on my exact ingredients using the online calculator. Your Syn value may vary based on your ingredients and the size of your baking containers and portions, so use this number as a guide only.]
You will Need:
1 Dozen eggs, hard boiled and peeled
4-6 TBS Fat Free Fromage Frais
1 tsp Mustard Powder
1 tsp Paprika
1 tsp Tumeric* (optional)
Fresh Ground Pepper
Pastry/icing Bag (optional)
Big Cake Decorating Tip (optional)
1 – Carefully slice each egg in half lengthway and scoop out the yolk (a teaspoon works great!).
2 – Combine all yolks with 4 TBS Fromage Frais, Mustard Powder, Tumeric, and Paprika. If your mixture seems a little dry, add some more Fromage Frais. Give it a tiny taste and if it’s not tangy enough for your tastes, add a little more mustard powder. I found that using my stick blender gave a smoother texture.
3 – if you want to be fancy, place the yolk mixture into a pastry bag fitted with a large decorating tip and carefully pipe the filling into the empty holes in the whites. If you don’t have a cake decorating set, you can still easily pipe your filling by cutting off the corner of a plastic bag, or just use a teaspoon and spoon it in.
4 – Sprinkle the tops of the eggs with more paprika and a few twists of a pepper grinder.
The beauty of this recipe is it can be scaled up or down based on how many eggs you want. There is no wrong amount, just mix until you are happy with the consistency and flavour of your filling.
~~*~~
*Tumeric is an optional ingredient and is only used to add that bright yellow colour you would usually get from using American mustard.
The contents of this post, including images are © Rebecca J Lockley and Tim Lockley unless otherwise stated and should not be reproduced without permission. If you are not reading this on http://blog.beccajanestclair.com, my facebook page, Networked Blogs, the RSS feed(s), or through an e-mail subscription, please notify me.
[LJ readers reading this on the LJ RSS feed: Please click on the link at the top of the entry to go directly to my blog to leave a comment, as comments left on the LJ RSS do not get seen by me. Facebook users reading this from my Networked Blogs link can either comment on facebook or on my blog. If you are reading this through an e-mail subscription, you might need to go directly to my blog to view videos and images.]
For full Copyright and Disclaimer, please read http://www.blog.beccajanestclair.com/copyright/
No comments[Recipe] Slimming World Crock Pot Christmas Pudding (6 Syns per serving!)
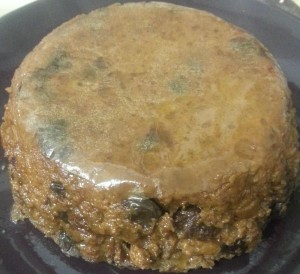 Ah, the Christmas Pudding. Probably one of the most iconic puddings of Christmastime in the UK. Last year, I was brave and tried making my own. It was really good, but the number of Syns in that recipe would have done my head in. Slimming World’s Christmas Made Extra Easy cookbook contains a recipe for “The Pud” coming in at 7 1/2 Syns. I felt that this was a lot of syns just for my pudding (half my daily syns in one go? No thank you), so I sat down with the online Syn calculator and my ingredients and I worked out a pudding that comes in slightly lower at 6 Syns per serving. That meant I could add on a level tablespoon of Brandy sauce (1 Syn!) and still enjoy the rest of Christmas. In fact, my Christmas Day syns only came to 16! So, on to my recipe!
[Please note: Syn values are based on my exact ingredients using the online calculator. Your Syn value may vary based on your ingredients and the size of your baking containers and portions, so use this number as a guide only.]
This pudding takes multiple days to prepare, so start it at least three days before you plan on serving it.
You Will Need:
225g Dried Mixed Fruit (I used a Waitrose mix that had sultanas, raisins, and peel)
1 TBSP Brandy
50g Self-raising wholemeal flour (I used Allinson’s)
85g fresh brown bread crumbs (I used Walburton’s bread. 3-4 slices blitzed in my blender)
25g Splenda Brown Sugar OR Tate and Lyle Light at Heart Brown Sugar
170g Grated Carrots
200g Grated Bramley Apple
1 tsp Mixed Spice
1/2 tsp Nutmeg
1/2 tsp Cinnamon
2 Eggs, beaten
150ml Old Speckled Hen* (adjust your Syns if using another type of Ale. Old Speckled Hen has 11.5 Syns per 500ml)
25ml Brandy
You also will need:
2 Pudding basins
Baking Parchment
Aluminium Foil
String
Small bowl or saucer
Crock Pot
Fry Light
1 – Put your dried fruit in a bowl with the brandy and leave to soak overnight.
2 – The next day, mix together the brandied fruit, flour, breadcrumbs, sugar, carrot, apple, and spices.
3 – Add the eggs and Old Speckled Hen. Let your mixture rest for about a half an hour
4 – Trace the top and bottom of your pudding basins onto parchment paper and cut out the circles. Spray the bottom of the basin with fry light, place the bottom sized piece of parchment paper on top, and spray again. Spray the sides of your basin with Fry light, too.
5 – Divide the mixture between the two basins. I filled mine to about an inch or two from the top. Place the top sized piece of parchment paper on the top of your pudding.
6 – Make a Z fold in a piece of parchment paper and place over the pudding, using the string to hold it in place (tie the string around the top of the basin). Trim off the excess paper. Place the parchment covered basin on top of a piece of foil and wrap the bottom and sides. Leave a gap over the top near the Z fold (for steam to escape!)
7 – Find a saucer or bowl that will fit the bottom of your crock pot. Make sure you can balance the pudding on top of the bowl with the lid of your crock on. I found that a cheapie cereal bowl from Asda does the trick in mine. Place the saucer in the crock pot and put one of your puddings on top of the bowl. Fill the crock pot with water (I pre-boil mine in the kettle) until the water comes up within an inch or two of the top of your crock pot OR 2/3 of the way up your pudding basin. Do not cover the top of the pudding with water.
8 – Turn the crock pot on high and steam away. Your steam time may vary. I steamed our puddings on high for about 5 hours, then low overnight, and then back to high in the morning for another 5 hours. Check the water level before you go to bed and add more if you need to, and then check again in the morning. If your bowl starts to “dance”, crack the lid of the crock pot open with a wooden spoon to let some of the steam escape.
9 – Carefully remove your pudding from the crock pot and allow to slightly cool before unwrapping (you don’t want to get burned!)
10 – You will need to repeat steps 7-9 for the second pudding.
11 – On Christmas Day (or whenever you are serving your pudding), put your pudding back in the basin and steam again for about an hour, just to heat it through.
12 – Just before serving, poke a few holes in the top and pour on the 35ml of Brandy and light it on fire!
Syn Value: 6 Syns** per serving if you divide each pudding into 5 pieces. Add a tablespoon of Brandy sauce for another 1 Syn.
~~*~~
*I used Old Speckled Hen because my husband had a mini keg of it already opened and I felt it was silly to open a bottle of a different ale to only use 150ml.
**Technically, it calculated out at 5.7 Syns per serving. My husband thought I should have rounded it down to 5.5, but I chose to round it up to 6 to err on the side of caution.
The contents of this post, including images are © Rebecca J Lockley and Tim Lockley unless otherwise stated and should not be reproduced without permission. If you are not reading this on http://blog.beccajanestclair.com, my facebook page, Networked Blogs, the RSS feed(s), or through an e-mail subscription, please notify me.
[LJ readers reading this on the LJ RSS feed: Please click on the link at the top of the entry to go directly to my blog to leave a comment, as comments left on the LJ RSS do not get seen by me. Facebook users reading this from my Networked Blogs link can either comment on facebook or on my blog. If you are reading this through an e-mail subscription, you might need to go directly to my blog to view videos and images.]
No comments[Recipe] 2 Syn Mince Tartlets
 I’ve created this recipe quite by accident today….I first wanted to make my own mince filling and had been looking up the Syn values for the ingredients so I could properly calculate Syn values and I was going to make the mince pies that are in the Slimming World Christmas cookbook….but I had this mini tartlet dish and a hankering to get creative, so Mince Tarlets were born. [Please note: Syn values are based on my exact ingredients using the online calculator. Your Syn value may vary based on your ingredients and the size of your tartlets, so use this number as a guide only.]
You Will need:
1 jar mincemeat (I used one from Waitrose suitable for Vegetarians)
225g wholegrain flour (if you use white flour, you will need to adjust your Syns)
50g Stork or other butter substitute (my Syns were calculated using Stork)
60g Quark (you could use 110g Stork instead, but you will need to recalculate your Syn value)
pinch of salt
Frylight (again, if you use any other spray you will need to recalculate the Syns!)
Tartlet pan
Rolling Pin
Biscuit cutter
UK teaspoon
1)Pre-heat oven to 180C
2) add salt to flour, and rub in Quark and Stork until combined. knead your dough and add a little water until you can form a ball with no dough touching the sides of the bowl (about 1-2TBS water). Put dough in fridge for 30 minutes.
3)Spray a tartlet pan with Frylight. (my pan is about an inch across the bottom, if that helps for size!)
4)When dough is chilled, roll out onto a smooth surface and use a small biscuit cutter to make rounds of dough. Press dough circles into the bottom and up sides of tartlet pan. I was able to make 38 rounds with my dough* (If you have more than 38, your Syns per tart will be lower, less than 38 and your Syns will be slightly higher).
5) Fill each tartlet with one teaspoon** mince pie filling (again, if you use more, your Syns will be higher)
6) Bake for 20 minutes, or until shells are golden
7) Carefully remove tartlets to a cooling rack. I made the mistake of tipping my first tray full out and two of them spilled. I found using the bamboo tongs from the toaster seemed to work the best for getting them out.
Makes 36 Tartlets. Well, technically 38, but I didn’t feel like baking two tartlets on their own and my pan makes 12 at a time!
~~*~~
*Based on the online calculator, each shell is approximately 1.5 Syns
**Based on the online calculator, 1 Tablespoon*** of Waitrose mincemeat filling is 2 Syns, 1 teaspoon*** is approximately half a syn
***Using UK Tablespoons and teaspoons. If you are using American teaspoons, your Syn value will vary, as it is 3 US teaspoons in a US Tablespoon, but 4 UK teaspoons in a UK Tablespoon.
The contents of this post, including images are © Rebecca J Lockley and Tim Lockley unless otherwise stated and should not be reproduced without permission. If you are not reading this on http://blog.beccajanestclair.com, my facebook page, Networked Blogs, the RSS feed(s), or through an e-mail subscription, please notify me.
[LJ readers reading this on the LJ RSS feed: Please click on the link at the top of the entry to go directly to my blog to leave a comment, as comments left on the LJ RSS do not get seen by me. Facebook users reading this from my Networked Blogs link can either comment on facebook or on my blog. If you are reading this through an e-mail subscription, you might need to go directly to my blog to view videos and images.]
For full Copyright and Disclaimer, please read http://www.blog.beccajanestclair.com/copyright/
No comments[Recipe] Slimming World Friendly Chicken Korma
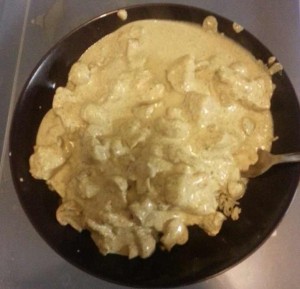
About a week or so ago, I posted to my Facebook page that MüllerLight Coconut with Chocolate Sprinkles yoghurt tasted like eating a Bounty (US: Mounds) bar and I was in heaven and my friend Paul commented with a recipe for chicken korma involving the yogurt. I was dubious as chocolate sounded like a strange ingredient, but tonight I decided to try it. I ran out of Korma powder, so mine was made with half Korma and half Garam Marsala, but it was still ridiculously creamy and “gooey”, as my husband called it. Definately going into regular rotation!
Slimming World Chicken Korma
You Will Need:
2 boneless, skinless chicken breasts, cut into bite-sized pieces
250g button mushrooms, halved (or bigger mushrooms cut into smaller pieces)
(2 large onions, diced – I omitted this as I am allergic to onion!)
3 TBSP Korma spice
1/2 tsp vanilla extract
1/2 tsp almond extract
2 MüllerLight Coconut with Chocolate Sprinkles yoghurt pots
1 container Quark
1/2 tsp tumeric (I had to borrow some from my mother-in-law!)
Fry Light
Rice
-Spray a griddle pan (or frying pan) with FryLight and add the chicken to the pan to brown the chicken (you will need to stir the chicken a few times to get all sides cooked)
-While the chicken is cooking, put a small frying pan over high heat and dry fry the Korma spice, then add the vanilla and almond (though I’m sure both of those are optional!)
-Transfer the spice to a large pot and stir in the yoghurts, Quark, and sweetener. Heat over low heat, making sure you don’t curdle the yogurt.
– Stir in the tumeric.
-Once the chicken is cooked, stir chicken into the sauce and keep on very low heat.
-add the mushrooms (and optional onions) to your griddle (or frying pan) and cook for 5-10 minutes or until soft.
-Add the mushrooms to your chicken and sauce
Divide into two portions and serve over rice. Yum!!
~~*~~
The contents of this post, including images are © Rebecca J Lockley and Tim Lockley unless otherwise stated and should not be reproduced without permission. If you are not reading this on http://blog.beccajanestclair.com, my facebook page, Networked Blogs, the RSS feed(s), or through an e-mail subscription, please notify me.
[LJ readers reading this on the LJ RSS feed: Please click on the link at the top of the entry to go directly to my blog to leave a comment, as comments left on the LJ RSS do not get seen by me. Facebook users reading this from my Networked Blogs link can either comment on facebook or on my blog. If you are reading this through an e-mail subscription, you might need to go directly to my blog to view videos and images.]
For full Copyright and Disclaimer, please read http://www.blog.beccajanestclair.com/copyright/
No commentsRecipe: Slimming World Friendly Sweet & Sour Pork
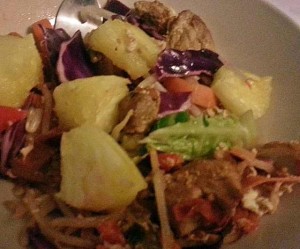
Firstly, I need to apologize for my photo. Once again, I took a really bad photo of the meal, and as the meal has now been eaten, I don’t have anything else to take a replacement photo of. So, crappy photo it is!
Anyway.
If you are familiar at all with dieting and have used any of the “programs”, you probably have come across a recipe for Diet Coke Chicken. If you haven’t, you basically turn the Diet Coke into a marinade and it’s supposed to taste similar to barbecue sauce. I’ve never tried it, but I’m willing to give it a go sometime after today’s recipe turned out so great!
I’m on a few groups online for support in this whole Slimming World thing, and one of the ladies, Stephanie, posted that she made a sweet and sour version using Fanta Zero, so I had to give it a try tonight! I had some diced pork in the freezer, so tonight’s dinner became Sweet and Sour Pork.
You will need:
Fry Light
1 can of Fanta Zero (US friends, Fanta is orange soda, so use a diet orange)
4 TBS passata (Tomato Sauce)
Worcester sauce
Red pepper flakes
2 TBS vinegar (any flavour)
1/2 C diced cherry tomatoes
1 TBS soy sauce
Stir-fry vegetables (use whatever you like!)
500g diced pork (cut off all fat)
2 eggs, whisked (optional)
Rice
Fresh pineapple, diced
-Cook rice according to package directions.
-Combine Fanta Zero, passata, a dash of Worcester, a pinch of red pepper flakes, and vinegar into a saucepan and bring to a boil. As it starts to boil, add your diced tomatoes. Reduce heat, cover, and simmer for 20 minutes.
-Spray a wok or large frying pan with Fry Light and cook the pork until it is no longer pink. Add 1TBS Soy Sauce and your vegetables and stir-fry for 5 minutes, depending on how crunchy you like your vegetables.
-(optional) pour the two eggs into the wok and stir until scrambled (I do this because we like egg fried rice. It takes about 5 minutes).
-Check sauce. If it hasn’t reduced, take the lid off and turn up the heat. If it looks thick enough for your liking, pour over the mixture in the wok and stir, cooking an additional 5 minutes.
-Serve with rice (optional) and garnish the top with some fresh pineapple.
-This should serve 3-4 people.
I ate mine without rice because I don’t eat a lot of carbs, but rice is a free food, so this recipe would still be totally free on the Extra Easy Slimming World plan. If you modify any of the ingredients (other than the vegetables used or swapping the meat for chicken), you will need to look up the Syn values for those ingredients.
Like I said, my photo isn’t pretty, but I’ll include it anyway:
~~*~~
The contents of this post, including images are © Rebecca J Lockley and Tim Lockley unless otherwise stated and should not be reproduced without permission. If you are not reading this on http://blog.beccajanestclair.com, my facebook page, Networked Blogs, the RSS feed(s), or through an e-mail subscription, please notify me.
[LJ readers reading this on the LJ RSS feed: Please click on the link at the top of the entry to go directly to my blog to leave a comment, as comments left on the LJ RSS do not get seen by me. Facebook users reading this from my Networked Blogs link can either comment on facebook or on my blog. If you are reading this through an e-mail subscription, you might need to go directly to my blog to view videos and images.]
For full Copyright and Disclaimer, please read http://www.blog.beccajanestclair.com/copyright/
3 commentsRecipe: Slimming World Friendly Turkey and Pumpkin Chili
I’m at it again. Changing and modifying other people’s recipes. This time, it’s a recipe for Turkey Pumpkin Chili.
I’ve just started Slimming World with a few other people and this recipe is perfect as it contains all FREE FOOD on the EXTRA EASY plan.
You will need:
Fry Light
200g button mushrooms (finely chopped)
500g lean turkey mince (it has to have less than 5% to be free. I got my pack at Waitrose and it was 3% fat)
2 tins of tomatoes or diced tomatoes
1 pint of pumpkin puree*
3 teaspoons mild chili powder
2 teaspoons dried oregano
2 teaspoons cinnamon
1 teaspoon cumin
1 teaspoon ground pepper
salt
500g corn (fresh, frozen, or tinned)
-Spray the inside of your dutch oven or large pot with fry light and saute the mushrooms for a few minutes until they start to get a little mushy.
-Break up the turkey mince and add it to the pot and let turkey fully cook (about 10-15 minutes)
-Add the tins of tomatoes (and the juice) and use a wooden spoon to break them up if you used whole tomatoes. Give it a stir
-Carefully add the pumpkin. This filled my pot to the brim so I had to sort of fold it in instead of stir.
-Add your spices minus the salt (you’ll salt it later)
-Cook until the it boils, about 15 minutes. Turn down the heat and give it a taste. Adjust your spices if you don’t think it is spicy enough and add salt if necessary.
-Stir in the corn and heat corn thoroughly (maybe another 5-10 minutes)
As I said, according to checking all the Syn information on the Slimming World website, this meal as-is is entirely FREE. If you make any additions yourself, please check your ingredients against the Slimming World website first. This might taste really good with a dollop of cream fraiche on it, but that would add I think 2 Syns.
Want a really bad photo of the dish?
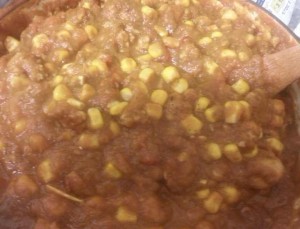
There’s a much prettier photo on Garnish With Lemon with the original recipe.
~~*~~
*The original recipe calls for 2 15oz tins of pumpkin puree. I don’t have tins of it, I have fresh pumpkin I pureed**, so I took my pint sized glass measuring jug and filled that with puree. a pint falls a little short of 30oz, but I wasn’t going to fiddle with it and the amount I used worked fine as you could definitely taste the pumpkin.
**Every October I buy several pumpkins and roast them to make my own puree since tins of it are hard to find in the UK and it’s not a year-round food here. You never know when you’ll want to make a pumpkin pie in the middle of February!
~~*~~
The contents of this post, including images are © Rebecca J Lockley and Tim Lockley unless otherwise stated and should not be reproduced without permission. If you are not reading this on http://blog.beccajanestclair.com, my facebook page, Networked Blogs, the RSS feed(s), or through an e-mail subscription, please notify me.
[LJ readers reading this on the LJ RSS feed: Please click on the link at the top of the entry to go directly to my blog to leave a comment, as comments left on the LJ RSS do not get seen by me. Facebook users reading this from my Networked Blogs link can either comment on facebook or on my blog. If you are reading this through an e-mail subscription, you might need to go directly to my blog to view videos and images.]
For full Copyright and Disclaimer, please read http://www.blog.beccajanestclair.com/copyright/
No commentsRecipe: Easy Peasy Chocolate and Cherry Cake
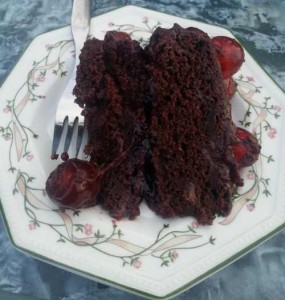 Today (er, yesterday) was a friend’s birthday. A few weeks ago, she told me she was going to purchase a cake to celebrate with, and I said “no, I’m making you a cake”. And then I went on holiday to the US and promptly forgot until I looked at the calendar over the weekend where I had written “make Helen a cake” on Thursday!
So what to make? Like me, my friend is diabetic, so I sent her a text and asked her if she wanted a “good for us” cake or something gooey and naughty and gooey and naughty won out. She had no flavour preferences, so I started racking my brain for something interesting and I kept coming back to the Black Forest Gateau I made for a different friend’s birthday several years ago. The problem was, I really wasn’t in the mood to make a full on Gateau with layers of biscuit and cream, so I settled on somehow combining chocolate and cherries.
Well, this is a hard combination to find recipes for. Either the recipes called for loads of crazy ingredients (one recipe had both buttermilk and sour cream in it!) or they weren’t for a layer cake. I specifically had the idea in my head that there would be cherries IN the cake, between the layers, and on top. I also thought it would involve cherry pie filling and/or cherry jam as opposed to fresh cherries. I was right.
Scouring Pinterest, I came across a Betty Crocker recipe that I am almost ashamed to say is the recipe I settled on!
You Will Need:
1 box Betty Crocker Devil’s Food Cake Mix (they sell them now at Waitrose and probably a few other places)
21 oz cherry pie filling (in the US, this is one large can. In the UK, it took me about 1 2/3 tins. My kitchen scale had ounces on it as well as grams, or you can just eyeball it. 21 oz is approximately 600 grams)
2 eggs
1 tsp vanilla
1/2 jar cherry jam or conserve
1 container glace or maraschino cherries
Chocolate frosting of your choice (store bought or homemade!)
-Preheat your oven to 175C and line the bottom of two 8″ round cake tins with parchment paper
-Ignore instructions on the back of the box
-Combine dry cake mix, eggs, pie filling, and vanilla. As you stir, the cherries will start to break up. This is fine.
-Divide batter between cake tins
-Bake for 20-30 minutes, until a toothpick comes out clean (unless you stab a cherry!)
-Cool cakes for about 15 minutes in the tin, remove from tins and cool for at least an additional hour. You don’t want the cakes to be warm when you put them together (unless you want runny jam in the middle)
-Place the first cake upside down on your serving plate and spread with cherry jam. I used about a half of the jar, you can use more or less. I also added the extra cherries leftover from the pie filling.
-Put the second cake on top of the jam.
-Scrape out the cherry pie filling tins and spread the leftover “jelly” on the top and sides of the cake.
-Spread your frosting all over the top and sides of the cake
-Decorate with glace cherries however you like.
I was told this cake was amazing, and the taste I had was really good. The cherry and chocolate flavours both really come through nicely.
~~*~~
The contents of this post, including images are © Rebecca J Lockley and Tim Lockley unless otherwise stated and should not be reproduced without permission. If you are not reading this on http://blog.beccajanestclair.com, my facebook page, Networked Blogs, the RSS feed(s), or through an e-mail subscription, please notify me.
[LJ readers reading this on the LJ RSS feed: Please click on the link at the top of the entry to go directly to my blog to leave a comment, as comments left on the LJ RSS do not get seen by me. Facebook users reading this from my Networked Blogs link can either comment on facebook or on my blog. If you are reading this through an e-mail subscription, you might need to go directly to my blog to view videos and images.]
For full Copyright and Disclaimer, please read http://www.blog.beccajanestclair.com/copyright/
No commentsRecipe: Philly Cheesesteak Peppers
I can’t take credit for this recipe. Credit belongs to Peace, Love, and Low Carb, but I modified her recipe to fit to what’s available in the UK and to my personal preferences. This is a great low-carb dinner when paired with a salad!
You Will Need:
2 peppers per person (I used green and red. I think the yellow or orange ones would be too sweet)
8-10 slices of roast beef (I used Tesco Finest), cut into thin strips (kitchen scissors makes this easy)
shredded mozzarella
300g (aprox) mushrooms, diced (I used my hand held Tupperware dicer)
1 container tomato passata (I think they are 500g in a carton)
Oregano
1. Pre-heat oven to 175C
2. Slice off the tops of your peppers and remove the seeds as well as as much of the membrane as you can. If your peppers won’t stand up, you might want to prop them up in ramekins or in a casserole dish with sides.
3. Using your biggest frying pan (I use my wok), sauteé the mushrooms in a little olive oil until they are soft (about 10 minutes).
4. Add the strips of roast beef and cook an additional 10 minutes.
5. Add a sprinkle of Oregano to your passata and add the passata to the mixture. Cook until bubbly.
6. Sprinkle a little mozzarella in the bottom of each pepper cup and ladle in the meat/mushroom/sauce mixture. Top each pepper with some more cheese.
7. Bake 15-20 minutes until cheese is melted and golden brown.
YUM.
I made 2 peppers for myself and used half a baguette to make open-faced sandwiches for Tim (he doesn’t like peppers and isn’t eating low-carb) and there is still loads of mixture leftover to save for another day, so I bet this would easily fill 6-8 peppers. Each pepper has approximately two soup ladles of mixture in it.
~~*~~
The contents of this post, including images are © Rebecca J Lockley and Tim Lockley unless otherwise stated and should not be reproduced without permission. If you are not reading this on http://blog.beccajanestclair.com, my facebook page, Networked Blogs, the RSS feed(s), or through an e-mail subscription, please notify me.
[LJ readers reading this on the LJ RSS feed: Please click on the link at the top of the entry to go directly to my blog to leave a comment, as comments left on the LJ RSS do not get seen by me. Facebook users reading this from my Networked Blogs link can either comment on facebook or on my blog. If you are reading this through an e-mail subscription, you might need to go directly to my blog to view videos and images.]
For full Copyright and Disclaimer, please read http://www.blog.beccajanestclair.com/copyright/
No commentsHave Yourself a Diabetic Christmas Part 4
The last Christmas recipe I have to share with you all uses Carbquik. I did not make this cake for Christmas, but I made it for New Year’s Day when Tim and I ate our Christmas dinner (since we had dinner on Christmas Day with his parents). I found this recipe for Low-Carb Pound Cake on the Low Carb Friends website, where it says this contains 1g of carbs per serving. I don’t like the taste of Carbquik by itself, so I replaced part of the Carbquik. If you wanted to make this with just Carbquik, you would need 3 and a half cups of it. The way I made it has a few more carbs than that per serving, but I don’t know exact amounts.
Low Carb Pound Cake
You will need:
1 1/2 Cup Carbquik
1 Cup Wholegrain Flour
1/2 Cup Ground Almonds (or Almond Meal/Almond Flour)
1/2 Cup Coconut Flour
3/4 Cup Splenda for Baking
3/4 Cup Butter (softened)
200g Cream Cheese (one pack/8 oz)
6 eggs
1 tsp Vanilla
Pinch of Salt
-Pre-heat the oven to 175C.
-Butter the sides of a Bundt pan (I’m sure other cake pans work just as well!)
-Combine Carbquik, Flour, Ground Almonds, Coconut Flour, and salt in a small bowl
-In a larger bowl cream together Splenda for Baking, butter, and cream cheese.
-Add eggs one at a time to liquid mixture. Add vanilla.
-Slowly add dry mix to the wet until it is well blended.
-Pour the mix into the cake pan and bake for 45-60 minute or until a toothpick comes out clean.
We had this for Strawberry Shortcake with some fresh berries and cream. It’s so tasty and low-carb that you don’t feel guilty sneaking a piece for breakfast the next morning!
~~*~~
The contents of this post, including images are © Rebecca J Lockley and Tim Lockley unless otherwise stated and should not be reproduced without permission. If you are not reading this on http://blog.beccajanestclair.com, my facebook page, Networked Blogs, the RSS feed(s), or through an e-mail subscription, please notify me.
[LJ readers reading this on the LJ RSS feed: Please click on the link at the top of the entry to go directly to my blog to leave a comment, as comments left on the LJ RSS do not get seen by me. Facebook users reading this from my Networked Blogs link can either comment on facebook or on my blog. If you are reading this through an e-mail subscription, you might need to go directly to my blog to view videos and images.]
For full Copyright and Disclaimer, please read http://www.blog.beccajanestclair.com/copyright/
No comments
