Travel Products Part 2
You can read part one here: Travel Techish Stuff Review
[Official Shop] BXT Travel Essential Bags-in-Bag,Travel Storage Underwear Pouch With Handle – Rose
– I first bought this when I was going on The Rock Boat XV in January 2015. I wanted to give packing cubes a try, and thought an underwear organiser/holder would be great since I was sharing a cabin with three other girls (ok, they were all friends of mine, but still) and then after I would be staying with my cousins in their guest room/office and I didn’t want my bras and knickers on display for my cousin’s husband and son. Unfortunately, I still haven’t actually taken this with me on a trip. I’ve attempted to pack into it THREE TIMES and all three times I changed my mind because the end result is too bulky. I’m not saying all packing cubes are bulky (my BFF has a nice set that worked well for her on the cruise), but this one just didn’t work for me. I think this could work if you were taking flimsier bras like sports bras or non-wired bras, but my wired bras just didn’t fit well in it. Either that, or my boobs are too big. But I really like the concept! Shame it didn’t work for me. I would love to get myself a set of eBags packing cubes, and I’ll probably get a set before the next trip to the US and see if it helps cut down on space. But honestly? Ziplock gallon and two gallon sized bags or travel space bags from the pound shop work pretty well for me.
Baggallini Plaza Mini Messenger Bag, Pink (Cherry Blossom)
– This travel purse is pretty awesome and there are so many features to show you I’m going to go make a video about it and I will post it below:

Columbia Women’s Silver Ridge Skort – Fossil, UK 18,US 14,EU 46
– I bought this skirt (for a lot less!) in preparation for our trip to Austria last October. I already have one Columbia brand skort from about 10 years ago when I still lived in the US, and I love it. It was starting to get a little big on me, so I went for one size down from the size on the old one……this was a mistake. The skort did not fit over my hips and even if it had, it would have been VERY short….and when you’re under five feet tall, if something is short, it’s really short! But I am a fan of having a skort for travel, especially if it’s designed for hiking. It comes it handy to protect against chafing, and they look nice enough to be worn with regular tops. I’m just sad that I couldn’t wear this second one!

Regatta Mens NEW Work Outdoors Walking Hiking Water Repellent Action Trousers
– One for the men, or I suppose the women who know their size in men’s trousers and wouldn’t mind the straight cut of the leg. We bought these for Tim based off the review that said they dry overnight. They don’t. Well, the might in the warmer months, but not in September in Austria. They took about 2 days to fully dry, but Tim found them comfortable and warm. They are also water resistant, which can he helpful. £12.99 isn’t a bad price considering Tim’s cargos from Primark cost the same. I didn’t look to see if they did a ladies cut style, but I’m sure they do. Regatta is a really good outdoors type company, so when I spot things for a decent price I tend to snag them.

Reisenthel Shoulder Bag, 30 Litres (48 x 39.5 x 29 CM) Bavaria
– I love Reisenthel, and I particularly love the Bavaria print….but I am not in love with this bag or the medium version. (I also didn’t pay £40 for it! wow, prices have gone up!) The part I don’t like about it is the metal rods next to the zipper, which make it hard to open and close the zip…but the plus side is it opens up to a nice large rectangle with lots of side pockets. I take this shopping sometimes because it’s so big…but it’s also very bulky. It’s good for road trips and probably bus or train journeys, but I think the metal rods would get damaged if you used this as a checked bag.

My last item I’ll talk about in this post, is the neck wallet Tim wanted me t get before I took an overnight train from Florida to Pennsylvania on my own in January 2015:
This particular one is no longer available, but it was VERY useful and it held my passport, cash, ID, credit cards, house key, phone, tickets, and even my 8″ Samsung tablet fit in it (although that made it very bulky). I tucked this under my fleece when I was sleeping on the train and took it with me whenever I used the loo to keep all my important documents on me. If you are making long-distance/overnight trips on public transportation on your own, I recommend getting something like this. Or a money belt. They even make clothing now that have secret pockets, but I’m really not sure I want to keep my passport in my underwear!
***
Many of the Amazon UK links are affiliate links, so if you click on them and buy something, I do get a tiny percent.
This post has not been endorsed by Amazon or any of the products and websites mentioned in this post and I have not received compensation for writing this post or making any videos.
The contents of this post, including personal images are © Rebecca J Lockley and Tim Lockley unless otherwise stated and should not be reproduced without permission. If you are not reading this on http://blog.beccajanestclair.com, my facebook page, Networked Blogs, the RSS feed(s), or through an e-mail subscription, please notify me.
[LJ readers reading this on the LJ RSS feed: Please click on the link at the top of the entry to go directly to my blog to leave a comment, as comments left on the LJ RSS do not get seen by me. Facebook users reading this from my Networked Blogs link can either comment on facebook or on my blog. If you are reading this through an e-mail subscription, you might need to go directly to my blog to view videos and images.]
For full Copyright and Disclaimer, please read http://www.blog.beccajanestclair.com/copyright/

How To Monthly and Weekly Meal Plan [Slimming Word]
This past week at Slimming World, our consultant talked about learning visually and it got me thinking about meal planning, so I thought I would do a video showing how I meal plan. It turned into two videos – one for monthly planning, and one for weekly planning.
At the end of the previous month, or within the first week of a month, I sit down with a blank monthly calendar (I print out the ones Philifaxy makes) and some of my cookbooks and I plan out 30 days of meals. This doesn’t mean that the meal I write down for the 15th is going to be made on the 15th, it just means I have 30 meals for the month I can pick through when I make our weekly plans. It takes me about 45-60 minutes to plan the month this way, but then it keeps planning the week down to 30-45 minutes.
I also said I would upload my weekly planning sheet to dropbox, so feel free to download this and use it:
Weekly Slimming World Meal Planning Sheet
***
DISCLAIMER: I do not work for Slimming World, I am not affiliated with Slimming World beyond being a paying customer/member, I get no personal benefit from writing this post other than the joy of sharing.
The contents of this post, including images are © Rebecca J Lockley and Tim Lockley unless otherwise stated and should not be reproduced without permission. If you are not reading this on http://blog.beccajanestclair.com, my facebook page, Networked Blogs, the RSS feed(s), or through an e-mail subscription, please notify me.
[LJ readers reading this on the LJ RSS feed: Please click on the link at the top of the entry to go directly to my blog to leave a comment, as comments left on the LJ RSS do not get seen by me. Facebook users reading this from my Networked Blogs link can either comment on facebook or on my blog. If you are reading this through an e-mail subscription, you might need to go directly to my blog to view videos and images.]
For full Copyright and Disclaimer, please read http://www.blog.beccajanestclair.com/copyright/
What the Duck? Quackers over Sir Nigel Gresley’s Missing Duck
@CaroLowbridge @BBCNews pic.twitter.com/E1AecrercX
— Ice cafe Brighton (@icecafeBrighton) April 5, 2016
So, yesterday, we were interviewed by the BBC South East Today.
 (1)
(1)
 (2)
(2)
To make a long story that’s not my story short — A statue was created of Sir Nigel Gresley and he was to have a mallard duck at his feet to commemorate his love of birds and as a nod to one of his most famous engines – Mallard. Family members of Gresley opposed the duck, so a petition was started by the Gresley Society to reinstate the duck.
This all leads up to the unveiling yesterday at London King’s Cross and a faceboook post made by my friend M. He wanted to get a group together to show support for the Gresley Society and the sculptress by bringing along ducks. Well, how could we refuse?
As it turned out, our ducks made quite a stir with the press there to cover the event. Because we were peacefully standing on the mezzanine just waving and squeaking our ducks, no one minded that we were there, and in fact, lots of people told us they liked the ducks and wanted the duck with the statue! Hamish (and his friends) have had their picture taken sitting on Sir Nigel’s newspaper by mane people, including the press. While Hamish did not make it into the newspapers (and really, wouldn’t it have been better to have a Scottish duck?), one of the other ducks I brought and gave to my friend Han did:
 (3)
(3)
Our picture has now accompanied articles all over the place!
BBC – ‘Deamining’ Duck Absent from Sir Nigels Statue
ITV – Rail engineer statue unveiled… but lack of duck ruffles a few feathers
The Daily Mail – Feathers are ruffled as statue is unveiled of genius behind world’s fastest steam train the Mallard – WITHOUT a duck at his feet
Yorkshire Post – Nigel Gresley statue unveiled at King’s Cross – and he’s out for a duck
Edinburgh Evening News: Sir Nigel Gresley statue ruffles Mallard fans’ feathers
and the Times:
Here we are – Today's Times shows the stupidity of the Gresley Society. A pyrrhic & pedantic approach #gresleyduck pic.twitter.com/NHGpXImGdB
— fraser pithie (@Fradgie) April 6, 2016
 (4)
(4)
(It’s a subscription service, so could someone who subscribes get me screenshots?)
And, well, it looks like people are still leaving ducks there!
The pro-duck lobby have made their mark on the new Gresley statue at King's Cross (see https://t.co/dgiLExDtGH) pic.twitter.com/5njukqRlbA
— Ed Boiling (@boilerwadding) April 5, 2016
We had a great day. Our little group had 6-7 people, but we kept meeting other people who had brought ducks as well! After, we all headed to the Parcel Yard for a much deserved pint.
If I find more links or photos, I’ll be adding them to this post. I still have to unload my camera too and see what other people in our group managed to take. If you spot me or the ducks on another site, please let me know!
***
Photo credits when the photo was not mine or embedded:
1 – Screencap from the BBC SE Today, capped by Dave Rudderham
2 – Press Assoiation
3 – BBC
4 – Rob Bough
The contents of this post, including images are © Rebecca J Lockley and Tim Lockley unless otherwise stated and should not be reproduced without permission. If you are not reading this on http://blog.beccajanestclair.com, my facebook page, Networked Blogs, the RSS feed(s), or through an e-mail subscription, please notify me.
[LJ readers reading this on the LJ RSS feed: Please click on the link at the top of the entry to go directly to my blog to leave a comment, as comments left on the LJ RSS do not get seen by me. Facebook users reading this from my Networked Blogs link can either comment on facebook or on my blog. If you are reading this through an e-mail subscription, you might need to go directly to my blog to view videos and images.]
For full Copyright and Disclaimer, please read http://www.blog.beccajanestclair.com/copyright/
A Tour of my A5 Filofax Finsbury
*warning, this was really long!*
I always use A5 sized notebooks for keeping notes, writing lists, keeping track of things, etc. etc. And when I would run out of space I’d buy a new notebook and then staple or re-write the things I wanted to keep OR I’d leave them in the old notebook, then lose the notebook by the time I needed the note! So I asked Tim for an A5 Filofax for Christmas and I’ve spent the past few months customising it. Am I done? No. I think customising it and rearranging it is something I’ll probably constantly do as my needs change.
I made the tour video above, and promised a blog post with links to the freebies I grabbed and printed. I also made a lot of my own inserts and the debate is out over offering them on Etsy for a few quid or just giving them away for free. Opinions? I wont be selling the tabs though because I don’t own the laminator. If we ever buy our own laminator, I might.
The Simon Cat’s pages came from a Simon’s Cat A5 diary I got for Christmas. I took it out of the spiral, covered the spiral with washi tape, and repunched holes. Of course, I wound up not using all the pages so I wasted a bit of time, but it might still come in handy.
TIP: To print A4 sized documents as A5, you have two options. If it is a PDF, you just set the print settings to booklet, and then if you want it to be left or right and if you want it to print front and back. If your document is a word doc, you can just set the printer settings to print 2 per page.
As I said, I designed my Daily Task, To-Do, Weekly Task, Monthly Task, and Quarterly Task pages myself. If there’s any interest in them, I might list them on Etsy or stick them on dropbox. IF I sell them on Etsy, I’d only sell them as printables and charge maybe £2 for the set.
The monthly calendars came from The Handmade Home. She released her 2016 freebies in June last year, so I’m going to make sure I check out her website around June for 2017! On that same page, you can find the emergency contact list I used (but didn’t show) and lots of other great printables.
My weekly pages are just the Filofax ones that came with my planner. I didn’t see any reason to look for other inserts, but I might seek different vertical pages for 2017. But I wouldn’t want to print my own, since I’m lazy and don’t want to have to cut and hole punch that many pages!
For meal planning, I printed out the monthly calendars offered on Philofaxy (They don’t want people to link to their stuff on Pinterest, and I’m not sure if they allow links, so you can google for them). Philofaxy offers lots of plain and simple inserts for a no-frills look. I originally was going to use them for my regular month, but I liked the pretty colours on the other ones better and decided to use these for my meal plan instead. The weekly meal plan pages I designed myself. I also had designed some Slimming World style weekly tracker pages, but I gave them up as I didn’t really like them and preferred the stickers from Dook Plook.
I followed this tutorial for making the folders. I had to modify the directions slightly to make the pocket A5 sized, but it generally worked. Really, you just fold and trim paper and use tape or glue to keep the end closed.
The Christmas planning pages I designed myself. If anyone wants them, I’ll toss them on Dropbox as it’s not worth charging for these!
Stickers:
My two favourite Etsy shops are Dook Plook Designs and The Geeky Planner. I also bought some stickers from Anna’s Planner Bubble. There are loads of other shops on Etsy, but I prefer buying stickers from a few shops to take advantage of bulk discounts and single postage rates. Some of my other stickers came from Paperchase or my stash of scrapbook stickers from the US. Basically, use what you like or what’s functional.
Any questions? Let me know!
***
The contents of this post, including images are © Rebecca J Lockley and Tim Lockley unless otherwise stated and should not be reproduced without permission. If you are not reading this on http://blog.beccajanestclair.com, my facebook page, Networked Blogs, the RSS feed(s), or through an e-mail subscription, please notify me.
[LJ readers reading this on the LJ RSS feed: Please click on the link at the top of the entry to go directly to my blog to leave a comment, as comments left on the LJ RSS do not get seen by me. Facebook users reading this from my Networked Blogs link can either comment on facebook or on my blog. If you are reading this through an e-mail subscription, you might need to go directly to my blog to view videos and images.]
For full Copyright and Disclaimer, please read http://www.blog.beccajanestclair.com/copyright/
Pocket Filofax Finsbury as a Purse/Wallet
I made this video for my friends on the facebook groups after I asked lots of questions about turning the pocket sized Filofax into a purse/wallet.
As you can see, it’s VERY full and with the one ring splitting a bit, I’m really not sure if this is useful or if I will keep using it, but I’m willing to give it a go.
Where to buy*:
Filofax Pocket Finsbury in Raspberry
Pocket Filofax Zipper Envelopes
Pocket Filofax Credit Card Holders
Pocket Filofax Clear Pouch
***
*All links lead to Amazon UK and are affiliate links, so if you click on them and buy something, I do get a tiny percent.
This post has not been endorsed by Filofax OR Amazon and I have not received compensation for writing this post or making this video.
The contents of this post, including images are © Rebecca J Lockley and Tim Lockley unless otherwise stated and should not be reproduced without permission. If you are not reading this on http://blog.beccajanestclair.com, my facebook page, Networked Blogs, the RSS feed(s), or through an e-mail subscription, please notify me.
[LJ readers reading this on the LJ RSS feed: Please click on the link at the top of the entry to go directly to my blog to leave a comment, as comments left on the LJ RSS do not get seen by me. Facebook users reading this from my Networked Blogs link can either comment on facebook or on my blog. If you are reading this through an e-mail subscription, you might need to go directly to my blog to view videos and images.]
For full Copyright and Disclaimer, please read http://www.blog.beccajanestclair.com/copyright/
Travel Products [Techish Stuff] Review
I thought I would write up a post about some of the travel products I’ve bought in the past year. All of the links lead to Amazon (and are Amazon Affiliate links). All of the photos have come from Amazon as well. Amazon is my current go-to for pretty much everything I can’t buy in town because I am an Amazon Prime member and get free one-day shipping. Despite all the issues I sometimes have with the delivery drivers, I still prefer Amazon over eBay.
ButterFox Universal Electronics Accessories Travel Organiser / Carry Case
– The Butterfox organiser is one of those packing cube like products that works. When Tim and I travel together I’m able to fit nearly all of our cables for two DSLRs, my laptop (including external mouse), 2 phones, 2 tablets, and 2 kindles. This bag has two small inner pockets so I tucked in a few USB sticks and a card reader. When we travelled internationally, I also was able to include a double plug converter for the camera chargers and laptops. This bag also is great at home for keeping the camera chargers locatable. Much easier to see the mesh bag in a basket of chargers than finding the individual cords, and much easier when you’re travelling to not have lots of cords tangled all over the bottom of your bag. I WISH I had had a bag like this when my mom and I went to Ireland in 2009. We had a connecting flight in Paris (sadly, no chance to see Paris) and I had my backpack filled with stuff. For whatever reason, at CDG you have to go back through security to get a connecting flight and the lady on security did not like my bag full of tangled cords and actually made me empty my entire rucksack for her so she could see everything because “cords”. Literally, the only reason she gave me for wanting me to empty my bag. She also confiscated my awesome EMS caribeaner that I still haven’t been able to replace, but that’s another story. So, bag to organise your cords is a good idea. If you don’t want to go with a bag, maybe you want one of these:

dodocool Universal Grid-it Organization System
– Tim and I both have grid-its we bought before our trip to the US in 2013. These were my first attempts at cord organising, and I like them a lot, but the only problem is they can get quite bulky if you have a lot of boxy plugs. The grid is good for flat items though, so it would be a great organiser for USB cables and other flat things. I’ve also seen people use these for more than electronics – you could use one of these for your make-up when you travel instead of a make up bag, you could use one to organize your pens/pencils and other stationary bits, or just to keep track of all the little odd things you take with you that don’t really have a home….and ok, that’s all I can really think of. Again though, these are great at home for securing all those odd cords and things you have no idea where to put because every item comes with a separate USB cable, but you only really use one cable for everything….or you have a video camera that comes with an AWKWARD cable that when you lose it you wind up not being able to empty it for a year. Yeah, that happened. We didn’t take these on our recent trips, but I still think they’re good.

Damai Portable Universal Electronics Accessories Travel Organizer
– Another organising case for electronics. I picked this up because it said “fits ipad” and my Samsung is the 8″ version, so I assumed it would fit. It does not, and this case is not big enough for a standard ipad. Maybe the mini would have fit? But it is a great case because it zips shut so unlike the grid-it, nothing ever falls out. And it has loads of little pockets and elastic bands so it holds loads. It also has lots of slots that are credit card sized, so you can use it to empty out your purse of all the unnecessary store loyalty cards if you’ve forgotten before you go, or use it to keep track of attraction tickets. I used this to keep things like USB sticks, extra headphones, my ipod (which is now lost! :'( ), and extra memory cards for the cameras. This wasn’t useful on our short trip to Austria because of space (I took the Butterfox case), but I took this to the US for three weeks to try to keep things organized. This worked, but it also suffered the same problem as the grid it because once you cram it full, you risk it being bulky.
Probably my favourite product, and one we use all over our home is this:

Multi Port USB Mains Charger – 4 Ports USB Charger with UK, EU, US & AU Plugs
– These are great! One plug, four USB ports. Like a USB hub but for the outlet. Tim and I each use one upstairs on our bedsides to charge phones, tablets, and kindles without taking up multiple plugs and we keep one downstairs in the living room for charging Tim’s work phone, my fitbit, an emergency phone or tablet charge if one of us starts beeping low battery before bed, etc. They’re also great for hotel rooms where they usually only have one or two plugs for the whole room and you have loads of devices to charge! It also comes with interchangeable plugs for the entire world, so no matter where you are travelling, you will have a charger without needing to pack loads of those little converters, assuming everything you have can charge via USB.

Travel Adapter USA 3 Pin Earthed Extension Lead 2 UK Socket
This is a USA plug, but here’s the one for Europe: Travel Adapter EUROPE Multi Extension Lead 2 Pin Earthed Plug 2 UK Sockets
. Having two plugs on a short extension instead of a bulky plug at the wall is so much easier! Especially if access is limited because plugs are behind furniture or high up on the wall and there isn’t space for a bulky plug. 2 sockets instead of one because this way you can charge your camera and use your laptop at the same time, or you can charge two cameras, or both you and your husband/partner can use your laptops. I also have a UK 4-plug with a US plug on the end that lives at my mom’s house since when we visit her it’s for a long visit and we will usually want to be charging cameras AND using both laptops at the same time. And since my 4-port plug has a UK plug for it, I sometimes don’t bother switching it to a US plug and plug it in to the extension.

SAMAR® Extendable Integrated Selfie Handheld Stick
– Yep. A selfie stick. Because Tim and I travel alone and we usually get loads of pictures of me some place or him som eplace, but very few of the two of us together. So a selfie stick was purchased in the Amazon day deals for £2. We really used it for the first time when we were in Austria, and we have tons of pictures of us together! And if you have short arms, it’s also good for yourself if you travel alone. The trick to not being “that guy” is to just take out the stick when you want your photo, extend it, get it all set up (mine has bluetooth and then you press a button on the stick to take the picture), go to where you want your photo (set it up while you’re waiting in a queue if it’s a place with a queue!), use it, then walk away to put the stick away. People will like you better.

There’s also things I don’t have that I’d love to have, like a really good portable USB charger. Tim has one of these, but I only have what I like to call “lipstick chargers” and they’re only good for maybe 75% of a charge and only good once before you need to recharge it, but the one that Tim has can be used multiple times to a full 100% and can even do two devices at once. So much easier than carrying around the 3-4 portable chargers I was carrying around in Austria.
I feel like I’ve really rambled on about travel tech stuff and haven’t talked at all about anything else, but this post is getting pretty long, so I’ll do a second post on other things.
***
The contents of this post, including images are © Rebecca J Lockley and Tim Lockley unless otherwise stated and should not be reproduced without permission. If you are not reading this on http://blog.beccajanestclair.com, my facebook page, Networked Blogs, the RSS feed(s), or through an e-mail subscription, please notify me.
[LJ readers reading this on the LJ RSS feed: Please click on the link at the top of the entry to go directly to my blog to leave a comment, as comments left on the LJ RSS do not get seen by me. Facebook users reading this from my Networked Blogs link can either comment on facebook or on my blog. If you are reading this through an e-mail subscription, you might need to go directly to my blog to view videos and images.]
For full Copyright and Disclaimer, please read http://www.blog.beccajanestclair.com/copyright/
I Passed My Driver Theory Test!
 I applied for my Learner’s Permit back in October 2014 because I wanted a photo ID before my trip to the US the following January (Jan 2015) that wasn’t my passport. I might be 36, but I surprisingly get carded in the US. And, of course, I planned on learning how to drive.
In the UK, learning how to drive and getting your license is a three-part process. Well, more than three when you add in everything you need to do.
Step 1: Apply for your provisional. This is really easy and you just go to the Post Office for a form, and send off the application with the fee, a photo of yourself, and your ID (passport if you are foreign). You can send them a self-addressed postage paid envelope to return your documents (I used one with tracking). It only takes about two weeks.
Step 2: Get car insurance. If you have someone else in your house who own a car, ask them to add you as a named driver. All Tim had to do was ring up his insurance (Directline) and it was around an additional £100 to add me for the year and the only difference is I have a higher deductible than Tim. If you have US driving experience and it hasn’t been forever since you had a valid license in the US, some UK insurance companies will accept your no claims bonus, but I haven’t had insurance in the US since 2008 so I didn’t bother. It probably also helped that I’m older than 25.
Step 3: Book lessons. As an experienced driver, I contacted a few local driving schools to ask them what options they had since I know the basics of driving and needed to learn 1) manual transmission and 2) how to drive on UK roads/how to pass the test. I found a school that was willing to offer me the same introductory rates as a new driver, but start me right away behind the wheel (instead of explaining “this is the brake/this is the gas/etc”).
Step 4: Book your Theory test. Apparently, the DVLA has been seriously backed up and in some places it’s taking up to three months just to schedule the theory test. When I went online to schedule mine, I had to schedule it for five weeks away from the date I was booking it because it was the first date available. I would have liked to have taken it sooner, but it gave me plenty of time to study.
Step 5: The actual test for getting your license in the UK has two parts – a written part (Theory) and a behind the wheel part (Practical). Both parts have several sections to them. You MUST pass the theory test before you can even schedule the practical, so step 5 is STUDY. Even if you think you know…study. Tim bought me the study books in a three pack for Christmas, but they are available at WH Smith and online from TSO for about £20 for the three books. I also paid for the official apps for my Android tablet (the guide, the theory test, and the hazard perception test), which I think cost around a tenner for all three, and in addition to all of that, we also bought the Hazard Perception DVD (I had to use Tim’s desktop since my laptop doesn’t have a DVD drive!) Overkill? Actually…..no. I read (most of) the book (I also had a free download on my Kindle I read), and then started in on the practice tests on my tablet. A lot. I failed some, I passed some. It was FRUSTRATING! I even practised the tests while I was soaking in the bathtub! And the night before my test, I took 10 tests (failed one, but all the other ones were passed with plenty of room to spare)
The Hazard Perception test is a separate section to the Theory, and a separate score. You need to pass BOTH sections in order to have passed the theory test, and if you fail one, you retake both. The Hazard Perception is a series of scenarios and you have to click when you see a developing hazard. Sort of similar to that simulation from Driver’s Ed in the 90s with the brake pedal and the ball rolling into the street. In the Hazard Perception test, you can score up to 5 points on each scenario, but one is worth 10 (it’s a double hazard). The later you click, the less points you get…but if you click in a pattern or the computer thinks you are clicking on everything, you don’t get *any* points! There is an app for this, but since you will be taking the test at a computer with a mouse, I felt it would be better to practice on a computer. The DVD cost £15 at WH Smith, so all in all we spent around £45 just on study aids. But this test is tough, and it only has a 50% pass rate for most testing centres! And since you have to pay £23 for the test each time you need to take it…well, you want to study as much as you can and use as many resources as you can. They even have the practice tests online for free, so if you didn’t want to pay for as many applications or books, you could take the tests online (but they don’t have the Hazard Perception test online).
Step 6: Take (and pass) the Theory test. You get given a set of instructions to follow the day of your test, and these include not bringing anyone with you to the test (Sorry Tim!), turning your phone off, and locking your phone, watch, tablet, handbag, jacket, and basically anything else you have with you in a provided locker. The only thing you are permitted to take into the testing room is your provisional license and the key to the locker.
The test starts out with a short 15-minute maximum practice session just to get you used to the way the test is conducted. Then, the computer gives you a timed 1-minute break (But you can skip ahead) before starting the theory test. The test is 50 questions long, and you have 57 minutes. You can flag questions you are unsure of and then at the end you can either review your entire test or just review your flagged questions. At the end, the test will also tell you if you failed to answer a question, so make sure you check! You need to get at least 43 questions correct, so I flagged the questions I wasn’t 100% on and at the end I had only flagged 5. If I had all 5 of those wrong, I still would have passed the test. But I went back and in the end I only had 2 questions I was unsure on. After you click the final submit button, it gives you a three-minute break (you can skip this or take less than three, but after three minutes it will move on to the Hazard test).
Just like the Theory test, the Hazard perception test will give you an example/practice test, then a one-minute break before starting the test. The Hazard part is 14 clips and each clip is probably around a minute long. You just click when you see the hazard developing.
When you’re done, you get up and leave the room and your print out with your score will be waiting for you with the receptionist.

And check out my score! *one* question wrong on the Theory, and 65/75 on the Hazard perception! They break down the score for you, so I know I scored 9 points on the double hazard, and then mostly 5s and 4s, with only 2 points on two of the hazards.
Step 7 is of course, scheduling, taking, and passing the Practical. Watch this space!
***
The contents of this post, including images are © Rebecca J Lockley and Tim Lockley unless otherwise stated and should not be reproduced without permission. If you are not reading this on http://blog.beccajanestclair.com, my facebook page, Networked Blogs, the RSS feed(s), or through an e-mail subscription, please notify me.
[LJ readers reading this on the LJ RSS feed: Please click on the link at the top of the entry to go directly to my blog to leave a comment, as comments left on the LJ RSS do not get seen by me. Facebook users reading this from my Networked Blogs link can either comment on facebook or on my blog. If you are reading this through an e-mail subscription, you might need to go directly to my blog to view videos and images.]
For full Copyright and Disclaimer, please read http://www.blog.beccajanestclair.com/copyright/
[Recipe] Boston Cream Cake
I’m posting this recipe by request of one of my friends who commented on my original Instagram share. I made this cake for my Mother in Law for Mother’s Day, which was yesterday in the UK. I wanted to make her something different from the normal Victoria sponge, and I had the week before done a Chocolate and Peanut Butter cake for my SIL, so I didn’t want to repeat flavours.
A lot of Americans will have heard about the Boston Cream Poke Cake, which is basically a box yellow cake mix, a box of yellow pudding, and a can of chocolate icing. You *could* make your cake this way in the UK as they now sell Betty Crocker mixes and sub custard for the pudding, but there’s something really satisfying about baking from scratch. Although I will say I did use a can of Betty Crocker Chocolate Fudge icing, simply because I hate making icing. But by all means, use your favourite chocolate icing recipe!
You Will Need:
Your favourite standard cake recipe OR a box mix for a yellow/vanilla cake OR use my recipe below –
125g butter (or Stork)
125g sugar (caster is best for baking)
125g self rising flour
1tsp baking powder
2 large eggs (if you’re eggs aren’t particularly big, use 3)
1tsp vanilla
1 standard sized tin of custard OR one packet of instant custard OR about 400g homemade custard (if you’re in the US, use Vanilla Jell-O pudding)
1 tub of Betty Crocker Chocolate Fudge icing OR your favourite chocolate icing recipe
50g chocolate chips
1. Pre-heat your oven to 180C and line 2 round cake tins with parchment paper* or butter and flour the tins, whichever you prefer or have handy.
2. Mix your cake. If you’re using a box mix, follow the instructions on the box. If you’re making one from scratch, start by sifting the flour and baking powder together in a small bowl and cream together the butter and sugar in a larger bowl. Add eggs one at a time, beating after each egg, and add the vanilla. Then slowly mix in the flour.
3. Divide your cake evenly between the cake tins, and bake for 25-30 minutes (or follow the instructions on your box)
4. If you’re not using a tin of custard, now is the time to make it as you will want it to cool completely before you use it.
5. Take the cakes out of the oven and cool them in their tins for 10 minutes, then turned out onto a wire rack. Now, here is where you need to decide what to do – if you want your cakes to be gooey with custard, let them cool completely. If you want the to be moist, continue on.
6. Place your bottom layer on your plate and use the end of a wooden spoon to poke holes about 3/4 of the way through the cake. You don’t want the holes to go the whole way through.
7. Use half of the custard and slowly pour over the holes in the cake. If your cake is still warm, the custard will slowly get absorbed making the cake extra moist and giving it a slight custard flaour, but if you let the cakes cool first, the custard will fill the holes and be gooey and custardy when you eat it.
8. For the icing/chocolate bit: Melt 50g chocolate chips and stir it into your icing. This should thin out the icing a little and make it softer. Unless it’s the dead of winter and your kitchen is cold (like mine!), in which case you might want to microwave the icing for 30 minutes to soften it. Slowly pour enough chocolate icing on the top of the cake to just cover it just to the edge. Don’t worry if the custard and chocolate are combining together, that’s fine.
9. Add the top half, poke holes, and repeat step 7 and 8, using the rest of the icing to completely cover the cake so it drips down the sides. You could neaten this up with a knife if you want to, but I left it to drip down and then scooped up the excess and put it back on top. Again, don’t worry about the custard mixing itself in with the chocolate, the flavour will still be there. Because of the added chocolate chips, the icing will go slightly hard and shiny, like the chocolate topping on a Boston Cream doughnut from Dunkins!
TIP: Want cupcakes instead? I made these as cupcakes for an event and I used a cupcake corer to core the cupcakes, fill them with custard, add the top back on, and then put a spoonful of chocolate icing on top. This works best on cupcakes that don’t quite reach the rim of the paper liner so the chocolate doesn’t run off, so slightly underfill the cups.
My MIL, FIL, and husband all agreed this cake is very tasty!
***
*A neat trick is to trace around the bottom of your pan onto the parchment paper, then cut out just inside your trace lines. It should give you the right size. I also help my parchment paper stick little by giving the tin a squirt of fry light.
The contents of this post, including images are © Rebecca J Lockley and Tim Lockley unless otherwise stated and should not be reproduced without permission. If you are not reading this on http://blog.beccajanestclair.com, my facebook page, Networked Blogs, the RSS feed(s), or through an e-mail subscription, please notify me.
[LJ readers reading this on the LJ RSS feed: Please click on the link at the top of the entry to go directly to my blog to leave a comment, as comments left on the LJ RSS do not get seen by me. Facebook users reading this from my Networked Blogs link can either comment on facebook or on my blog. If you are reading this through an e-mail subscription, you might need to go directly to my blog to view videos and images.]
For full Copyright and Disclaimer, please read http://www.blog.beccajanestclair.com/copyright/
Packing Minimal Toiletries
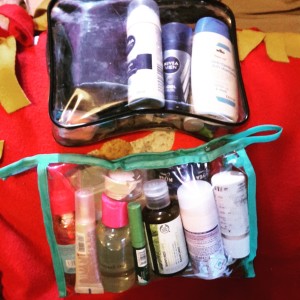 I know I previously posted about packing toiletries in my Packing for Autumn in Austria blog post, but I decided to expand on it because I’ve been watching a lot of travel videos on youtube and a lot of “minimalist packing” videos and the amount of toiletries is insane! Someone went down to London for a weekend and they took a massive bag and then a huge train case full of toiletries and make up. Our weekend trip to London? A rucksack and the TSA sized baggie of toiletries. And some of the international travel ones make me laugh too. Americans visiting the UK or the EU, Brits visiting America…..people, none of these places are third world. If you run out of something or forgot something, you can buy it.
I decided to make my own “What’s in my Bag?” video sort of as a rebuttal, and as a way to show people who are looking for ideas on what they could do to pack into smaller bags. When we went to Austria, we each took a backpack and shared a wheeled suitcase. And the toiletries in this video and post are what we took with us and what I’ve taken before when we took backpacks only to Ireland to meet up with my cousins and it’s generally what I even take for a weekend away since it’s all basically what I use on a daily basis, although a single overnight I’ll take a lot less….I’ll detail that below too.
Tim’s Bag
Tim’s bag is the middle size of a three-pack of travel bags I bought at Marks & Spencer’s, but I’ve seen the three packs on Amazon for around £7. I used the big bag on our trip to the US in 2013 and I soon realised I did not need a bag that big. It took up way too much real estate in my suitcase, and half the stuff I had packed I never used. The middle sized is the appropriate size for taking in your carry-on and since it was piped in black, I gave it to Tim. Tim barely has any toiletries to begin with, so packing for him is simple and all his stuff, both liquid and non-liquid, fit in one bag. On longer trips, I sometimes steal space in his bag and put his non liquids in a separate bag! His toiletries are:
-Travel electric razor. I think its a Phillips, I’m not sure. I bought it at Boots when Boots had men’s razors on 1/3 off just before our trip to the states last May and it runs off AA batteries, so no charger to pack.
-Shampoo. He uses a 2 in 1, whatever is on sale usually. I think that might be an old bottle refilled.
-Body Wash. We use a 100ml bottle and I fill it with whatever he’s currently using (again, whatever was on sale)
-Aftershave. It’s in a little (30ml) bottle from Muji* because he really doesn’t use much on a daily basis.
-Deodorant. Whatever is available in the travel size.
-Toothbrush/toothpaste. We have folding toothbrushes where you unfold them and they’re the same size as a regular toothbrush. Toothpaste is, once again, whatever is available (do you see a pattern here? We are totally not brand snobs!)
-Deep Heat. This is in another bottle from Muji. We both use this for sore muscles especially after a long day of walking!
-Nail clippers. Because his bag has room for it 😉
-Tums/Pepto/Lemsip. Again, because his bag has room for it. We just travel with the things we might need if we get ill. Chances are, if we’re on a longer trip, one of us will get a slight cold or an upset tummy.
As you can see, not much. I think that’s pretty much all Tim ever needs even on a daily basis at home. Oh, and if we’re going on a longer trip, he’ll also pack his wet razor and a travel thing of shave gel. If he needs a brush, he just uses mine. Some of Tim’s things are from gift packs he was given for various gift giving occasions. We keep all that stuff in a drawer in the bathroom and pull things out as they’re needed.
For myself, I use one clear plastic bag that is size appropriate for a carry-on and then usually a second bag with my non liquids. I think my liquids bag might have come as part of a kit, either designed for travel, or with other stuff already in it. I had it in a box full of make-up bags (seriously. I have loads of free with purchase bags) and since it was clear and the right size for travel, it got used. My non-liquid bag is a Cath Kidston 20th anniversary wristlet that has served many purposes in it’s life so far**.
My liquids:
-Shampoo/Conditioner. I’m just refilling the bottles I bought ages ago with whatever I’m currently using. I saw on a video someone actually combined their shampoo and conditioner to make a 2 in 1 in a single bottle, and I might give that a trial at home to see if it really works…..if it works, I expect I’ll do that the next time we travel!
-Hibiscrub. It’s for my Hidradenitis Supperotiva. That’s a tiny bit that is enough for 4-5 days. For longer trips, I either pack 2 or a larger container….and when we go on a three week trips, I need about 200ml (but we also usually have checked bags for longer trips thaat I can put it in, and technically, hibiscrub is available without a prescription, it;s just pricey.)
-bodywash. Whatever I currently am using, usually decanted into whatever container I have around. Again, I’m not fussy.
-Deodorant. I prefer the Nivea Pearl stuff as it doesn’t agitate my armpits, but if that’s not available I’ll grab a different brand.
-Facewash. I bought 100ml foam pumping bottles off eBay before our trip to the US in May. I haven’t seen this in a smaller size anywhere yet, but if there was one I’d get it because even on a long trip I only use about 30ml as it’s a foaming pump so it distributes a lot per pump! I use a tea tree oil wash from Boots.
-Moisturisers. I bought the small tube at Muji and it’s filled with Boots Vitamin E face moisturiser. I also take a Nivea cream pot, since that’s good for all over the body. In the same vein, I always take a small pot of vaseline (it’s the lip stuff, but really it’s all the same). And there’s also a pot of Blistex lip balm. I recently discovered Lanacane anti-chafing gel and it’s amazing.
-Tea tree oil spot treatment gel and night cream. Zits happen. Especially when travelling.
-Antibacterial hand gel. I have a whole little drawer full of bath and body works mini hand sanitizers, so I just grab one in a scent appropriate for the season.
-Febreeze. Again, it’s in a bottle from Muji. Always handy if you plan on re-wearing clothing.
-Body Spray. I currently have Mist You Madly by Soap and Glory in a small sprayer I bought off eBay.
-BB Creame. I use this as concealer and foundation when I travel. It’s in a small pot from Muji (again!)
-Under eye brightener. Because I sometimes don’t get a lot of sleep on trips if we have late nights and early mornings.
Non Liquids:
-Travel hairbrush. £1 at Primark, though I just got a tangle teezer, so I might have to rethink this as the teezer is bigger (and I’m now obsessed with brushing my hair!).
-All-in-one Makeup pallet. Keeping it simple. 2 neutral eye shadows, blush, and a mini mascara in one little pallet.
-Face powder/Brush. Self explanatory. I wish they made these in a mini version. I’ll take any brand, so if you know of one, let me know!
-Lip crayon. It was in my advent calendar this year, but basically, I always have some kind of lip colour thing with me.
-Mirror
-Emergency sanitary product (you never know)
-cotton buds/cotton pads
-emery board
-mini first aid kit. just some plasters, blister band-aids, and antiseptic wipes. This goes with me when we’re out and about, too.
-Safety pins, hair grip/bobby pins, and hair ties
-mini medicine cabinet. Or at least, that’s what Tim calls it. It’s a weekly pill organizer I repurposed with all the little OTC things you might need – paracetamol, ibuprofen, kwells, pepto, and enough of my prescription Metformin for 2-3 days (any longer and I’ll add a strip of meds to my bag).
Missing from the video:
-Travel Razor. I got one of those Venus Snap ones and I love it. I’m hoping it’s in the bathroom and not left at Mom’s in PA! I’m not bothered about gel, so I’ll usually pinch a bit of Tim’s. I only take my razor on trips longer than a week because I’m lazy.
-Dry Shampoo. Depending on how long the trip is for, but this is handy especially if we have to be up early in the morning and shower the night before.
-Face wipes. They’re good for everything from their actual purpose to spot treating a stain or cleaning off a dirty table on a train. I usually grab the cucumber scented ones from Boots. They live in an outer pocket of my backpack when we’re out and about along with the first aid kit and pill container.
-Sun cream. Depending on where we’re going and the season. My face cream has SPF15 built in, but if we’re in FL or it’s the Summer, we usually take along a mini size of a sun cream and then buy more when we’re at our destination. Our three week trip to FL and PA last May we went through 3 cans between the two of us because Tim is a pasty British man and when he visited the US in the Summer of 2009 when we were dating I neglected to think about sunblock because I didn’t need any and he blister burned. And if we’re packing sun cream, I’ll probably pack a 100ml bottle filled with some aftersun too.
And, I think that’s everything. Anything else that we need or run out of we can easily pick up at a chemist/Apotheke***/grocery store. I tend to buy us pre-packaged travel sized bottles over refillable ones (And then refill them!) because if we need toss things due to space it’s not a huge loss, but Muji and Superdrug are both great places to get refillable bottles. Obviously, I use refillable bottles for things that either aren’t available in travel sizes or are specific products we need (like my Hibiscrub). And if we’re going to the US, we’ll only pack what we need for the first night in the hotel in London and usually make CVS our first stop (although now I have things at my cousin’s house in FL and my Mom’s in PA). For those trips, we usually take the dregs of a previous trip’s bottles and then we toss them in the morning.
I don’t wear a lot of make-up on a daily basis, so the items I pack is pretty much what I’d use on a day I felt like wearing make-up. When we went to the US in May for Laura’s wedding, I also took a whole bag full of my special occasion make-up.
I don’t pack many “what ifs?” because I think they take up a lot of space and I could probably fill a train case full of things I “might need”. Just about the only what ifs I take are all medical related – medicines, first aid, and creams/balms. And that’s because I know I will need those what if items. I’m accident prone. Chances are, I’ll cut my finger open or bang my knee against a table and need pain relief or plasters. My rule is always if there is something I discover I need, I can probably buy it. If it’s not available where I’m travelling to, well then I probably didn’t need it.
When we go on single overnights, I won’t pack all of this. If we’re spending the night with a local friend and planning on coming home straight away the next morning I might only take deodorant, face wipes, moisturiser, toothbrush/toothpaste, body spray, a hairbrush, and dry shampoo because I’ll shower when we get home. If we’re spending the night down in London and travelling by train, I’ll probably take shampoo, conditioner, hibiscrub, face wash, deodorant, toothbrush/toothpaste, body spray, and a hairbrush. The little Clinique pallet will usually go into my handbag along with a lip gloss and a little concealer if it’s a short trip as my Cath bag might wind up being my purse on those trips! But Boots often does 3 for 2 on the travel toiletries, so it’s super easy to pop into one on our way through King’s Cross or St Pancras.
***
*Muji is a Japanese store that has a few UK locations. I stumbled onto them when I had one of my “Day of her own”s in London back in August and they have all sorts of travel sized bottles — loads more than they show online.
**It’s been used as a purse, a camera bag, a make-up bag, a cords organiser, a handbag, a pencil case, and probably about a dozen other things. It’s super versatile! The ribbon strap is surprisingly strong and the inside is lined with red spotted fabric and it has a little pocket on the inside too.
***Apotheke is the German word that signifies a chemist. In Austria, it’s a giant A on the outside of the building. We needed one twice on our trip, once for some plasters and once for some additional deep heat.
The contents of this post, including images are © Rebecca J Lockley and Tim Lockley unless otherwise stated and should not be reproduced without permission. If you are not reading this on http://blog.beccajanestclair.com, my facebook page, Networked Blogs, the RSS feed(s), or through an e-mail subscription, please notify me.
[LJ readers reading this on the LJ RSS feed: Please click on the link at the top of the entry to go directly to my blog to leave a comment, as comments left on the LJ RSS do not get seen by me. Facebook users reading this from my Networked Blogs link can either comment on facebook or on my blog. If you are reading this through an e-mail subscription, you might need to go directly to my blog to view videos and images.]
For full Copyright and Disclaimer, please read http://www.blog.beccajanestclair.com/copyright/
[Slimming World] Motivation
 Ok, so this is a Subway salad. You’ve seen them before, and if you follow Slimming World, you probably eat this a lot when you’re out and about. You know the deal. Lots of Speed, a little bit of P foods, and around 2 syns for some Ranch dressing. But. When I was in town today I very nearly strayed and went to Burger King.
So, let me back up bit. The other day, a friend messaged me to tell me she had joined Slimming World, and she wanted to know if I had any tips for her. I drew a blank. How can I offer tips to someone when I’ve spent a year mostly gaining weight instead of losing? So I gave her a generic “stick to the plans”…..and I thought oh, you dummy. How about YOU follow the plans?
So back to today. I’m in town. I need Lunch. Options are – fast food or a sit down restaurant. Out of the fast foods, we all know Subway is the best option…..but when you can smell the chips…….
In Lincoln, the BK is inside the shopping centre off the high street. To get to it, you have to either take the escalator down into New Look and walk out of New Look and over to it, or you have to walk the length of the upper level and then go down to the lower. So I walked into New Look and just looked at the first item in my path. It wasn’t anything in particular that I would wear, but I looked at the size on the shirt. 10. Could I some day fit into a 10 and take that shirt into the dressing room just to see what it looks like? Would eating at BK really help me on my way?
I turned around and walked to Subway.
….just don’t ask me about the rest of the day 😉 (I’m kidding. It wasn’t a bad day at all!)
***
DISCLAIMER: I do not work for Slimming World, I am not affiliated with Slimming World beyond being a paying customer/member, I get no personal benefit from writing this post other than the joy of sharing.
Please note: Syn values are based on my exact ingredients using the online calculator. Your Syn value may vary based on your ingredients and the size of your baking containers and portions, so use this number as a guide only. Syn values also frequently change, but these values are correct at the time of publication.
The contents of this post, including images are © Rebecca J Lockley and Tim Lockley unless otherwise stated and should not be reproduced without permission. If you are not reading this on http://blog.beccajanestclair.com, my facebook page, Networked Blogs, the RSS feed(s), or through an e-mail subscription, please notify me.
[LJ readers reading this on the LJ RSS feed: Please click on the link at the top of the entry to go directly to my blog to leave a comment, as comments left on the LJ RSS do not get seen by me. Facebook users reading this from my Networked Blogs link can either comment on facebook or on my blog. If you are reading this through an e-mail subscription, you might need to go directly to my blog to view videos and images.]
For full Copyright and Disclaimer, please read http://www.blog.beccajanestclair.com/copyright/
[Hotel Review] Apart Heim, Fügen
When we first decided to visit Austria, we intended on it only being a long weekend to the Zillertal region. We decided to look for self-catered to cut down on costs, and we knew we wanted to be near the Zillertalbahn railway. When I spotted an apartment for rent less than 2KM away from the Fügen station, we decided to book it. The one-bedroom apartment was listed on booking.com at £50/night plus a cleaning fee of €50. It was amazing. I reviewed it over on Trip Advisor, but thought I would expand on it here.
We originally thought we would have issues crossing the border between Germany and Austria, so I contacted the hotel and asked for a late check-in, which we were granted. As it turned out, we didn’t need it and I wound up ringing the landlord several hours ahead of time to tell her we had arrived! Unfortunately, we arrived outside of their check-in hours, so we had to wait for her to come over to let us in, and then she had to leave to pick up her children from school right away so we had to wait for her to return to go over the rest of check in, but the important part was we were IN our apartment! Since we had arrived in Jenbach early, we took a quick walk over to the Billa (grocery store) and had picked up a few things, so waiting for our landlady gave us plenty of time to look around and explore the apartment.
Here’s a video I took of our apartment:
Our apartment was on the top floor, so lots of steps to walk up to get to it! Once in, there was a small foyer area to remove outerwear and a hallway. The end of the hallway opened up into a combination living room/dining room/kitchenette. We booked a one bedroom apartment, so our bedroom was off this hallway as was the water closet (toilet only) and shower room. The bedroom and the living room both opened up onto a balcony….my favourite part of the place! Of course, the weather was a bit chilly in September, but we still managed to spend some time out on our balcony each day, even if we were hugging a cup of tea at the same time!
As I mentioned in my TripAdvisor review, I was a bit disappointed with the kitchenette. There was mismatched glasses and in fact only one glass the appropriate size for a bottle of beer. There was a lack of some basic staples. It would have been nice if they had included some salt & pepper and coffee for their specific coffee machine. Because we were only staying for 4 days, it wasn’t worth us buying the required pods, but if they had provided us with a few pods it would have been a nice touch. And salt/pepper would have been nice to at least have some seasoning available. I wound up snagging some packets from one of the restaurants we ate at. The kitchen also didn’t have an oven, so everything we cooked had to be cooked on the hob (stove), and we only had two burners. We ate a lot of pasta and bratwurst based meals!
I found the bed to be very soft and comfortable, but Tim says he didn’t think it was comfortable. But we each had our own separate bed (the double bed was two singles pushed together, which seems to be the norm in Austria) so it’s possible his bed wasn’t as comfortable as mine! The downside to the separate beds was it made it hard for us to cuddle right before bed and one of us wound up in the crack between the beds, but I actually quite enjoyed having my own duvet! haha! The bedroom also had two bedside tables with lamps and outlets(!!), a dressing table, and a large triple wardrobe with shelves on one side. I unpacked our bags, but we really didn’t have a lot since we had packed so light.
The shower was hot and the water pressure was nice. The shower room also had a towel warming rack, but it took over a day for the rack to be hot enough to warm things (and then I used it as a hot drying rack to dry stuff I sink washed!). The toilet made quite a bit of noise though, so we tried not to use it in the middle of the night.
As I said, the kitchen/dining room/living room was all one large room with a door out to the balcony. The dining table was large enough to fit 6 (the apartment sleeps 4), with a bench going around the corner of the room and then a few chairs. The living room had a sofa, which would convert to a sofa bed if you needed it and then the living room also had a wardrobe and a TV. We didn’t use the TV at all, but obviously, it would have been in German! I tried plugging in my USB stick to watch a film, but it didn’t work.
Apart Heim is located partway up a mountain right near the Speiljoch and the Speiljochbahn (which we rode!), a few small shops (one was a news agent, the other was a very limited convenience store), and Hotel Kohlerhof, which was a spa hotel with several restaurants (we ate breakfast there twice, dinner there our first night, and pizza there another night) that our apartment was affiliated with. There also was a preschool located nearby, but since our room was up on top, we never heard the children. Instead, we always heard the cow bells from a nearby field.
One thing I had failed to think about was the apartment’s location. 2KM away from the railway station sounds great….until you realise that it’s 2KM up a mountain! We had to walk this every day, including once with all our luggage. The day we checked out, our landlord offered to give us a lift down, and I wish I had thought to have asked for a lift on the way up when we got there! We also found out there is a taxi service in Fügen that I hadn’t found online when I ran a search. The taxi service is called Egger Taxi. We did not use the taxi service, but I have made a note of it for future trips!
We hope to stay here again on a future trip. Unfortunately, it won’t be this Summer when we return as they did not have any rooms, but we will be back!
***
The contents of this post, including images are © Rebecca J Lockley and Tim Lockley unless otherwise stated and should not be reproduced without permission. If you are not reading this on http://blog.beccajanestclair.com, my facebook page, Networked Blogs, the RSS feed(s), or through an e-mail subscription, please notify me.
[LJ readers reading this on the LJ RSS feed: Please click on the link at the top of the entry to go directly to my blog to leave a comment, as comments left on the LJ RSS do not get seen by me. Facebook users reading this from my Networked Blogs link can either comment on facebook or on my blog. If you are reading this through an e-mail subscription, you might need to go directly to my blog to view videos and images.]
For full Copyright and Disclaimer, please read http://www.blog.beccajanestclair.com/copyright/
[Recipe] Cheap and Easy Vegetable Soup
 When I was younger and home sick from school, my mom would always make me a bowl of Campbell’s vegetable soup with ABC pasta (I liked vegetable soup better than chicken noodle). When I became a vegetarian, I stopped eating it because it had meat based (beef or chicken) stock in it. And then I moved to the UK and stopped being vegetarian, but Campbell soup wasn’t sold here until recently. Two weeks ago when I was sick I happened to be looking at the tinned vegetables in Tesco and I spotted a tin of mixed veg – carrot, potato, parsnip, and peas. I thought it might be nice as a soup, so I picked some up and I’ve been making this soup every few days since. It’s quick, cheap, easy, and surprisingly tastes just like Campbell’s, so it’s also a nice bit of comfort food for this expat.
Vegetable Soup
Syns: 0
You will need:
1 tin mixed vegetables
1 tin chopped tomatoes
1L vegetable stock or broth (made from scratch, cubes, or stock pots*)
handful of pearl barley, small pasta, or rice (optional)
1. Check the cooking time on the barley, pasta, or rice as this will determine how long the soup will take. Pearl barley takes about 30 minutes, but small pasta only 10-15 minutes.
2. Combine everything in a large pot, bring to a boil, and then simmer per directions on the barley, pasta, or rice (I simmer mine for 30 minutes).
And you’re done. This made plenty for my husband and I to have for lunch over two days. I think the total cost for this is under £1, so it’s quite frugal too!
***
*Double check to make sure your stock is still syn free, or calculate the syns. Oxo cubes are free.
DISCLAIMER: I do not work for Slimming World, I am not affiliated with Slimming World beyond being a paying customer/member, I get no personal benefit from writing this post other than the joy of sharing.
Please note: Syn values are based on my exact ingredients using the online calculator. Your Syn value may vary based on your ingredients and the size of your baking containers and portions, so use this number as a guide only. Syn values also frequently change, but these values are correct at the time of publication.
The contents of this post, including images are © Rebecca J Lockley and Tim Lockley unless otherwise stated and should not be reproduced without permission. If you are not reading this on http://blog.beccajanestclair.com, my facebook page, Networked Blogs, the RSS feed(s), or through an e-mail subscription, please notify me.
[LJ readers reading this on the LJ RSS feed: Please click on the link at the top of the entry to go directly to my blog to leave a comment, as comments left on the LJ RSS do not get seen by me. Facebook users reading this from my Networked Blogs link can either comment on facebook or on my blog. If you are reading this through an e-mail subscription, you might need to go directly to my blog to view videos and images.]
For full Copyright and Disclaimer, please read http://www.blog.beccajanestclair.com/copyright/
[Recipe] Peanut Butter Blondies
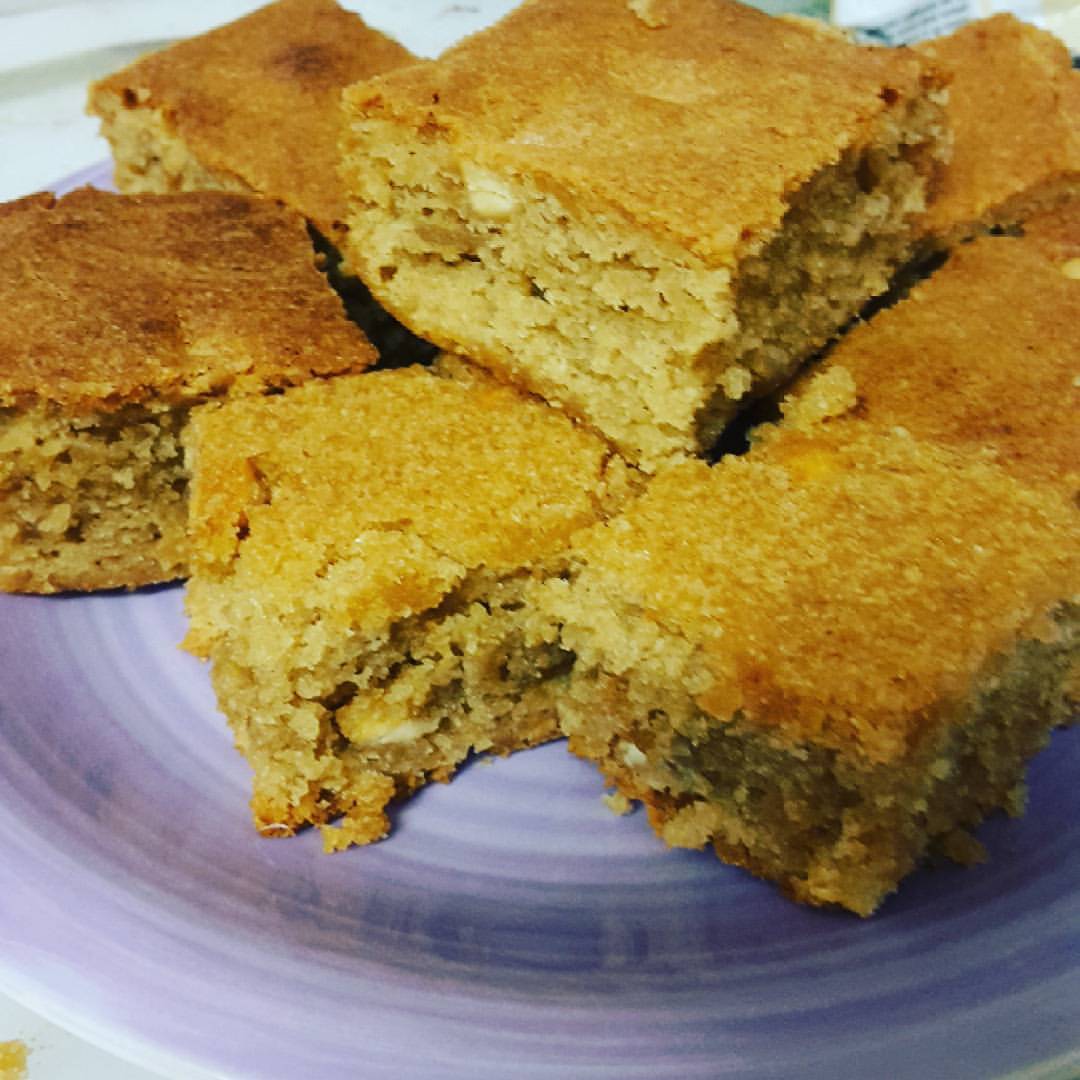 Several months ago, my husband’s aunt hosted all of us for a Sunday dinner and asked everyone else to bring along a sweet. About a month before that, just after our niece was born, I brought over a meal to my Brother and Sister-in-Law and made them some brownies. SIL asked if I would make them again, so I agreed and then I was rooting through my cupboard and found a bag of peanut butter chips I had brought back from the US and I decided to make some blondies too, since Tim’s sister loves peanut butter. Both were a big hit, and when Tim’s aunt decided to host a family dinner again, the request came through from my sisters-in-law (sister-in-laws? How do you plural SIL?) for brownies…..and blondies. The only problem was that I had used the bag of PB chips last time and as it was a grocery item from the USA, I had no way of getting them. So, I went on a hunt for a decent PB blondie recipe. Pinterest yielded a bunch, and then my sister (from another) linked me to a recipe. It only had seven reviews and one review said it was more like a cake, but there also was a side bar link to another PB bar recipe, so on analysing both recipes and then converting down to metric, I came up with this recipe. It’s still a little more cakey than a traditional brownie, and I think I used more white chocolate last time, but these are pretty peanut buttery!
Peanut Butter Blondies
You will need:
275g peanut butter* (I used Jif, you can use any brand. I used smooth, but if you like chunky, use chunky)
100g butter, softened (I used Stork)
175g caster sugar
175g brown sugar
4 eggs
1TBS vanilla essence
200g flour (I used self-rising, plain might have been better and not gone so cakey!)
100g white chocolate chips (optional. Add more if you want!)
1. Pre-heat the oven to 175C and spray a tray bake tray** with fry light or line with baking parchment.
2. Cream together peanut butter, butter, and both sugars.
3. Add vanilla and add eggs one at a time.
4. slowly mix in flour.
5. stir in white chocolate chips
6. Spread evenly in the baking tray and bake 30-40 minutes or until top is golden brown and it pulls slightly from the edge
7. Allow to cool in the pan for 10 minutes before turning out onto a cooling rack.
Makes 32.
I did not calculate syns for this treat, but I do know that peanut butter has a lot of syns in it. Something like 4 or 4.5 per Tablespoon (15g!), so at a bare minimum you would be looking at at least 6 syns per piece (if divided into 32) at a rough estimate using flora light instead of stork, and that’s without the white chocolate chips too. So…..yeah. This has lots of syns in it. If I was planning on keeping it at home, I would work out the syns more accurately, but since I’m taking this to a party, I’m not concerned in knowing.
***
*I would love to try this out with almond butter or other non-peanut butter butters for people with peanut allergies. I bet it would taste really good!
**I bought a pack of 10 tray bake trays at ASDA for £1 or £2 that I’ve been using every time I make brownies so I can easily give it away to someone without worrying about getting the tray back.
The contents of this post, including images are © Rebecca J Lockley and Tim Lockley unless otherwise stated and should not be reproduced without permission. If you are not reading this on http://blog.beccajanestclair.com, my facebook page, Networked Blogs, the RSS feed(s), or through an e-mail subscription, please notify me.
[LJ readers reading this on the LJ RSS feed: Please click on the link at the top of the entry to go directly to my blog to leave a comment, as comments left on the LJ RSS do not get seen by me. Facebook users reading this from my Networked Blogs link can either comment on facebook or on my blog. If you are reading this through an e-mail subscription, you might need to go directly to my blog to view videos and images.]
For full Copyright and Disclaimer, please read http://www.blog.beccajanestclair.com/copyright/
[Recipe] Cherry Almond Marzipan Cake
 Today was my Mother-in-law’s birthday and she wanted to have pizza with her kids, so my sister-in-law hosted us, brother-in-law picked up pizza, and I offered to make a cake. I asked if there was anything in particular she wanted, and she said to surprise her. After thinking about what I knew she liked (Marzipan) and some browsing on Pinterest, I found this cake, showed it to Tim, and he thought his mum would like it. Off I went to Tesco for ingredients…..to discover Tesco was OUT of glacé cherries! In fact, I found out from a friend who works for Tesco that Tesco had issues with the supplier, so NONE of the stores had any! Fortunately, there is an Aldi on the same road as Tesco, so I called in there and found stacks of them (and purchased three containers to be safe!). So, if Tesco hasn’t fixed their issue, you can find the cherries at Aldi. I also purchased a jar of cocktail cherries in case I couldn’t find the glacé, so I bet those could be used in a pinch (but I would drain and pat them dry).
One tip the original recipe suggests is tossing the cherries in a little bit of flour before mixing them in as it will keep the cherries from sinking. I did this, but I’m not sure it really made a difference because once the cherries touched the batter I felt like the coating disappeared. However if I had needed to use the cocktail cherries, I think I would have coated them.
When I took this cake out of the oven, it looked like a mess. Honestly. It looked awful. And after it had cooled off, it felt very dry, so I wound up poking holes in the top with a fork and drizzling over it some of the juice from the jar of cocktail cherries. If you don’t have any and you need to moisten the cake, you also could thin a teaspoon of jam with some boiling water and use that. It didn’t need a lot of liquid, maybe only about 2 teaspoons worth, but I do think that helped. I also thought about using some cherry kirsch, but with one family member pregnant and one breastfeeding, I wanted to keep alcohol away.
This cake also has an incredibly high calorie and fat content due to the almonds. The website the original recipe was on pegs it at just under 400 calories per serving, but doesn’t state how many servings the cake serves. There are 8 of us, so we divided the cake into eight. Slimming World, what slimming world? haha.
This was only my second time working with marzipan (the first being the Battenburg cake), and my first time ever coating a cake with marzipan, because the Battenburg is rolled to wrap it, not draped. So now I can add draping a cake with marzipan to my list of kitchen skills I never thought I would have.
Cherry Almond Marzipan Cake
You will need:
150g butter, softened (I used Stork)
150g caster sugar
2 extra large eggs
150g self-rising flour
150g ground almonds
25g flaked almonds (optional and approximate)
1 tsp almond extract
200g glacé cherries
25g self-rising flour (optional, for coating the cherries)
400g marzipan (divided into 150g and 250g pieces)
1 TBS cherry jam (or any flavour you happen to have)
1. Preheat the oven to 180C and line an 8-inch (20cm) round cake tin with parchment paper.
2. Take 100g of the cherries and cut them in half. Save one half of a cherry for decoration at the end. Coat cherries (both halved and whole) in flour (optional).
3. Cream together butter and sugar. Add almond extract and add eggs one at a time.
4. Alternately mix in flour and ground almonds until mix is smooth.
5. Put away the mixer, and grab a wooden spoon and stir in the cherries. Set mix aside.
6. Roll out 150g marzipan between two sheets of parchment paper and cut it into an 8-inch round (use the cake tin as a guide).
7. Fill the tin with HALF the batter, level off, and carefully place the 150g disc of marzipan on top of the batter. Cover with remaining batter.
8. Bake 45-60 minutes. It’s hard to tell when this one is done, because a toothpick inserted will likely grab onto the marzipan, but the top of the cake will go golden. If you think the bottom isn’t cooked yet but the top is, cover the top with some foil to keep it from burning (this is the reason my cake dried out a little I think)
9. Remove from oven and cool in the pan for 20 minutes, turn out, and cool completely. I left mine overnight.
10. Roll out the 250g piece of marzipan between two sheets of parchment paper until it is 10-12 inches in diameter (27-30cm). You will want the marzipan sheet to be slightly bigger than the size of your cake.
11. Microwave the jam for 30 seconds just to let it go runny and brush over top and sides of cake.
12. Carefully transfer your marzipan round on top of the cake, smooth down the sides, and trim. I did need to make a few patches towards the bottom because it didn’t quite reach. If you’re worried about presentation, you could wrap a ribbon around the cake to cover your mistakes!
13. Place the half cherry you saved in the middle, and artfully arrange the almonds (optional)
Everyone who tried a piece loved it! Which is great, because I was really nervous about this one, and this morning I debated trying to make a new cake and debated dividing the batter between two cake tins and then sandwiching the cakes together with marzipan instead of baking the marzipan into the middle, but it worked out and I didn’t need to. Good thing too, as I had very little sleep last night thanks to a hacking cough keeping me awake!
***
The contents of this post, including images are © Rebecca J Lockley and Tim Lockley unless otherwise stated and should not be reproduced without permission. If you are not reading this on http://blog.beccajanestclair.com, my facebook page, Networked Blogs, the RSS feed(s), or through an e-mail subscription, please notify me.
[LJ readers reading this on the LJ RSS feed: Please click on the link at the top of the entry to go directly to my blog to leave a comment, as comments left on the LJ RSS do not get seen by me. Facebook users reading this from my Networked Blogs link can either comment on facebook or on my blog. If you are reading this through an e-mail subscription, you might need to go directly to my blog to view videos and images.]
For full Copyright and Disclaimer, please read http://www.blog.beccajanestclair.com/copyright/
[Recipe] Crustless Pumpkin Pie
 Because everyone knows the filling is the best part! Special thanks go to Sue, who gave me the original recipe I modified after I lamented on Facebook about all the recipes I found on Pinteresst calling for either ingredients that aren’t sold in the UK or ingredients I didn’t have. You can use fresh or tinned pumpkin for this (you also could use a butternut squash or sweet potato), though the verdict is still out if tinned pumpkin is syn free. I say it is, because it’s a tinned vegetable (and contains 100% pumpkin), but a friend of mine says it isn’t. So, use fresh pureed pumpkin if you have it, syn the tinned or don’t syn, it’s your choice. This pie comes in at 2 syns per slice if you divide it into 8 and it tastes exactly the same a the filling in a regular pie does.
Crustless Pumpkin Pie
You will need:
425g pureed pumpkin
250ml semi-skim milk
75g Truvia for Baking*
2 eggs
2TBS cornflour**
1/2 tsp salt
1 tsp cinnamon
1/2 tsp nutmeg
1/4 tsp ginger
1/4 tsp ground cloves
1. Preheat the oven to 220C and spray your pie plate with fry light.
2. Combine all ingredients and use a hand mixer to mix until smooth
3. Pour into the sprayed pie plate and bake for 15 minutes.
4. Lower the oven to 180C and bake an additional 30-45 minutes, or until it is firm on the edges (a little wiggle is ok. In fact, I think I slightly overcooked mine since it cracked the whole way around!)
I served this after we had a mini Thanksgiving, or Fauxgiving as I called it.We don’t celebrate Thanksgiving in the UK, so anyone who is celebrating it here today is probably an American or related to an American (or friends with, etc.). Basically, we had a roast dinner with turkey instead of chicken and I added a bit of stuffing and cranberry sauce. I served mashed potatoes instead of the usual roast only because my throat hurts right now and I thought the sharp corners on the potatoes would have hurt going down. I followed the cranberry sauce recipe in the Slimming World Christmas cookbook and made a double batch of it to store in a jar until Christmas (if you turn the jar upside down, it will seal itself).

***
*Truvia for baking is sold in a 500g bag and is amazing to bake with on Slimming World, as it only has 2.5 syns per 25g. You could use regular sweetener, but 75g would be A LOT of sweetener, or you could use sugar, but adjust the syns accordingly. 75g Truvia baking blend is 7 1/2 syns.
**If you’re in the US, this is cornstarch, not the stuff you make cornbread with!
DISCLAIMER: I do not work for Slimming World, I am not affiliated with Slimming World beyond being a paying customer/member, I get no personal benefit from writing this post other than the joy of sharing.
Please note: Syn values are based on my exact ingredients using the online calculator. Your Syn value may vary based on your ingredients and the size of your baking containers and portions, so use this number as a guide only. Syn values also frequently change, but these values are correct at the time of publication.
The contents of this post, including images are © Rebecca J Lockley and Tim Lockley unless otherwise stated and should not be reproduced without permission. If you are not reading this on http://blog.beccajanestclair.com, my facebook page, Networked Blogs, the RSS feed(s), or through an e-mail subscription, please notify me.
[LJ readers reading this on the LJ RSS feed: Please click on the link at the top of the entry to go directly to my blog to leave a comment, as comments left on the LJ RSS do not get seen by me. Facebook users reading this from my Networked Blogs link can either comment on facebook or on my blog. If you are reading this through an e-mail subscription, you might need to go directly to my blog to view videos and images.]
For full Copyright and Disclaimer, please read http://www.blog.beccajanestclair.com/copyright/
[Recipe] Easy Chocolate Fudge
 Yum! Who doesn’t love Fudge? Tim and I decided that we will no longer put anything in our mouths unless we know the syn values for it, and that includes tasty chocolate treats. I always like to make assorted treats at Christmas time, and last year I made Peanut Butter Fudge. This year, I want try a few other types of fudge including chocolate, and I decided it needed a trial run and I needed to work out the syns for this. If you follow my recipe exactly and use an 8″ square tin, depending on how small you cut the pieces they can be as little as 4 syns or as many as 9 syns per piece. You might need a ruler to work out the exact sizes!
You Will Need:
1 tin of Carnation Condensed Milk
300g Dr Oetker plain chocolate chips
Parchment paper
microwave safe bowl
8 inch square tin
Spatula
1. Line an 8 inch square tin with parchment paper.
2. Combine milk and chocolate in a microwave safe dish.
3. Microwave for 1 minute, stir, and microwave in 30 second intervals stirring between until chocolate is melted and it is evenly combined with the milk.
4. Pour mixture into tin, and smooth out into the corners with the spatula and level off.
5. Refrigerate overnight.
6. When solid, cut into pieces. 36 pieces = 4 syns per piece, 25 pieces = 6 (5.76) syns each, 16 pieces = 9 syns each.
If you use a different sized container, what you need to know to calculate the syns is the total syn value of these exact ingredients are 144.
***
DISCLAIMER: I do not work for Slimming World, I am not affiliated with Slimming World beyond being a paying customer/member, I get no personal benefit from writing this post other than the joy of sharing.
Please note: Syn values are based on my exact ingredients using the online calculator. Your Syn value may vary based on your ingredients and the size of your baking containers and portions, so use this number as a guide only. Syn values also frequently change, but these values are correct at the time of publication.
The contents of this post, including images are © Rebecca J Lockley and Tim Lockley unless otherwise stated and should not be reproduced without permission. If you are not reading this on http://blog.beccajanestclair.com, my facebook page, Networked Blogs, the RSS feed(s), or through an e-mail subscription, please notify me.
[LJ readers reading this on the LJ RSS feed: Please click on the link at the top of the entry to go directly to my blog to leave a comment, as comments left on the LJ RSS do not get seen by me. Facebook users reading this from my Networked Blogs link can either comment on facebook or on my blog. If you are reading this through an e-mail subscription, you might need to go directly to my blog to view videos and images.]
For full Copyright and Disclaimer, please read http://www.blog.beccajanestclair.com/copyright/
[Recipe] A Taste of Austria – Pork Schnitzel
 Austria has some amazing food. Some amazingly fattening food. Did you know that Austrians consume on average more calories per day than most other countries in the world? I didn’t either until my husband found an article about it. No wonder he and I both gained weight on our trip to Austria. We figure native Austrians probably need all those calories since everything is on top of a mountain! One of my huband’s favourite foods is Schnitzel, and they serve it pretty much everywhere. Large pieces of chicken, pork, or viel coated in batter and then deep fried. Wow. I can feel my arteries clogging just writing that. A few years back, the Slimming World magazine had some international foods, and incldued a recipe for Schnitzel, which I have used to base my recipe off of. The breadcrumbs are best if you are able to let them bake and stand for several hours, but you can crisp them up just before you make them or you can use them soft. But this is best with crispy crunchy breadcrumbs.
Pork Schnitzel
1 Syn per Schnitzel
You Will Need:
60g wholemeal bread (loaf or roll, but measure to make sure it’s 60!)
2 tsp Celery salt
2 tsp mixed herbs (I actually used Italian herbs as I was out of mixed and it was fine)
1 tsp dried parsley
1 egg
6 pork chops with the fat trimmed off (or pork steaks or pork medallions)
Frylight
For the Breadcrumbs:
1. Preheat oven to 150C.
2. Blitz the bread along with the spices in a blender or food processor until crumbs.
3. Line a baking tray with parchment paper.
4. Bake the crumbs for 15 minutes, stirring halfway.
5. Turn off the oven and and leave the crumbs in the oven for 4 hours.
6. Fold over the parchment paper and crush the now crispy crumbs with your hands, the back of a knife, or a rolling pin.
For the Schnitzel:
1. Preheat oven to 200C.
2. Whisk the egg white, then add the yolk and whisk some more.
3. Spray a baking tray with frylight.
4. Dredge the pork first in the egg, then in the breadcrumbs and place on the tray.
5. Spray the tops of the pork with some frylight.
6. Bake 25-30 minutes or until breadcrumbs are starting to brown.
This goes great with some chips, peas, and sauerkraut! Don’t forget to measure out your ketchup too. 1 TBS of reduced sugar and salt ketchup is half a syn. I just dumped all my ketchup on my chips, so it looks like a lot, but I only used 2TBS, bringing the total syns to my dinner to 4.
***
DISCLAIMER: I do not work for Slimming World, I am not affiliated with Slimming World beyond being a paying customer/member, I get no personal benefit from writing this post other than the joy of sharing.
Please note: Syn values are based on my exact ingredients using the online calculator. Your Syn value may vary based on your ingredients and the size of your baking containers and portions, so use this number as a guide only. Syn values also frequently change, but these values are correct at the time of publication.
The contents of this post, including images are © Rebecca J Lockley and Tim Lockley unless otherwise stated and should not be reproduced without permission. If you are not reading this on http://blog.beccajanestclair.com, my facebook page, Networked Blogs, the RSS feed(s), or through an e-mail subscription, please notify me.
[LJ readers reading this on the LJ RSS feed: Please click on the link at the top of the entry to go directly to my blog to leave a comment, as comments left on the LJ RSS do not get seen by me. Facebook users reading this from my Networked Blogs link can either comment on facebook or on my blog. If you are reading this through an e-mail subscription, you might need to go directly to my blog to view videos and images.]
For full Copyright and Disclaimer, please read http://www.blog.beccajanestclair.com/copyright/
[Recipe] Savory Cheese Cookies (Cheese Scones)
 I know you’re probably thinking savory cookies? What? But see, I started out reworking a recipe for Victorian Cheese Scones, and they came out a bit flat – more like a cheese biscuit, but they’re soft like a cookie. Since they’re too flat to be scones, I’ve decided they must be savory cookies. Even better? They work out at 2.5 Syns each! Of course, you could make them bigger/thicker and have them at 5 syns each, too. As this was originally a recipe measured in ounces, the grams are a little funny looking.
Savory Cheese Cookies (Cheese Scones)
You will need:
170g self-rising flour
28g Flora light (blue container) (if you’re not following SW, use any butter or margarine)
84g grated reduced fat Cheddar cheese*
1 egg
2 TBS semi-skim milk
pinch of salt & pepper
1/4 tsp Coleman’s mustard powder
about 1/2 TBS water (optional)
1. Preheat oven to 180C and line a tray with parchment paper OR spray with Frylight.
2. Whisk together egg and milk in a small bowl and set aside.
3. Sift together flour, salt, pepper, and mustard powder.
4. Rub in the Flora. I did his by kind of scrunching it, if that makes sense. You’ll wind up with the texture of breadcrumbs.
5. Stir in the cheese.
6. Mix in the milk and egg and combine until it forms a ball. If it’s not picking up all the flour and looks dry, add about 1/2TBS of water.
7. Lightly flour your work surface and roll out the dough to around 1/4″ to 1/2″.
8. Using a middle sized biscuit cutter, cut out 20 rounds and transfer them onto the baking sheet.
9. Bake for 15-20 minutes, or until golden brown.
If you divide this into 20, each cookie is 2.5 Syns each. If you roll out the dough thicker and only cut 10 out, each one is 5 syns. For a more rustic look, you could just shape them by hand.
Add-ins: Make Cheese & Onion scones by adding some chopped spring onions after adding the cheese. Make Cheese & Bacon by adding drained chopped bacon (use lardons for no added syns) to the dough. Try adding chilli powder for a kick. The possibilities are endless!
*You can use another type of cheese, but you will need to recalculate the syns.
***
DISCLAIMER: I do not work for Slimming World, I am not affiliated with Slimming World beyond being a paying customer/member, I get no personal benefit from writing this post other than the joy of sharing.
Please note: Syn values are based on my exact ingredients using the online calculator. Your Syn value may vary based on your ingredients and the size of your baking containers and portions, so use this number as a guide only. Syn values also frequently change, but these values are correct at the time of publication.
The contents of this post, including images are © Rebecca J Lockley and Tim Lockley unless otherwise stated and should not be reproduced without permission. If you are not reading this on http://blog.beccajanestclair.com, my facebook page, Networked Blogs, the RSS feed(s), or through an e-mail subscription, please notify me.
[LJ readers reading this on the LJ RSS feed: Please click on the link at the top of the entry to go directly to my blog to leave a comment, as comments left on the LJ RSS do not get seen by me. Facebook users reading this from my Networked Blogs link can either comment on facebook or on my blog. If you are reading this through an e-mail subscription, you might need to go directly to my blog to view videos and images.]
For full Copyright and Disclaimer, please read http://www.blog.beccajanestclair.com/copyright/
[Recipe] Stuffed French Toast
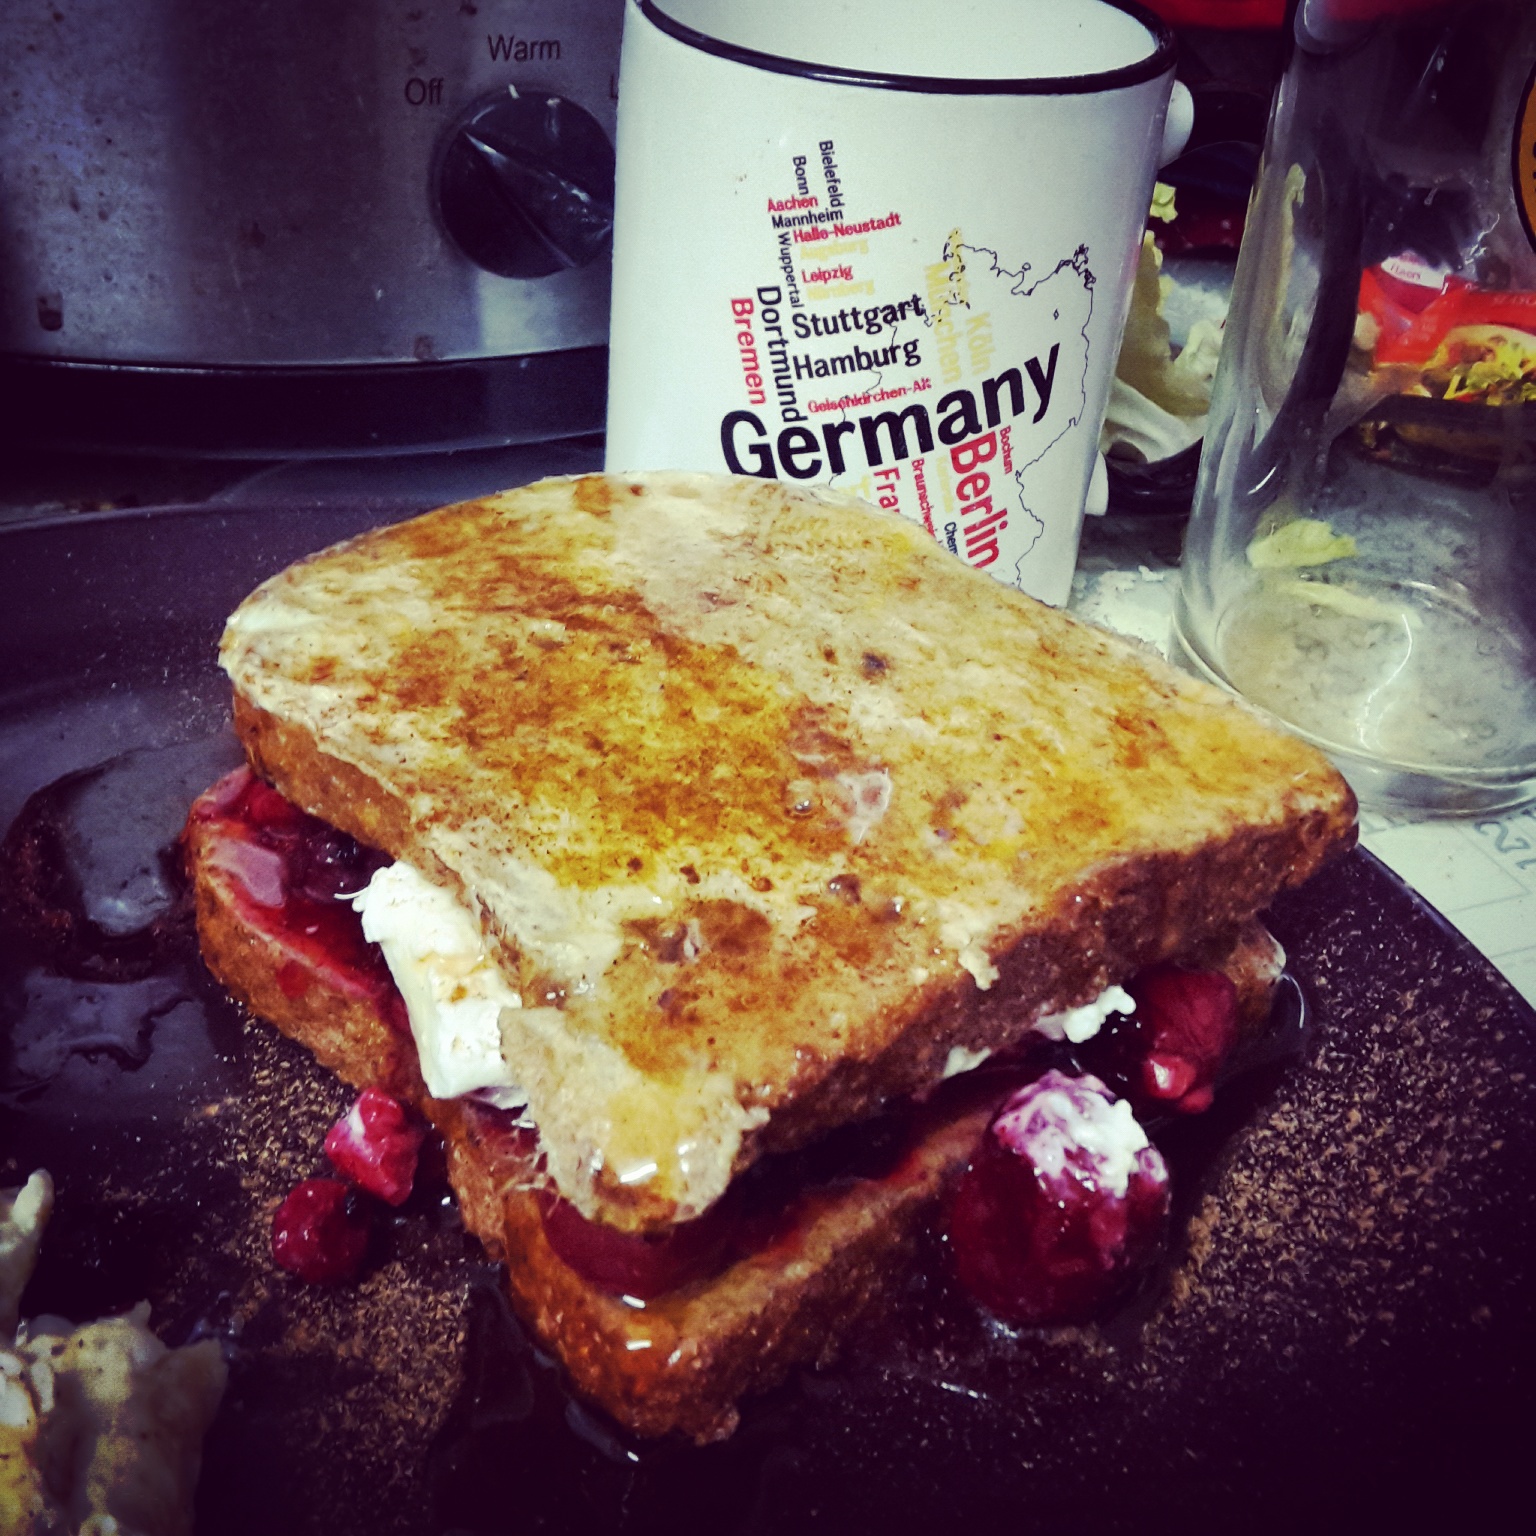 Walk into an American diner, and one thing you’ll spot on the menu is French Toast, and about a half dozen (or more!)) ways to have it , including stuffed.
French toast is known as eggy bread in the UK, the only difference being that eggy bread is more of a savory dish, and French toast is usually a sweet. And to further confuse things, in the UK we also have something called fried bread, which you would think would be similar, but nope. Fried bread kind of grosses me out.
If you order Stuffed French Toast in a diner, you will usually get two really thick slices of white bread, dipped in a mixture of egg and milk, and fried. Between the two pieces of bread they lay on the sweet cream cheese and then it’s topped with fruit mixed in a sugary syrup. Sounds disgustingly delicious, doesn’t it?
Since Tim was swapping over to night shift on Saturday, I knew we would be up late on Friday night (to try to sleep in on Saturday to help him switch over) and Saturday by the time we got up we would be having Brunch instead of Breakfast, and I decided to make French Toast. Then, when I was getting the milk out for my coffee, I spotted the dish of thawed out frozen berries and a container of quark, so I decided to make mine stuffed!
Stuffed French Toast
Syns: 0, but this will count as your HEB. If you’re not having it as your HEB, you will need to syn the bread.
You will need:
2 slices of any Healthy Extra B bread option
2 eggs
1 tsp cinnamon
100g frozen mixed berries, thawed (or fresh berries)
2 TBS quark
Fry Light
1. Spray a frying pan with Fry Light and pre-heat it on the hob (that’s stove for my American readers!).
2. Whisk the eggs with the cinnamon in a bowl or dish large enough to fit a slice of bread.
3. Soak one slice of bread in the mixture and fry until golden brown (3-4 minutes per side). Repeat with the second slice of bread (you might need to give the pan another spray of Fry Light too). If your frying pan is large enough, you could do both slices at once.
4. Spread one slice of French toast with quark, top with mixed berries, and place the second slice of French toast on top.
5. Optional: top the whole thing with some agave syrup, treacle, American pancake syrup, or golden syrup (and make sure you calculate the syns for your syrup!)
Not only is this a great Slimming World brunch choice, it’s great for a diabetic! If you wanted to make a “full fat” version, use cream cheese instead of quark and you could use tinned fruit in syrup.
***
DISCLAIMER: I do not work for Slimming World, I am not affiliated with Slimming World beyond being a paying customer/member, I get no personal benefit from writing this post other than the joy of sharing.
Please note: Syn values are based on my exact ingredients using the online calculator. Your Syn value may vary based on your ingredients and the size of your baking containers and portions, so use this number as a guide only. Syn values also frequently change, but these values are correct at the time of publication.
The contents of this post, including images are © Rebecca J Lockley and Tim Lockley unless otherwise stated and should not be reproduced without permission. If you are not reading this on http://blog.beccajanestclair.com, my facebook page, Networked Blogs, the RSS feed(s), or through an e-mail subscription, please notify me.
[LJ readers reading this on the LJ RSS feed: Please click on the link at the top of the entry to go directly to my blog to leave a comment, as comments left on the LJ RSS do not get seen by me. Facebook users reading this from my Networked Blogs link can either comment on facebook or on my blog. If you are reading this through an e-mail subscription, you might need to go directly to my blog to view videos and images.]
For full Copyright and Disclaimer, please read http://www.blog.beccajanestclair.com/copyright/
[Recipe] Queen Cakes from Beamish
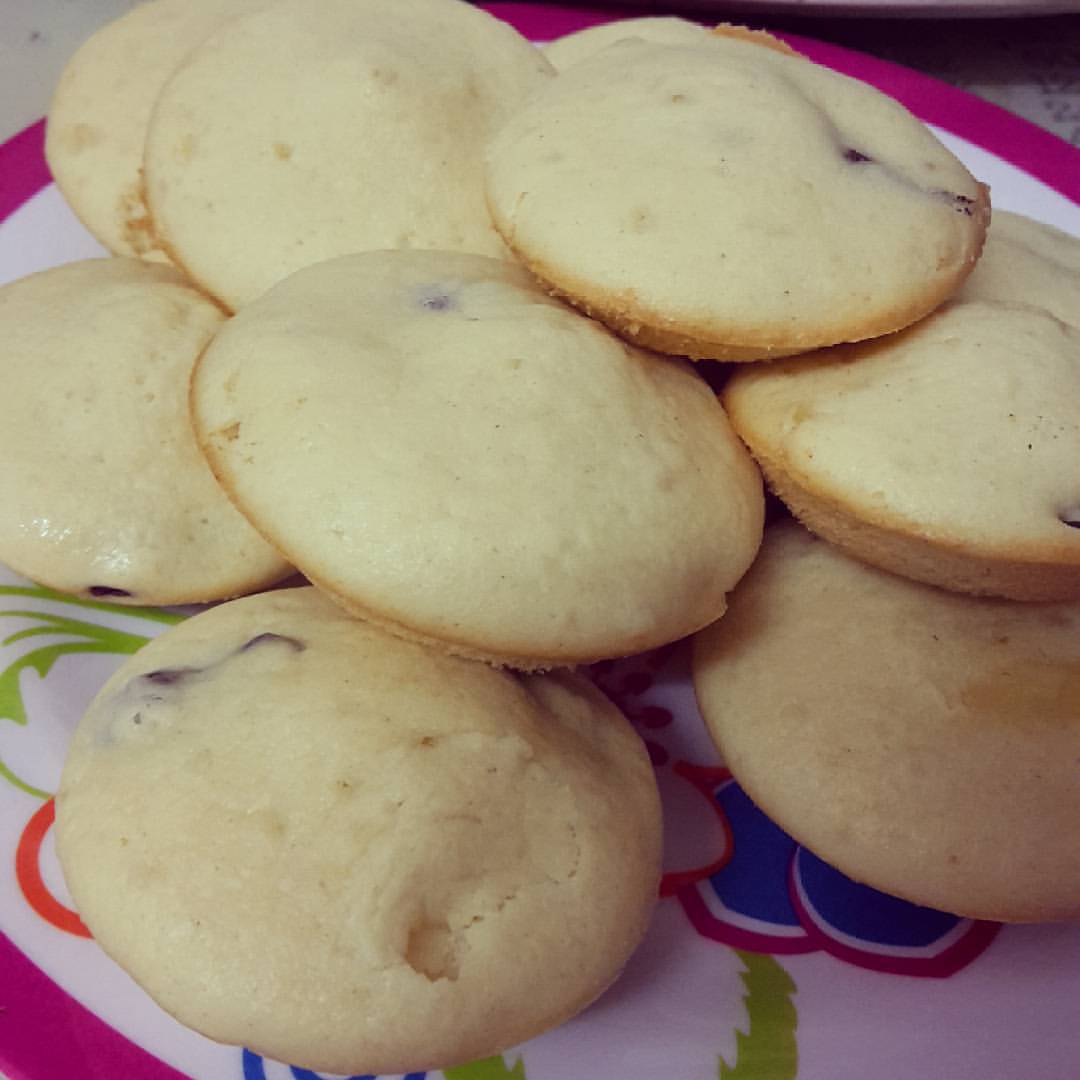 Last year, my husband gave me an experience day at Beamish for our 5th anniversary. I went on the baking course, and it was loads of fun! Not only did we get to use recipes from the Victorian era, we also baked on a coal stove, similar to the Esse stove I have in my kitchen (which I still haven’t used…..). We got to take home everything we baked and we were given a packet with the recipes to use at home. The goodies were enjoyed by my husband and I over our weekend break up North, and also given to my in-laws. We enjoyed everything we made, with the exception of the bread as it had too much yeast in it for our tastes. I held on to the recipe packet, and today when my pictures from the baking day popped up on my Timehop, I asked Tim what from that day I should make again. He suggested queencakes.
If the measurements look a little odd, its because the recipe from Beamish was in ounces. Fortunately, my digital scale can be switched from grams to ounces, so I swapped it over and then swapped it back to see what it was in grams so I could share this in an easier to measure measurement. I also worked out the sys for this since I wanted to know if I could have any and if you make 12, they come out at 3.5 Syns each. The batter filled up the tins, so I debated making 24 with the mixture, which would make them 1.7 syns each (round up to 2), but I think they would wind up being too small.

Queen Cakes
Makes 12, 3.5 Syns each
You will need:
114g self-rising flour
56g caster sugar
56g Flora light
1 egg
2 TBS semi-skim milk
31g currants
1. Preheat oven to 180C and spray a 12-hole bun tin with fry light.
2. beat the egg and milk together and set aside.
3. Cream together Flora and sugar.
4. Alternate adding egg mixture and flour to the mix.
5. Stir in currants.
6. Divide evenly into the bun tin and bake for 15 minutes.
7. allow to cool in the pan for about 5 minutes, then turn onto a cooling rack.
***
DISCLAIMER: I do not work for Slimming World, I am not affiliated with Slimming World beyond being a paying customer/member, I get no personal benefit from writing this post other than the joy of sharing.
Please note: Syn values are based on my exact ingredients using the online calculator. Your Syn value may vary based on your ingredients and the size of your baking containers and portions, so use this number as a guide only. Syn values also frequently change, but these values are correct at the time of publication.
The contents of this post, including images are © Rebecca J Lockley and Tim Lockley unless otherwise stated and should not be reproduced without permission. If you are not reading this on http://blog.beccajanestclair.com, my facebook page, Networked Blogs, the RSS feed(s), or through an e-mail subscription, please notify me.
[LJ readers reading this on the LJ RSS feed: Please click on the link at the top of the entry to go directly to my blog to leave a comment, as comments left on the LJ RSS do not get seen by me. Facebook users reading this from my Networked Blogs link can either comment on facebook or on my blog. If you are reading this through an e-mail subscription, you might need to go directly to my blog to view videos and images.]
For full Copyright and Disclaimer, please read http://www.blog.beccajanestclair.com/copyright/