[Recipe] A Trio of Cheap and Easy Crock Pot Soups
 I regularly make Slimming World speed soup because it’s super easy, and the ingredients are almost always in my cupboard and if they’re not, the local co-op stocks everything I need. I’ve been on a Crock Pot (Slow Cooker) kick lately, especially with it becoming colder outside and Tim wanting to take food in a hot food flask for his pack-up. Last year, Tim wound up with microwave curries most days (at a hefty cost of £6 for 2!) or a Bachelor’s Pasta N Sauce. But I decided to try to not only save us some money, but to also give him some healthier meals, as the only way his curry was Slimming World friendly was if I went to Iceland and bought the SW frozen curries, but more often I wound up popping down to the co-op at the last minute! Using the crock pot to make soup means I can make it in bulk to last the whole week. A few weeks ago, I made Parsnip and apple soup, last week was butternut squash soup, and this week is Tomato Speed soup. The best part about the tomato soup is it’s less than £3 for all the ingredients as this works great with the value ranges! And if you’re on an early shift, you can put this in the crock pot the night before!
Parsnip and Apple Soup
You will need:
6 Parsnips, chopped
1 large cooking apple
2 Celery ribs, diced
1 Vegetable stock cube, made up with water to make 500ml vegetable stock
2 tsp Nutmeg
Dump everything into a 3L crock pot and turn on low for 8-10 hours. In the morning, use a stick blender or transfer into a blender to blend until smooth. You will need to weigh your apples before putting them in the crock pot to determine the total number of syns for this soup, then divide it by the number of portions. This should make at least 4 servings and each serving should be 1-2 syns. I did not peel the parsnips or apples as I relied on the stick blender to smooth everything, but you could take an extra step and peel them first. If the soup is too thick, add more vegetable stock to thin it out.
Butternut Squash Soup
You will need:
1 Butternut (or other squash) squash, quartered and de-seeded
1 Sweet potato, roughly chopped
2 Celery ribs, diced
3 Spring onion sprigs, chopped
2 Vegetable stock cubes, made up with water to make 1L vegetable stock
Put all ingredients in a 6L crock pot and cook on low for 8-10 hours. In the morning, use a stick blender or transfer into a blender to blend until smooth. I did not peel the squash or potato as I relied on the stick blender to smooth everything, but you could take an extra step and peel them first. If the soup is too thick, add more vegetable stock to thin it out, but we liked it as a thick soup. I also added leftover mashed potatoes and leftover carrot and swede mash to it this time, and it gave it some extra flavour and helped to stretch the servings. This soup has no syns!
Tomato Speed Soup
You will need:
6 tins of chopped tomatoes
2 tins of carrots (or 6 carrots diced)
2 tins of baked beans (for this, I bought the cheapest beans Tesco sell)
2 Celery ribs, diced
3 Spring onion sprigs, chopped
4 TBS Italian herbs
2 tsp chili powder (optional, to give it a kick)
3 TBS Worcestershire sauce
2 vegetable stock cubes, crumbled
Dump everything into a 6L crock pot and turn on low for 8-10 hours. In the morning, use a stick blender or transfer into a blender to blend until smooth. If the soup is too thick, add more vegetable stock to thin it out. Makes 8 400ml portions. This soup has no syns!
***
DISCLAIMER: I do not work for Slimming World, I am not affiliated with Slimming World beyond being a paying customer/member, I get no personal benefit from writing this post other than the joy of sharing.
Please note: Syn values are based on my exact ingredients using the online calculator. Your Syn value may vary based on your ingredients and the size of your baking containers and portions, so use this number as a guide only. Syn values also frequently change, but these values are correct at the time of publication.
The contents of this post, including images are © Rebecca J Lockley and Tim Lockley unless otherwise stated and should not be reproduced without permission. If you are not reading this on http://blog.beccajanestclair.com, my facebook page, Networked Blogs, the RSS feed(s), or through an e-mail subscription, please notify me.
[LJ readers reading this on the LJ RSS feed: Please click on the link at the top of the entry to go directly to my blog to leave a comment, as comments left on the LJ RSS do not get seen by me. Facebook users reading this from my Networked Blogs link can either comment on facebook or on my blog. If you are reading this through an e-mail subscription, you might need to go directly to my blog to view videos and images.]
For full Copyright and Disclaimer, please read http://www.blog.beccajanestclair.com/copyright/
No comments[Recipe] Battenberg Cake
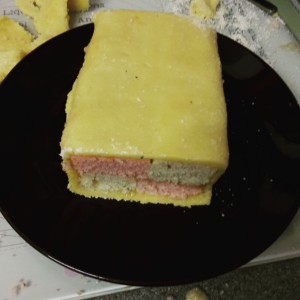 I had never heard of Battenberg Cake until I moved here and I think it took several years before I even had a piece, as it’s not something I would usually pick. But Tim and I were at a cafe once and he bought one, which had me curious. Recently, Tim told me Battenberg was one of his favourite treats when he was a kid. I became inspired to try to make one myself, and today I finally did.
I will admit I did not make my own marzipan, but that’s something for me to think about trying in the future. I also did not calculate syns for this cake or use anything low fat/ low sugar as I knew I wouldn’t be keeping the cake for myself. I made today’s as a trail run for Christmas.
Battenberg Cake
You will need:
175g butter
175g golden caster sugar
3 eggs
175g self-raising flour
65g ground almond
3/4 tsp baking powder
Pink (or red) food colouring
150g apricot jam
250g ready-made marzipan (half a pack)
You also will need:
Square baking tin (20x20cm/8″x8″)
Parchment paper
Aluminium foil
Non-stick cooking spray
Small strainer (I used a tea strainer)
1. Pre-heat the oven to 180C
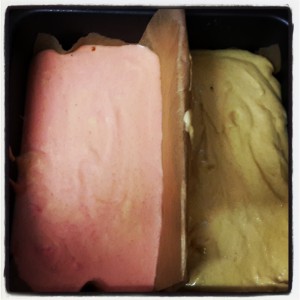
2. Divide your cake tin in half. Fold a piece of foil over and over itself several times to make a thick divider the same length as your tin. Line the tin with parchment paper and then cover the foil divider with parchment paper. I used cooking spray to stick the parchment divider to the parchment liner.
3. Cream together eggs, butter, and sugar. Add eggs one at a time.
4. Combine dry ingredients and slowly add dry to wet.
5. Put HALF the batter in one side of the cake tin.
6. Add pink food colouring to the remaining batter until the batter is the shade of pink you like and pour it into the other half of the in
7. Bake 30 minutes. I rotated it after 15, but if your oven doesn’t need things to be rotated, you can skip that.
8. While the cake is baking, bring the jam to a boil and then strain it over a small bowl. Discard the apricot bits left in the strainer. Allow the jam to cool completely.
9. Remove cake from oven and cool in the pan for 10 minutes, then turn out onto a cooling rack and allow it to cool for about an hour.
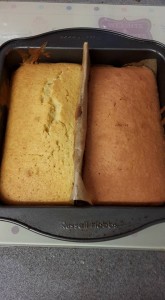
10. Cut each cake in half lengthwise, making 4 cake strips. Trim each strip so they are all the same size.
11. Stack the cakes. Bottom layer – one pink, one yellow. Top layer – yellow on top of pink, pink on top of yellow.
12. Use some of the apricot jam to stick the strips of cake together. Sit to one side.
13. Knead the marzipan slightly and roll out onto a floured surface (you can use icing sugar or more ground almond for this, too) until it is a rectangle large enough to cover all four sides of the cake.
14. Spread apricot jam onto the marzipan and lay the cake down onto the jam. Wrap the jam covered marzipan around the cake.
15. Trim off the excess marzipan on each edge of the cake and slightly trim the cake so you can see the checkerboard pattern.
Now what can I do with all these cake ends?!?!
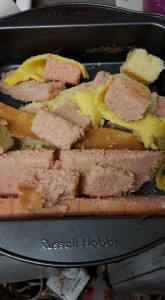
(Answer: Cake Pops!)
***
The contents of this post, including images are © Rebecca J Lockley and Tim Lockley unless otherwise stated and should not be reproduced without permission. If you are not reading this on http://blog.beccajanestclair.com, my facebook page, Networked Blogs, the RSS feed(s), or through an e-mail subscription, please notify me.
[LJ readers reading this on the LJ RSS feed: Please click on the link at the top of the entry to go directly to my blog to leave a comment, as comments left on the LJ RSS do not get seen by me. Facebook users reading this from my Networked Blogs link can either comment on facebook or on my blog. If you are reading this through an e-mail subscription, you might need to go directly to my blog to view videos and images.]
For full Copyright and Disclaimer, please read http://www.blog.beccajanestclair.com/copyright/
1 comment[Recipe] Weetabix Tea Cake
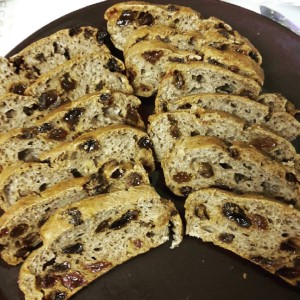
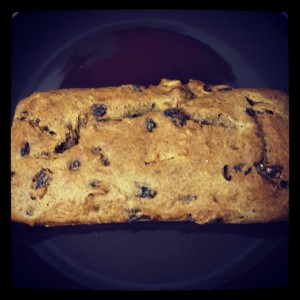 When a new Slimming World recipe book comes out, I always flip through it with a set of tabs and tab off the recipes I’d like to try. One of the recipes I marked in Best Loved Extra Easy Recipes was Weetabix Cake (p156). I finally decided to make it today, but unfortunately I didn’t have the Skim Milk or the mixed spice it calls for, so I needed to get a little creative. I thought about the recipe for my Lincolnshire Plum Bread and how you soak the sultanas in tea, so I decided to try it with the Weetabix Cake, and for the spices, I used the mixture I use for Plum Bread (which is actually Pumpkin Pie spice). So really, alternate names for this could be Weetabix Plum Bread or even Pumpkin Spice Weetabix Cake. But I called it a tea cake on my Instagram pictures, so Tea Cake it is. This cake is not only suitable for someone following Slimming World, but it is suitable for a diabetic as well.
Weetabix Tea Cake
2 Syns per slice if divided into 15 slices / 30 Syns for the whole cake (for you to divide by number of slices) [PLEASE NOTE: You cannot use the Weetabix as your Healthy Extra B choice as it is considered a tweak and the 6 syns for the Weetabix have been calculated into the Syn value.]
You will need:
2 Weetabix
200ml very strong tea (I used a chai spiced, but any black tea will work)
100g sultanas
100g self-rising flour
1 tsp pumpkin pie spice OR 1/4 tsp each of Cinnamon, Nutmeg, All Spice, and Ginger
2 TBS sweetener (I used Splenda)
2 eggs
1. Pre-heat the oven to 180C and line a loaf tin with some parchment paper or spray with fry light
2. Place Weetabix and sultanas in a large bowl and pour over the tea. Leave to soak for 5 minutes.
3. Whisk two eggs in a separate bowl, set aside.
4. Add all dry ingredients to Weetabix and sultana mix and beat in the eggs.
5. Pour mixture into prepared tin and spread out evenly
6. Bake for 45-60 minutes or until a toothpick inserted into the cake comes out clean
7. Cut into 15 equal pieces.
***
DISCLAIMER: I do not work for Slimming World, I am not affiliated with Slimming World beyond being a paying customer/member, I get no personal benefit from writing this post other than the joy of sharing.
Please note: Syn values are based on my exact ingredients using the online calculator. Your Syn value may vary based on your ingredients and the size of your baking containers and portions, so use this number as a guide only. Syn values also frequently change, but these values are correct at the time of publication.
The contents of this post, including images are © Rebecca J Lockley and Tim Lockley unless otherwise stated and should not be reproduced without permission. If you are not reading this on http://blog.beccajanestclair.com, my facebook page, Networked Blogs, the RSS feed(s), or through an e-mail subscription, please notify me.
[LJ readers reading this on the LJ RSS feed: Please click on the link at the top of the entry to go directly to my blog to leave a comment, as comments left on the LJ RSS do not get seen by me. Facebook users reading this from my Networked Blogs link can either comment on facebook or on my blog. If you are reading this through an e-mail subscription, you might need to go directly to my blog to view videos and images.]
For full Copyright and Disclaimer, please read http://www.blog.beccajanestclair.com/copyright/
No comments[Recipe] Self Saucing Chocolate Cake
 Today is our 6th wedding anniversary! Since we’ve had a pretty amazing year already between 3 weeks in the US in May and a spur of the moment 10 days in Austria, we decided to keep our anniversary low-key. When I asked Tim what he wanted, he asked for pulled pork and a gooey dessert, the kind like you can get a Frankie and Benny’s. A dish my Aunt Barb made came to mind, which was like a brownie baked in a pie pan that made it’s own sauce and I remembered it was out of the Betty Crocker cookbook. It’s on Page 200 of the spiral bound (US) version and is called a Hot Fudge Sundae Cake. I’ve made it once before, but this time I wanted to scale it down to 2 servings, convert it to UK measurements, and work out the syns for Slimming World. As listed in the cookbook, the original serves 9 and has 10 Syns per serving (basing it on calories only as I don’t have the size of a serving to plug it into the calculator). I wanted to scale this down to serve 2 (no leftovers means no temptation!) and I also wanted to make it diabetic friendly and use some sugar substitutes. It still comes out to 10 syns, so changing the sugar didn’t matter and I will list the recipe using both regular sugar and sweeteners.
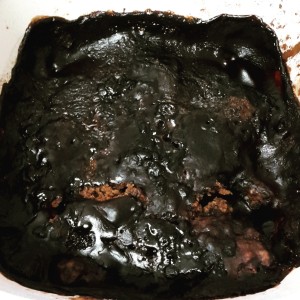
I baked this in a small Corningware dish my mom gave me when I moved. It’s an individual casserole size, so an individual pie dish would work for this or possibly dividing it in half into two ramekins (but then you would need to adjust cooking time). There also is a recipe for a Melting Chocolate Pudding on the Slimming World website which has 9 syns per serving, but I didn’t have individual microwaveable pudding containers and I wanted to be a bit more creative.
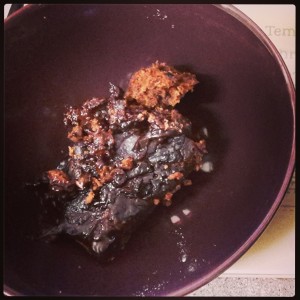
Self Saucing Chocolate Cake
Serves: 2
Syns: 10 per serving (it’s 9.25 if you use sweetener products)
You Will Need:
Cake –
50g self-rising flour
15g Truvia baking blend OR 30g caster sugar
1/2 TBS cocoa (I used Green & Black’s Organic)
25ml semi-skim milk
1-2 TBS water
1/2 TBS vegetable oil
1/2 tsp vanilla essence
Topping –
25g Splenda for baking Brown (or 50g brown sugar)
1 TBS cocoa
100ml very hot water (from the kettle)
1) Preheat oven to 180C (350F)
2) Combine flour, Truvia, and 1/2 TBS cocoa in the ungreased small casserole dish.
3) Mix in milk, vegetable oil, vanilla, and 1TBS of water. If mixture is still dry, add an additional Tablespoon water.
4) Spread mix evenly in dish.
5) Sprinkle batter with 1 TBS cocoa and brown sugar.
6) Pour hot water evenly over the top.
7) Bake 25-30 minutes until cake is cooked (Will be gooey on top. Stick a spoon in to check the cake)
Serve hot with custard or ice cream!
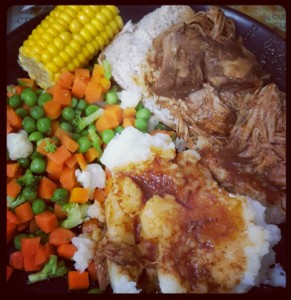
For the pulled pork, all you need is a piece of pork butt or shoulder (cut off all visible fat) and a batch of Slimming World Barbecue Sauce. Just toss it all in a crock pot and let it cook on low for 8-10 hours. I put ours in the crock pot last night before we went to bed and it was ready by the time we woke up and then I left it on warm until Lunch. We served it on top of wholemeal rolls (my HEB for the day) with smash, corn on the cob, and mixed vegetables.
***
DISCLAIMER: I do not work for Slimming World, I am not affiliated with Slimming World beyond being a paying customer/member, I get no personal benefit from writing this post other than the joy of sharing.
Please note: Syn values are based on my exact ingredients using the online calculator. Your Syn value may vary based on your ingredients and the size of your baking containers and portions, so use this number as a guide only. Syn values also frequently change, but these values are correct at the time of publication.
Photo of Tim and I taken by Eric Stocklin
The contents of this post, including images are © Rebecca J Lockley and Tim Lockley unless otherwise stated and should not be reproduced without permission. If you are not reading this on http://blog.beccajanestclair.com, my facebook page, Networked Blogs, the RSS feed(s), or through an e-mail subscription, please notify me.
[LJ readers reading this on the LJ RSS feed: Please click on the link at the top of the entry to go directly to my blog to leave a comment, as comments left on the LJ RSS do not get seen by me. Facebook users reading this from my Networked Blogs link can either comment on facebook or on my blog. If you are reading this through an e-mail subscription, you might need to go directly to my blog to view videos and images.]
For full Copyright and Disclaimer, please read http://www.blog.beccajanestclair.com/copyright/
No commentsHalloween
 This morning, I got the chance to speak on BBC Radio Lincolnshire about Halloween as an American now living in the United Kingdom, and it made me think of the holiday growing up.
First of all, a little history about Halloween — Did you know it didn’t originate in the USA? According to Wikipedia, Halloween has Celtic roots in the British isles, specifically in Scotland, Wales, and Ireland. In Wales, they still celebrate Calan Gaeaf on November 1. Halloween was then adopted by Christians as the day before All Hallow’s Day (Hallow in Scots Gaelic means Holy), like many other Christian holidays that have Celtic/Pagan roots.
It’s also interesting to learn that the idea behind trick or treating isn’t entirely American, either. This actually originated in Ireland, where it involved adults going door-to-door in costume, performing a song or play, and receiving food in exchange.
In the United States, the Puritans did not celebrate the holiday, and it was not celebrated at all (as far as historians can tell) until the Irish and Scottish began immigrating to America in the late 19th century and it did not spread beyond their culture until the early 20th century. Even the traditional Jack O’ Lantern carved out of a pumpkin is only a pumpkin because pumpkins were more widely available than turnips, the vegetable used in Scotland for carving lanterns.
Trick or Treating, called guising, continued in the United Kingdom until the 1930s, and first began in the USA in the 1920s. I can only assume it stopped in the UK due to WWII, though I can’t find any information to back this up. The use of the term ‘Trick or Treat’ did not come into use until the 1940s when it first appeared in children’s magazines in the United States. The term guising was still being used in the UK at that time and it wasn’t until the 1980s that the term ‘Trick or Treat’ began to be used here and it’s only become more and more popular in the UK as American mainstream media is imported more and more.
I find it fascinating to learn the holiday and practice has roots in the United Kingdom when so many people in the UK seem to hate Halloween and consider it to be “Americanising” children by celebrating it. Not so much, eh?
Halloween in the US and the UK are different, but also very similar. Like with the idea of Prom, it feels to me that the UK takes the American idea and makes it even bigger — possibly as a result of the public’s exposure to American television and films where most traditions are more over-the-top than they are in general.
While Halloween can have scary costumes, ghost hunts, and haunted mansions; Halloween also has home-made costumes, hayrides, and a lot of traditions associated with harvest and not scaring. In fact, I can’t actually remember my parents ever buying me a Halloween costume. Accessories to go with one perhaps, but most of my costumes were entirely home grown and either made specifically for Halloween or adapted from something I already owned. For example, if I wanted to dress as a black cat, my mom bought me a headband with cat ears and I wore a black leotard and tights for the body and my mom drew whiskers on my face with an eye pencil. I was fascinated with Little House on the Prairie when I was younger, so the year I dressed as Laura Ingalls I re-used my dress at Thanksgiving to be a pilgrim. One year when I was a teenager, my neighbour’s son asked me to take him Trick or Treating and as I had recently had knee surgery I wasn’t prepared and I managed to throw together “absent-minded professor” by wearing my Pajama bottoms with a white shirt and tie, one slipper on the leg that had surgery and a shoe on the other! But in the UK, I feel as though costumes are mostly bought and things are focused more on having scary/gory costumes.
Trick-or-Treating is also different. In the US, you would typically go out with your friends and maybe one parent when you were younger and you would only go to homes that had their porch light turned on. Here, the tradition seems to be a child going out with their parent, and only to the homes of friends/family. This year, I also heard about a UK tradition of putting out a pumpkin by your front door to indicate that you would allow trick-or-treaters, but more often I’ve seen online shares of signs to print that say things like “NO Trick-or-Treaters”, “Do not knock”, etc., and some of those have even been issued by local councils. I think the signs are unnecessary if you go by the rule of “look for a pumpkin”.
One thing I haven’t touched on at all is the idea of tricking or making mischief if you do not get a treat. I grew up in New Jersey, where we called it Mischief Night, but I personally was never involved in causing or receiving mischief, so I really don’t know how prevalent the practice is in the US or in the UK. I do remember being driven around the day after Halloween with my parents and you might see a few trees that had been littered with toilet paper, but not knowing who owned the house or who did the TPing, I don’t know if it was micheif or decoration!
Halloween, like any other holiday, is voluntary. If you don’t like it, don’t participate. Simple. Just please don’t ruin it for the people who do want to participate!
***
Top image from http://interactive360.wordpress.com
The contents of this post, including images are © Rebecca J Lockley and Tim Lockley unless otherwise stated and should not be reproduced without permission. If you are not reading this on http://blog.beccajanestclair.com, my facebook page, Networked Blogs, the RSS feed(s), or through an e-mail subscription, please notify me.
[LJ readers reading this on the LJ RSS feed: Please click on the link at the top of the entry to go directly to my blog to leave a comment, as comments left on the LJ RSS do not get seen by me. Facebook users reading this from my Networked Blogs link can either comment on facebook or on my blog. If you are reading this through an e-mail subscription, you might need to go directly to my blog to view videos and images.]
For full Copyright and Disclaimer, please read http://www.blog.beccajanestclair.com/copyright/
No commentsRenting a Holiday Apartment
 On our recent trip to Austria, we thought it would be a great idea to rent apartments instead of hotels so we could do a bit of self-catering to help cut costs. The last time we were in Austria, we were camping with our tent (and car) and had breakfast and dinner at our campsite, so shopping in Austrian grocery stores wasn’t a foreign concept (haha!).
When you are choosing to rent a holiday apartment, you have two options. You can either rent a private home through a site like airbnb or you can rent an apartment in a managed property, similar to a hotel through booking sites like booking.com (what I use)*. I also leave a tab open with TripAdvisor to check reviews of the apartments I’m looking at and a tab with google maps for checking the area the apartments are in for finding out how close they are to public transportation, shops, restaurants, and attractions. I’ve never used airbnb, but I have friends who have used it while travelling abroad, and they’ve had very good experiences. Airbnb also seems like they are on the ball with their customer service if you have any problems. Likewise, booking.com has excellent customer service. I have had good luck with booking.com, but also some less-than-perfect luck. Booking.com suggests not booking properties with a rating below 7, as their ratings are generated based on users reviews. So if you don’t mind renting someone’s private apartment, you might want to have tabs open for both to compare apartments. I also kept open a tab with google translate in case I needed to look up German words I wasn’t familiar with.
Firstly, you need to decide on your location and price range. Booking.com lets you search by towns as well as regions, so I put in “Zillertal” and then ticked the box for £0-£55/night which led me to several choices, including Apart Heim, the place we stayed. I wound up looking at around a half dozen places before making my decision, and one of our “musts” was being close to public transportation as we would be using the Zillertalbahn to get around and would not have a car. We also needed to be close to a grocery store, due to the aforementioned lack of a car. I used Google Maps to look at where the apartment was and zoomed in until I could see the icons. When I saw a shop icon, I googled to find out what the shop was and discovered MPREIS was the name of a grocery store.
Another thing to consider is what amenities you need. It was only my husband and I travelling, so we knew we could stay in either a studio apartment or a one-bedroom. When we travel next Summer with my mom, we will be looking at one-bedroom with a sofabed in the living room as well as two-bedroom apartments. Our only other requirement was that we wanted to have our own private bathroom (not usually a problem with apartments, but many hotels have shared bathrooms). I also looked at what was available in the kitchen and we picked an apartment that had a stove (hob), refrigerator, sink, microwave, and kettle. Our first apartment didn’t have an oven, but the second location did. We weren’t bothered by things like wifi or television since we knew we wouldn’t watch TV and we had our phones for internet. Our apartment provided dish soap, a sponge, and potholders in the kitchen. You also can assume that apartment rentals will include basic dishes and cooking equipment, though if you need anything specific you probably should pack it. Our apartments also included towels and linens, but some apartments do not or charge extra, so check the notes on the listing.
Most apartments also charge a flat cleaning fee between €25-50 no matter the length of your stay. You’ll want to make sure you factor this fee in when you’re picking an apartment as it won’t be part of your total for accommodation and many places will ask you to pay the cleaning fee separately in cash on arrival. Some apartments also charge a security deposit, so again, make sure you read all the information listed on the booking site.
Unlike a hotel, front desks at apartment rentals aren’t open 24 hours a day, so you will need to check and make sure you can arrive at the hotel while the desk is open or are able to ring the landlords when you arrive. This was another mistake I made with our second booking.
Even though you paid a cleaning fee, some apartments require their tenants to take out (and sort) the rubbish, strip beds, or sweep the floors. Most places will come with a set of rules, and it’s important you read over these. Google translate can help translate a picture of text. This is particularly important in case there are additional fees for breaking any of the rules!
Have fun and happy planning!
*~*
*But I did make a mistake and wound up booking a private apartment through booking.com….more details in another post on that apartment.
The contents of this post, including images are © Rebecca J Lockley and Tim Lockley unless otherwise stated and should not be reproduced without permission. If you are not reading this on http://blog.beccajanestclair.com, my facebook page, Networked Blogs, the RSS feed(s), or through an e-mail subscription, please notify me.
[LJ readers reading this on the LJ RSS feed: Please click on the link at the top of the entry to go directly to my blog to leave a comment, as comments left on the LJ RSS do not get seen by me. Facebook users reading this from my Networked Blogs link can either comment on facebook or on my blog. If you are reading this through an e-mail subscription, you might need to go directly to my blog to view videos and images.]
For full Copyright and Disclaimer, please read http://www.blog.beccajanestclair.com/copyright/
No commentsPacking for Autumn in Austria
Whenever I plan a trip, I immediately start making pakcking lists. Things I know I’ll need, things I might need, and things I need to buy. If I’ve already made my itinerary, I try to match up my outfits to what I’m doing. So for example, if I have a trip to a beach planned, I know that autumatically means a bathing suit and sunblock need to go on my packing list. I also check to see if we will have access to a washing machine (this time, we wouldn’t) and plan appropriately. If there is no washing machine, I think about what clothing we have that could be sink washed and we plan on wearing one shirt for two days, and trousers or skirts for 3-4 days. I also bring Febreeze along on all trips in a small spray bottle to help keep clothing refreshed.
I also immediately start scouring the internet for suggested packing lists for the area I’m visiting to get ideas….and the one blank spot in many websites and travel blogs seem to be visiting Austria in the Autumn. Plenty of packing lists for going in the Winter, plenty of packing lists specific to visiting Vienna, too….but nothing for visiting in the Autumn.
I checked the long-range weather forecasts and saw that the weather was predicted to be chilly and slightly damp, with not many warm days. This immediately indicated to me that I needed to think in terms of layers. Things that could easily be taken on or off (either in public or by visiting a toilet), and easily packed into whatever I was carrying for the day, as well as packed into my main luggage.
Before I go any further, let’s go over luggage. My luggage consisted of my LL Bean deluxe Bookbag (I’ve had it since I was 15 and this was its third trip to Austria!), a borrowed cabin sized bag wheeled suitcase, and my camera bag (Tim had an LL Bean bag and a camera bag). We decided to share the single checked bag for on the way to Austria, and I packed a folding ‘weekender’ bag which we decided to pre-pay for to use as a second bag for the trip home (GOOD idea). The weight limit on Ryanair for both checked and carry-on luggage is 15kg per bag, so I didn’t want to use a bigger bag for fear that it would soon get overweight. Ryanair does now allow TWO carryon bags, but one has to fit under the seat in front of you (my canmera bag) and one in the overhead. They also let you carry on a single carrier bag from the duty free shops in addition to your two carry ons.
Ok, so now that we know how much space we’re working with, we need to think about what we’re packing.
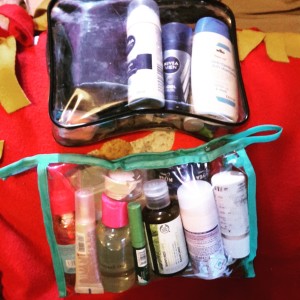
Toiletries for both of us immediately went on the list. I chose to buy pre-packaged travel sized versions of most things because I wouldn’t feel bad tossing them at the end of the trip to save space, but Poundland does a decent fillable set for £1 if you’d rather fill with your own products. I did also need a refillable pump with my armpit wash (prescription), and I filled a very small container with some aftershave for Tim. As you can see, nearly everything we needed fit into those two clear bags. I also had a separate bag that held both our razors and a small make-up bag that had everything non-liquid in it. I decided to put the toiletries in the checked bag, so I had an additional plastic baggie which I put in the things I wanted in my carry on (my liquid medicines, squash, and hand sanitizer). I packed minimal toiletries – Shampoo, conditioner, body wash, prescription armpit wash, face wash, deodorant, small body spray, toothpaste, face moisturizer, and pimple cream. My non-liquids included vaseline, a Clinique palate (blush, eyeshadow, mascara), a No7 face powder compact, a folding brush, nail clipper, tweezers, travel toothbrushes, and cotton pads. I went on the principle that Austria is not a third world country, and if there was anything we needed we could easily pick it up either at the Boots in the airport or once we were in Austria. Which we did do as I needed muscle rub, a sewing kit, and Tim needed bodywash partway through as I accidentally packed a 50ml bottle for him. Yes. I forgot my sewing kit. DON’T forget one, or if you need one you will be stuck for days wandering into shops using your German dictionary to ask for a sewing kit. Other than needing body wash for Tim, we managed to make 100ml of everything else last until the last day. If I was going for longer than 10 days, I would probably try to either pack extras of everything, pack bigger containers, or plan on purchasing things once I arrived.
Tim’s toiletries were just shampoo, body wash, deodorant, after shave, toothpaste, and shave gel. I also added a bottle of Dr Bronner’s All In One and a spray bottle of Febreeze to his bag.
The other thing I find incredibly useful day-to-day as well as for travelling is a pill container I picked up in Poundland. It folds over itself and one side has four large compartments (originally labelled Morning-Afternoon-Evening-Bed) and six smaller compartments on the other side. It’s supposed to be a weekly pill organizer, but I used Tim’s dymamo labeller and changed the labels on i onlit so I can keep with me paracetamol, ibruprofin, naproxin, pepto, kwells, antihisimine, and a few Metformin.
So now that I’ve waffled on about toiletries….let’s move on to outerwear, including shoes. You might have noticed from my pictures that I mostly wore a pink fleece body warmer (gilet). I deliberately chose this because I like having mobility in my arms and I knew it would fit over multiple layers and even if I purchased a fleece (I almost did, but stopped myself in the end), I knew the gilet would have zipped over that too. I packed the pink one only because I couldn’t find my black one the day before we left, but in the end, the pink matched most of my clothing anyway.
I also packed a black cardigan, black opera length wrist warmers/fingerless gloves, a headband earmuff thing, leg warmers, and a scarf. I always pack a scarf when I travel even in the Summer because it winds up being useful as a blanket or folded up as a pillow. I have loads of scarfs, but for this trip I took the pashmina I bought in a Vienna market in 2010. I bought one of those tube things (Tuk?) that can be worn multiple ways and a bandana as souvenirs. Both those items will be going into my regular travel rotation as I found them both very useful. You might be laughing at the leg warmers, but I wear a lot of skirts/dresses and a cheapie pair from Primark has kept my legs warm on more than one occasion.
Shoe-wise, I only had the hiking boots I wore most of the trip, and a pair of ankle boots. I hardly wore the ankle boots, but they were nice for my one dress-up day (my day in Salzburg) and they fit in the bottom of my rucksack. Because for the first four days we were staying halfway up a mountain, I was quite glad for my hiking boots. They were comfortable, dry, and generally warm. I paired my boots most times with wooly knee socks. Not particularly fashionable, but again, they kept my legs warm and I felt cute in them. Plus because they were wool I was able to wash them in the sink at our apartment and get multiple days use out of them, so I only packed 4 pairs of knee socks. I also packed 4 pairs of ankle socks for wearing with tights or leggings. I packed 3 pairs of cheap (Primark again) weather sensing tights, 3 pairs of footless tights, and one pair of thicker leggings. And while not strictly outerwear, I also had along a pair of bicycle shorts and a pair of knee-length leggings (to prevent chafing and to protect my modesty!). I only wore tights one day and I only needed leggings for two as my knee socks kept my pretty warm, but I always kept a pair in my bag (except for the day I forgot!) in case I needed them. They don’t take up a lot of room, so it wasn’t really a big deal.
I packed in layers on top. Most of my tops were hiking/exercise tops that also claimed to be “quick dry” (They weren’t and only dried because I had a radiator to hang them on!). My favourite top was a new top I picked up at TK Maxx for a tenner (Retail price was £55!) a week before we left. It was a Reebok brand long-sleeved top with built-in thumb holes to make the sleeves into wrist warmers. My other long-sleeved tops were a Nike top I bought on a trip to the US at a deep discount (mint green with shoulder vents), and a cheap Primark pink long-sleeved shirt. I also packed along a M&S short-sleeved work out top, a black primark T-shirt (didn’t wear it), and 2 camisoles (one black, one nude). I also had a pink dress (worn for travel) and a grey and black striped dress. For my bottom half, I only brought along two hiking skirts – a Columbia skirt I’ve had for years, a grey skirt from H&M that has bright pink shorts under it, and a pair of grey lounge pants/pajama pants. I did wish I had packed one more skirt simply because I got tired of the two I had, but it was manageable. I also wished I had added extra camisoles, as they didn’t take up much space. I also packed slipper socks (well, they looked more like booties) because they took up less space than slippers, 11 pairs of knickers, and 3 bras (black, white, nude). I also wished I had packed another bra, but I was able to wash one in the sink.
Tim’s wardrobe consisted of his hiking boots, 2 long-sleeved hiking shirts, 2 polo shirts, 1 short sleeved hiking shirt, 1 t-shirt, zip off trousers, walking trousers, and cargo trousers. He was supposed to also have a rugby top, but I wound up grabbing a dirty one so he wore his work shirt (button down) for travel instead. He also had 10 pairs of socks, 10 pairs of boxers, sleep shorts, and slipper socks. I think Tim probably wished he had an extra shirt or two by the end and possibly pajama trousers instead of shorts. For outerwear, he had a fleece pullover, fleece jacket, hat, fingerless gloves, and a neck warmer. He didn’t wear the neck warmer at all, but made use of the gloves and hat.
We also each had a kag in a bag and I had an umbrella. They weren’t needed, but we don’t travel without them!
As far as electronics go, we both packed our 10 inch laptops (didn’t pull them out for anything other than watching cartoons), DSLR cameras (with lenses), tablets, and mobile phones. We also brought the camcorder (barely used it), my ipod (didn’t use at all), and a tripod (also didn’t use at all). For charging our mobile devices, I picked up 4-port USB plugs that came with 4 changeable plugs for the UK, US, EU, and AU before our trip to the US. These plugs come in handy around the house too as they only need one plug to charge up to 4 devices. We also packed some emergency chargers, which can be picked up for as little as £5 to as much as £30, depending on capacity. I have three small lipstick sized chargers and Tim has a larger one. Since they also need to be charge via USB, having the multi port plugs was a big help. These chargers came in handy as we took lots of pictures on our phones for instant sharing and used our phone for internet access. Since our laptops and camera battery chargers didn’t have EU plugs, we also took along a two-plug converter. Out of all the electronics, we only used my laptop twice (once to watch cartoons and once to look up something that we could have looked up on the tablet), and I don’t think Tim used his laptop at all. We had planned on using the laptops to remove pictures from our cameras and possibly even post them while we were away, but a lack of wifi at most places prevented this and we didn’t take as many pictures as we had thought we would. Would we take the laptops again? Possibly. Only because knowing we had the capability to back up photos and clear off memory cards meant we weren’t afraid to click away, and loading my laptop with some silly cartoons (in English) meant we had a small amount of comic relief to wind down to in the evenings if we wanted it. Plus the laptops are so small they don’t take up much space. Tim’s fit into his camera bag, and mine was in my rucksack. We also had a small electronic luggage scale, which comes in handy for making sure all your bags meet weight requirements!
We took along a railway atlas (because…..train geeks.) and maps of the area as well as a German dictionary and phrasebook. The dictionary came in handier than the phrasebook did as I do speak German, but we occasionally needed to look up either an unfamiliar German word or how to say something specific in German (like sewing kit!). Yes, my phone had Google Translate installed, but that requires having signal and we couldn’t count on that. (I did later discover I could download an offline German dictionary to Google Translate, but I’m not sure how good it is). I also had a small notebook about the size of an airline ticket, though we never needed it. I organized all our tickets and itinerary in an A5 display folder from Paperchase (£2.50). This wasn’t entirely needed, but it gave us an easy place to keep track of train schedules and tickets and a place to pop in brochures we wanted to keep. We also brought along baggies of teabags because we remembered how horrendous Austrian tea was, and knew we would need the pick me up first thing in the morning.
I did not take a handbag along, instead I have a camera bag that functions as a handbag. I used a small Cath Kidston travel wallet for my money, debit card, credit card, and driver’s license. All other cards stayed at home in my regular purse. I used a wristlet from Cath Kidston that I usually used for makeup as my purse and kept my passports, travel wallet, and travel cards all in one place. It also gave me a small purse for the evenings we went out without our cameras. I did wish I had brought along a cross body bag for these evenings though, as my small wristlet wasn’t big enough for everything I wanted to take.
We also each had a folding shopping bag and folding rucksacks. I had been wanting to get us folding rucksacks for a while as we tend to take our large bags with us on holiday but then find they are too big to use as a daypack (like a day out at an amusement park), but the cost of some of them (£21 for a Sea to Summit) always put me off. I found some on clearance at trespass for £6 so I picked them up, assuming with the trespass name on it they would be good quality. They were…..ok. Mine seemed to have a factory defect on it with one strap not attached to the bag (hence needing the sewing kit!) and Tim had a strap start to go on his. But I was able to rig them back together with some duct tape (I always carry a little!) and safety pins until I was able to get my hands on a sewing kit.
The only other thing in my bag was a selfie stick (used to take “selvsies” as Tim called them), Bagpuss (I made sure I had room for him, but could have left him at home) and Hamish, the scottish rubber duck. We both had 750ml water bottles attached to a carabeaner on our bags. We took them empty through airport security, then filled them and used one of those Robinsons Squash’d to flavour them.
Looks like a lot, doesn’t it? I started looking on YouTube for packing tutorials and found lots of tips and tricks, but the one that appealed to me the most was an Army Roll/Ranger Roll as demonstrated in this video:
I used this technique on everything except for my knickers (too small and slippery as they were all microfiber) and bras (yeah, there is no way of folding bras. haha!). It WORKED. We really did fit nearly all of our clothing in the two rucksacks, and I think with a couple of better choices (less bulky clothing items) or a better rucksack (on designed for travel/backpacking and not one designed for schoolbooks) we might have been able to manage without the extra suitcase, but we were glad we had it for the trip home as there was plenty of room for lots of chocolate! I also used zipper top bags to compress things further. You can buy space bags for travel, but the zipper top bags work just as well and are easier to replace if they rip.
Things I wish we had packed:
-A sewing kit (mentioned above)
-Extra plastic zipper top bags for snacks OR plastic containers.
-Additional camisoles (also mentioned above)
-Hair elastics
-Dry shampoo
-fleece pullover for myself
-pajama trousers for Tim
Things we didn’t or barely use:
-tripod
-laptops
-black t-shirt
-camcorder
-make-up
-notebook
Everything I wish we had taken are all things that are small enough to add to a bag in the future, and all the things we didn’t use could either be left at home or didn’t take up much space to begin with.
For the return we decided to check an additional bag, and we needed it! Even after abandoning some of the clothing (all Primark buys – socks, my shirt and cardigan, tights, and a few pairs of underwear for each of us), we needed the space for the 3KG of chocolate we purchased! Plus since we had the room, we were able to put some of the heavier books into the checked bag to take some of the pressure off of our shoulders.
I know I wrote a lot, but I hope this helps you plan your packing for your next adventure!
***
The contents of this post, including images are © Rebecca J Lockley and Tim Lockley unless otherwise stated and should not be reproduced without permission. If you are not reading this on http://blog.beccajanestclair.com, my facebook page, Networked Blogs, the RSS feed(s), or through an e-mail subscription, please notify me.
[LJ readers reading this on the LJ RSS feed: Please click on the link at the top of the entry to go directly to my blog to leave a comment, as comments left on the LJ RSS do not get seen by me. Facebook users reading this from my Networked Blogs link can either comment on facebook or on my blog. If you are reading this through an e-mail subscription, you might need to go directly to my blog to view videos and images.]
For full Copyright and Disclaimer, please read http://www.blog.beccajanestclair.com/copyright/
2 commentsPlanning Austria

Recently, my husband and I returned from a a rather spontaneous trip to Austria. I say spontaneous, because we planned it 2 days after I received my British passport (yes, there will be a post about that) for travel the following month. We originally planned for a long weekend away to one of our favourite places, the Zillertal area of Tirol, but then realised Tim’s week of Autumn leave happened to be right after his long weekend, so a 10-day trip was put into place!
We booked our plane tickets with Ryanair, and I was pleasantly surprised at the cheap fares. However, once we added in checked bags (1 going, 2 coming home) at £15 and paid for our seats (£5 each each way), it soon added up and I was surprised to discover that British Airways actually offers cheap European flights that include both one bag and your seat selection for around the same price once you add in all of Ryanair’s extra fees. So, my suggestion is to shop around on several airlines before making your final selection. Ryanair might wind up being the best or go to the destination you need, but you might find BA or Lufthansa or Austrian Air offered a better price.
We flew into Linz, simply because it was the cheapest Austria option for flying with Ryanair. We needed to actually be closer to Innsbruck, and could have also flown to Munich, but after all the problems being reported with cross border trains in the weeks leading up to our trip, it was a good thing we chose to fly directly into Austria.
Our options to getting over to our first destination included rail, bus, or a car. We might have also been able to book a flight on a smaller, local, airline, but we skipped that option all together. We don’t like travelling by bus for long distances, so we also didn’t bother looking that information up. I did price out a rental car and I found a car for around €10/day. However, as my husband is a former BR staff member, he retained his BR privs and we get 4 48-hour free travel passes on OBB, Austria’s railway, so I began to look up trains.
Remember what I mentioned above about the border issues? Yeah, our train should have been a corridor train that crosses into Germany for about 45 minutes with no stops, but due to Germany deciding to close the borders, this was going to become a nightmare with a 90-minute delay! In the end, Germany decided to allow the corridor trains, so we were fine and in fact, things worked out so well that we managed to snag an earlier direct train to Jenbach without going out of our way to Innsbruck and got to our destination a lot earlier than we thought we would!
For rail schedules, I downloaded an app to my phone called OBB Scotty. For ticket prices and buying, you will need a separate app called OBB Tickets, but the Scotty app will prompt you to download it if you want to buy tickets. Also helpful is the DB app as DB has schedules for all European countries. The nice thing about all of these apps is that they seem to be automatically working in English for me. And if you’re using Chrome to look at websites, Chrome can automatically translate things into English.
Our schedule looked like this:
24 September- TRAVEL Stansted-Linz-Fügen
25 September-Brenner/Brennero (Italy!)
26 September-Achenseebahn/Achensee/Spieljochbahn
27 September-Zillertalbahn Dampfzug
28 September- TRAVEL Fügen-Zell am See
29 September-Salzberg
30 September-Pinzgauerlokalbahn/Krimml Wasserfälle
01 October-Pinzgauerlokalbahn Dampfzug/TRAVEL Zell -Linz
02 October-Pöstlingbergbahn/Linz
03 October-TRAVEL Linz-Stansted-Lincoln
We did have to modify our plans slightly as due to the no trains to Germany thing we had to cancel our plans to visit the Chiemsee, but we replaced it with a quick trip to Italy instead, so not all bad!
 
We changed locations twice, so we had a 4 night stay in an Apartment in Fügen, 3 nights in an Apartment in Zell am See, and 2 nights in a hotel in Linz. I will detail our stays later, however you can read my reviews of the first and last place on TripAdvisor. On average, we paid €50/night for our accomondation, but both apartments also charged a cleaning fee.
The nice thing about renting apartments is you get to eat on your own schedule, and you generally have a bit more space. The downside is you have to buy all your own food, but more on that in a later post.
Over the next few days/weeks I hope to post about our entire trip, since after all, my blog was originally a travel blog!
***
The contents of this post, including images are © Rebecca J Lockley and Tim Lockley unless otherwise stated and should not be reproduced without permission. If you are not reading this on http://blog.beccajanestclair.com, my facebook page, Networked Blogs, the RSS feed(s), or through an e-mail subscription, please notify me.
[LJ readers reading this on the LJ RSS feed: Please click on the link at the top of the entry to go directly to my blog to leave a comment, as comments left on the LJ RSS do not get seen by me. Facebook users reading this from my Networked Blogs link can either comment on facebook or on my blog. If you are reading this through an e-mail subscription, you might need to go directly to my blog to view videos and images.]
For full Copyright and Disclaimer, please read http://www.blog.beccajanestclair.com/copyright/
No comments[Slimming World] Always double check your Syn Values!
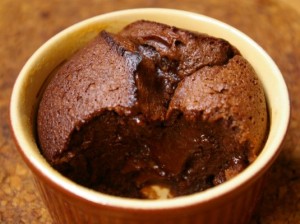 My slimming world mojo has been at an all-time low lately, and I took to Pinterest to look for some ideas and inspiration. Searching just “slimming world” gives you hundreds of results – links to recipes off the official website, charts showing syn values for snacks most often eaten, inspirational quotes, and recipes that other people have come up with. In fact, many of my own recipes I blog wind up on Pinterest, repinned by many. One thing I always leave in my disclaimer is that my Syn values are accurate at the time of posting, based on my exact ingredients and using the online Syn calculator, and I always encourage my readers to double check the syn values for themselves.
While scrolling through the results on Pinterest, I came across a link to 5 under 5 Syns Chocolate Treats. Now, I’m not a huge chocolate eater, but I do like the occasional chocolate treat, so I decided to check out the suggestions/recipes on that page. To my surprise, the last recipe was for a one syn chocolate cake in a mug.
The Slimming World website has a feature on meals in a mug, and one of theirs is a low-syn chocolate mug cake using an Options hot chocolate. I assumed this would be the same recipe, but to my surprise, it wasn’t. Her recipe uses a chopped apple and 2 TBS raw cacao powder (I won’t retype her entire recipe, as it’s hers. You can find it on her site I linked to above). I was interested, but curious as to the syn value as I know you need to syn cooked apple and I had never heard of raw cacao powder. I did some digging, and it turns out her 1 syn desert is actually a whopping NINE syns. 3.5 of them come from the hidden syns in the cooked apple and 5.5 come from the 2 TBS of raw cacao. I left her the following comment:
Hello, I always double check the syns when I find an online recipe (and encourage people who view my recipes to check for themselves, too) and I have a question for you……How is the chocolage mug cake only one syn? I can’t find raw cacao powder in the online syn database, but I found raw cacao nibs, which come in at 4.5 for 25g. I looked up nutritional information for The Raw Chocolate Co. Cacao Powder and ran it through the online Syn calculator, and it gives me 5.5 syns for 30g (2 TBS). You also would need to syn the apple, as it’s being cooked. 100g of an eating apple is 2.5 syns and 100g of a cooking apple is 1.5 syn. I just weighed a braeburn apple out of out a bag from Tesco, and it came in at 134g, so it would be slightly more than 2.5 syns (3.3 to be exact, I’d round it to 3.5, whicn nicely covers the dash of almond milk). Unsweetened almond milk is .5 syn for 100ml, although a dash is probably only around 50ml. So….. 5.5 + 3.5 = 9 Syns for your chocolate mug cup, not counting the chocolate yogurt on top. It’s a bit misleading to people to show this as only being 1 Syn.
I am sincerely hoping this was just a mistake on her part or a miscalculation online. But it just highlights the importance of double checking the syn value for recipes that other people are blogging. Obviously, the recipes that are on the Slimming World website, Slimming World cookbooks, and the Slimming World magazine will be accurate….but take anything else posted with a grain of salt. Including my own recipes, because I make mistakes, too.
[update 14/03/17]
Since I’m still getting comments on this both on my blog and on the original post, I thought I would add in a screenshot of Cacao powder from the Slimming World online syns database. You can clearly see that the lowest syn values found for cacao powder is 2.5 syns per TBS if you buy that specific brand. Other brands are listed as 1 syn per teaspoon, and there are 3 teaspoons in the UK Tablespoon (4 in a US one). The recipe calls for 2 TABLESPOONS of Cacao powder, so you’re still looking at 5-6 Syns for the Cacao, plus syns for the cooked apple (again, 3.5 for your average apple based on weight). Even if we overlook the almond milk or the dash comes from your HEA allowance, we’re still looking at almost 10 syns for this “low syn” dessert option.

***
Chocolate cake in a mug picture from http://food.thefuntimesguide.com/2009/11/microwave_cake_cup.php
DISCLAIMER: I do not work for Slimming World, I am not affiliated with Slimming World beyond being a paying customer/member, I get no personal benefit from writing this post other than the joy of sharing.
The contents of this post, including images are © Rebecca J Lockley and Tim Lockley unless otherwise stated and should not be reproduced without permission. If you are not reading this on http://blog.beccajanestclair.com, my facebook page, Networked Blogs, the RSS feed(s), or through an e-mail subscription, please notify me.
[LJ readers reading this on the LJ RSS feed: Please click on the link at the top of the entry to go directly to my blog to leave a comment, as comments left on the LJ RSS do not get seen by me. Facebook users reading this from my Networked Blogs link can either comment on facebook or on my blog. If you are reading this through an e-mail subscription, you might need to go directly to my blog to view videos and images.]
For full Copyright and Disclaimer, please read http://www.blog.beccajanestclair.com/copyright/
2 comments[Recipe] Orange Chicken [Slimming World]
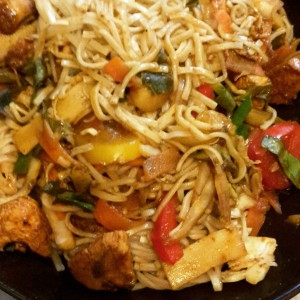 I love Chinese food. But Chinese food isn’t very Slimming World friendly unless you make it yourself…and the biggest hurdle for me has always been making a tasty sauce. My husband and I like gooey Chinese food, and lots of the recipes I’ve found online just aren’t gooey enough. I have tried using orange Fanta, and while that was good, it still wasn’t satisfying. The other day I was looking at a recipe for orange chicken and suddenly it dawned on me to use orange squash (which is free on Slimming World).
If you follow my exact recipe, this is a syn free meal that serves two comfortably, three if you bulk it out further. The nice thing about a stir fry is you can make it as big as you need it to be. Because all the ingredients are free on Slimming World, you also can play around with the taste of the sauce to get it to fit your specifications. I’ve made this three times, and the first time I didn’t do any measuring other than the squash, the second time I did measurements so I could blog the recipe accurately, and the third time I did a combination of measuring and estimating. All three times it turned out quite tasty!
You will need:
400G diced chicken (or there about. I sometimes cut up two breast portions, and I also used a packet of stir fry turkey last time)
6 TBS double concentrate orange squash (I used Robinson)
4 TBS soy sauce
3 TBS tomato puree (called paste in the US)
2 TBS red wine vinegar (I’m sure other vinegars could be used)
1 TBS Chinese five spice
2 Oranges, broken into segments (I used satsumas)
(optional 1 TBS sweetener)
Stir-fry vegetables of your choice
Dried Chinese noodles or rice (whichever you prefer. I prefer noodles)
Fry light
1. Spray a wok with fry light and pre-heat on the hob
2. Toss diced chicken with Chinese five spice to coat, then stir-fry chicken for 5-10 minutes.
3. Add squash, soy sauce, puree, and vinegar. Give it a stir and let it come to a boil.
4. Add vegetables and stir-fry an addtional 5-10 minutes or until vegetables are to your liking.
5. Cook noodles or rice according to package instructions.
6. Give your sauce a quick taste test. Too sweet? Add a splash more vinegar. Too sour? Add the sweetener. Not enough orange flavor? add another splash of squash. Not spicy enough? Add more five spice.
7. Divide noodles or rice between bowls and top with stir-fry. Garnish with fresh orange segments.
***
DISCLAIMER: I do not work for Slimming World, I am not affiliated with Slimming World beyond being a paying customer/member, I get no personal benefit from writing this post other than the joy of sharing.
Please note: Syn values are based on my exact ingredients using the online calculator. Your Syn value may vary based on your ingredients and the size of your baking containers and portions, so use this number as a guide only. Syn values also frequently change, but these values are correct at the time of publication.
The contents of this post, including images are © Rebecca J Lockley and Tim Lockley unless otherwise stated and should not be reproduced without permission. If you are not reading this on http://blog.beccajanestclair.com, my facebook page, Networked Blogs, the RSS feed(s), or through an e-mail subscription, please notify me.
[LJ readers reading this on the LJ RSS feed: Please click on the link at the top of the entry to go directly to my blog to leave a comment, as comments left on the LJ RSS do not get seen by me. Facebook users reading this from my Networked Blogs link can either comment on facebook or on my blog. If you are reading this through an e-mail subscription, you might need to go directly to my blog to view videos and images.]
For full Copyright and Disclaimer, please read http://www.blog.beccajanestclair.com/copyright/
No comments[Recipe] Four Syn Cupcakes [Slimming World]
 Recently, at my Slimming World Group, we had a taster night in honour of one of our member’s birthdays. It wound up being a double…no, triple celebration as my friend was celebrating her 40th birthday, reaching target, AND losing five stone! So proud of her! Anyway. Since it was her birthday, I really wanted to make some kind of low syn cake treat. The Internet is full of suggestions for low syn cakes. Most of them are flourless and use beaten egg whites to make the cake part, or use crushed Scan Bran or Weetabix or Ryvita. But I wanted proper cake. Enter, this Weight Watcher’s recipe! The original recipe states that you can use ANY diet soda with ANY box cake mix. But since Slimming World and Weight Watchers use different criteria for determining points and syns, I needed to use the online calculator to work out the exact syns for my cupcakes. So if you use the exact ingredients I’ve used and make 24 cupcakes, each cupcake will be 4 syns. Any other brand or type and you will need to use the syn calculator.
You will Need:
For the cake –
1 box Betty Crocker Red Velvet Cake Mix
1 330ml can (12 oz) Doctor Pepper Zero
24 cupcake papers
For the icing –
500g Quark
1 mug Truvia or other sweetener
(optional) food colouring
1. Preheat oven to 180C and put the liners in the cupcake tins
2. combine dry cake mix and Dr Pepper Zero. No other ingredients are needed.
3. Evenly divide between the cupcake papers. I discovered 2 Tablespoons per cup will evenly divide it.
4. Bake 15-20 minutes, or until a toothpick inserted comes out clean
6. Pour Quark into a bowl and slowly mix in the sweetener. I used about a mugful, but you might need more or less depending on your sweet tooth. I also added some red food colouring (but I wasn’t satisfied with the result, so I added blue to make violet). If you don’t add colouring, your icing will be white.
7. Pipe or spoon the icing onto the cupcakes.
You will need to store these cupcakes in the fridge because of the Quark icing.
About a week later, I made a Carrot Cake mix with Fanta Zero, and I would be willing to try a yellow cake with Sprite Zero. I bet a chocolate cake made with Cherry Coke Zero or Cherry Pepsi Max would be good, too.
***
[DISCLAIMER: I do not work for Slimming World, I am not affiliated with Slimming World beyond being a paying customer/member, I get no personal benefit from writing this post other than the joy of sharing.]
[Please note: Syn values are based on my exact ingredients using the online calculator. Your Syn value may vary based on your ingredients and the size of your baking containers and portions, so use this number as a guide only. Syn values also frequently change, but these values are correct at the time of publication.]
The contents of this post, including images are © Rebecca J Lockley and Tim Lockley unless otherwise stated and should not be reproduced without permission. If you are not reading this on http://blog.beccajanestclair.com, my facebook page, Networked Blogs, the RSS feed(s), or through an e-mail subscription, please notify me.
[LJ readers reading this on the LJ RSS feed: Please click on the link at the top of the entry to go directly to my blog to leave a comment, as comments left on the LJ RSS do not get seen by me. Facebook users reading this from my Networked Blogs link can either comment on facebook or on my blog. If you are reading this through an e-mail subscription, you might need to go directly to my blog to view videos and images.]
For full Copyright and Disclaimer, please read http://www.blog.beccajanestclair.com/copyright/
No comments[Recipe] Vegan Reduced Sugar Brownies
 Mmm. Brownies. Though, I must admit, these are more cakey than a usual brownie, but still. Yummm.
Last Thursday, we had our steam-up and we had a few friends present. I like to bake things when we play trains in the garden, but last time I made 24 cupcakes, we only had about 8 people show up and Tim wound up taking the cupcakes into work, so this time, I waited to see what the numbers were and needed something that would be quick to make. I immediately remembered a recipe for Vegan Brownies I made years and years ago (at least 10!) when I was vegetarian. I decided to change it a bit to make it more diabetic and diet-friendly. I did NOT calculate the syns for this recipe, because the original is in US measurements and all of my syns are calculated based on metric measurements, but I might go back and try to convert everything. Oh, and the best part is you only need an 8″ pan to mix AND bake them in!
You will need:
1 1/4 Cup flour (you can use plain or wholegrain. For denser brownies, I would only use 1 Cup)
1/2 C Truvia baking blend (or Splenda for Baking or Half Spoon…or regular sugar)
1/3 C cocoa (I used my good ol tin of Hershey, but I can’t wait to try this with Green & Black’s Organic)
1 tsp baking soda (if using bicarbonate, use 1 1/2 tsp. I happened to have a box of Arm & Hammer)
1/2 tsp salt
1 Cup warm water
1 tsp vanilla essence
1/3 Cup vegetable oil (You could probably sub in apple sauce. The next time I make this, I’m going to use applesauce)
And the magic ingredient:
1 tsp Red Wine vinegar (or other vinegar, but not balsamic)
Optional: I also added in a bag of dark chocolate chips (not Vegan) and white chocolate chunks (also not Vegan)
1. Pre-heat the oven to 180C (350F)
2. Mix all dry ingredients together in an 8 inch square baking pan.
3. Create holes in each corner of the dry mix and pour a wet ingredient into each corner.
4. Stir to combine. This is where you can stir in any add-ins such as chocolate chips, m&ms, 2 TBS of PB2, etc.)
5. Bake for 30 minutes or until a toothpick inserted into the center comes out clean.
6. Cool in the pan for about 20 minutes or you will have a crumbly mess.
Edited to add on 14 April 2015: If you use regular Truvia instead of the sugar blend and you do not add any additional chocolate chips, this recipe comes to 56.9 syns total. Cut into 16 it is 3.5 syns per brownie!
Enjoy!!
***
The contents of this post, including images are © Rebecca J Lockley and Tim Lockley unless otherwise stated and should not be reproduced without permission. If you are not reading this on http://blog.beccajanestclair.com, my facebook page, Networked Blogs, the RSS feed(s), or through an e-mail subscription, please notify me.
[LJ readers reading this on the LJ RSS feed: Please click on the link at the top of the entry to go directly to my blog to leave a comment, as comments left on the LJ RSS do not get seen by me. Facebook users reading this from my Networked Blogs link can either comment on facebook or on my blog. If you are reading this through an e-mail subscription, you might need to go directly to my blog to view videos and images.]
For full Copyright and Disclaimer, please read http://www.blog.beccajanestclair.com/copyright/
No comments[Recipe] Easter Traditions [Slimming World]
Once again, on my phone. Usual disclaimers apply….double check your syns and I’m not affiliated with Slimming World.
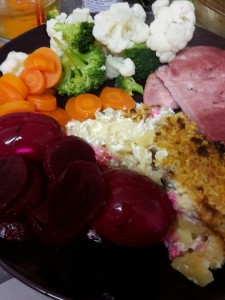
For some reason, Easter makes me homesick more than Christmas. This year, I decided to replicate some of my family’s favourite Easter staples, and managed to make it fit in with Slimming World!
First up, Heavenly Spuds.
The original calls for lots of cheddar cheese, butter, a creamy based soup, and butter. Sounds delicious, doesn’t it? I don’t even want to think about the syns.
Here’s my version that comes in at 10.5 syns for the whole dish!
You will need:
3 large tins of potatoes(you could use raw potatoes, but you would want to boil them first)
1 tin of mushrooms (I used my chopper)
1 tub quark
1/2 tub fromage frais
50g mozzarella, shredded
35g Kellog’s corn flakes, crushed
Pepper
Fry light
1. Preheat the oven to 180C. (200 if not fan assisted)
2. Drain and chop the potatoes (I used my chopper attachment on the stick blender).
3. Drain and chop mushrooms (ditto).
4. In a large bowl, combine potatoes, mushrooms, quark, fromage frais, and cheese.
5. Spray a casserole dish with frylight.
6. Spread potato mixture evenly in dish and top with crushed cornflakes.
7. Spray the top with butter flavoured fry light (if you have some, or use regular).
8. Bake 30-45 minutes or until bubbling.
The second food I missed was red beet eggs. This one is really easy.
You will need:
2 eggs per person
1 jar of sliced beets
Vinegar
1. Hard boil and peel eggs.
2. Place eggs in a large bowl.
3. Pour beets and juice over eggs.
4. Top with vinegar until eggs and beets are covered.
5. Cover bowl and refrigerate. The more time you have, the better tasting the eggs!
Happy Easter!
No comments[Recipe] One Syn Yorkshire Puds [Slimming World]
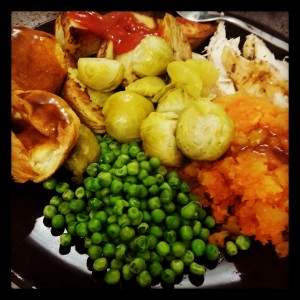
One thing my husband has missed with his Sunday dinners since I started on Slimming World has been Yorkshire Puddings. Especially after I got good at making them. Today, someone shared a one syn Yorkshire Pud recipe on one of the Slimming World Facebook groups and I decided to try it. The result was light and airy Yorkies with no guilt!
[DISCLAIMER: I do not work for Slimming World, I am not affiliated with Slimming World beyond being a paying customer/member, I get no personal benefit from writing this post other than the joy of sharing.]
[Please note: Syn values are based on my exact ingredients using the online calculator. Your Syn value may vary based on your ingredients and the size of your baking containers and portions, so use this number as a guide only. Syn values also frequently change, but these values are correct at the time of publication.]
You will need:
50g flour
120ml semi-skim milk
40ml water
2 eggs
Pinch of salt
Frylight
– Pre-heat the oven to 200C. While the oven is pre-heating, put in a 12-cup yorkie tin (I used a cupcake tin) so it can get nice and hot.
– Whisk (or use a hand blender) together all ingredients, until foamy.
– Carefully remove tin from the oven and spray each cup with Frylight.
– Evenly distribute mix between the cups. I found measuring spoons helped.
– Bake for 18-20 minutes or until puffy and golden brown.
Serve with your favourite roast dinner for only one syn each!
***
The contents of this post, including images are © Rebecca J Lockley and Tim Lockley unless otherwise stated and should not be reproduced without permission. If you are not reading this on http://blog.beccajanestclair.com, my facebook page, Networked Blogs, the RSS feed(s), or through an e-mail subscription, please notify me.
[LJ readers reading this on the LJ RSS feed: Please click on the link at the top of the entry to go directly to my blog to leave a comment, as comments left on the LJ RSS do not get seen by me. Facebook users reading this from my Networked Blogs link can either comment on facebook or on my blog. If you are reading this through an e-mail subscription, you might need to go directly to my blog to view videos and images.]
For full Copyright and Disclaimer, please read http://www.blog.beccajanestclair.com/copyright/
No comments[Recipe] Rat-onna-Stick (aka Chicken Satay) [Slimming World]
Terry Pratchett’s death has hit both my husband and I hard, perhaps him more than me. While discussing dinner tonight, Tim jokingly suggested Sausage-inna-bun and Rat-onna-stick ala CMOT Dibbler. So, I decided to make Chicken Satay.
[DISCLAIMER: I do not work for Slimming World, I am not affiliated with Slimming World beyond being a paying customer/member, I get no personal benefit from writing this post other than the joy of sharing.]
[Please note: Syn values are based on my exact ingredients using the online calculator. Your Syn value may vary based on your ingredients and the size of your baking containers and portions, so use this number as a guide only. Syn values also frequently change, but these values are correct at the time of publication.]
If you make 7 sticks, each stick is only half a syn.
You will need:
2 TBS PB2*
1 TBS water
6 TBS soy sauce
1 TBS sweet chili sauce
4 boneless, skinless chicken breasts
7 wooden skewers
*PB2 is a powdered peanut butter available on Amazon that has only 1 syn per Tablespoon. You will need to recalculate the syns and omit the water if you use a different brand.
1. Preheat oven to 180C
2. Slice chicken breasts into strips
3. Combine PB2, water, soy sauce, and sweet chili sauce and whisk until smooth.
4. Add chicken to bowl and leave to marinade at least 20 minutes (if you have time, I bet this would taste better marinaded overnight!)
5. Soak skewers in water and thread chicken on in a zig zag pattern
6. Place skewers in an oven proof dish, pour remaining marinade over chicken and bake for 20 minutes.
Enjoy!
***
The contents of this post, including images are © Rebecca J Lockley and Tim Lockley unless otherwise stated and should not be reproduced without permission. If you are not reading this on http://blog.beccajanestclair.com, my facebook page, Networked Blogs, the RSS feed(s), or through an e-mail subscription, please notify me.
[LJ readers reading this on the LJ RSS feed: Please click on the link at the top of the entry to go directly to my blog to leave a comment, as comments left on the LJ RSS do not get seen by me. Facebook users reading this from my Networked Blogs link can either comment on facebook or on my blog. If you are reading this through an e-mail subscription, you might need to go directly to my blog to view videos and images.]
For full Copyright and Disclaimer, please read http://www.blog.beccajanestclair.com/copyright/
No comments[Recipe] Slimming World Friendly Chocolate Cupcakes
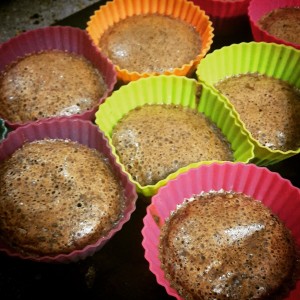
I really wanted cupcakes today. It’s a Sunday, so I either had to bake with what I had or what I could buy at the local co-op. I searched on the Slimming World website and found the recipe for the chocolate log….but I didn’t have the ingredients for the filling. I also prefer to reduce sugar where possible, so this is my cupcake recipe loosely based off the chocolate log. This should make 10 cupcakes for a total of 15 syns or 1.5 each.
Posting this from my phone, so I don’t have my usual disclaimers. But please double check your syn values if you use different ingredients.
Recipe:
50g self-rising flour
50g Truvia baking blend
15g cocoa powder (my American self used Hershey cocoa)
4 eggs
Preheat fan assisted oven to 180 (think that’s 200 on a regular oven)
Combine dry ingredients in a small bowl and set aside.
Whisk eggs until foamy (I used an electric whisk)
Spoon dry mix into eggs and gently stir.
Spray 10 silicone cupcake cases with frylight and evenly spoon in mix (about 3 dessert spoonfuls per case).
Bake 10-12 minutes until edges come away from the case.
BLATANT SELF PROMOTION!
I’m hosting a Scentsy ONE DAY ONLY sale! Save up to 75%!! Use my link and I can earn free stuff too! https://wicklesskaren.scentsy.co.uk/?partyId=265221728
No commentsAdventures in Cooking: I Made Risotto!
 At our recent Slimming World taster evening, one of the ladies made the risotto out of the August Slimming World magazine. It was delicious, and it was the first time I had ever had risotto. I just don’t like rice a whole lot so I don’t eat it often and I rarely make it. Even when we have a Chinese or Indian takeaway, it’s a struggle to eat the rice (even though it’s a fabulous free food!). When I got home, I mentioned this recipe to Tim and he asked if I would try it……ah, the things we do for love.
The original recipe was called (I think) Butternut Squash Risotto. Naturally, it called for a butternut squash. Which I didn’t have. But I did have something called an “onion squash” (called that, I’m guessing because it looked like a giant orange onion) I bought at Waitrose a few weeks ago, so I decided to use that. Cutting into it was tough…so tough my big knife slipped and took a slice out of my knuckle. Ow. Disaster #1. I decided to pull out some pumpkin puree from the freezer instead. I also decided to add some chicken to the recipe, as that’s how we had it at group and it was really good. The recipe also called for onion and garlic (which I omit always due to allergies) and a red chili…which I didn’t have, but I had some dried red chili flakes, so those would have to do.
After cooking the chicken and the veg, the next step is adding the risotto rice and BOILING HOT STOCK one ladleful at a time. The dish has to be kept constantly stirred and the idea is you add a ladle of stock, stir, let it absorb, and repeat until you have one last ladleful of stock to put in. So, ladle in one hand and wooden spoon in the other I began. After 2-3 ladlefuls, my wooden spoon slipped and >SPLAT< a spoonful of boiling hot stock and rice landed on my hand. Ow. I dropped the spoon into the dish and ran my hand under cold water. Disaster #2. I carried on, though I only used 700ml of stock when the recipe called for a full Litre. I can only assume this is because I used pureed pumpkin instead of chunks of squash. Since it looked awfully goey, I took it off the heat, didn't bother adding the last of the stock and stuck a lid on it for 3 minutes.
As I was dishing it out I discovered that when I stopped stirring it to tend to my burnt hand it caused some of the rice to stick to the bottom of my cast iron dutch oven. Disaster #3.
But the risotto was yummy, and Tim even went back for seconds!
I decided the best way to try to clean this would be to add some water to the pot, squirt in some Fairy Platinum, and boil it for 20 minutes to hopefully loosen the stuck on rice. After 20 minutes I took the pot off the heat, grabbed a scrubber and started scraping....and splashed my other hand with boiling hot water. Disaster #4. Fortunately, I was able to shift all the cooked on rice and have rescued my pot. Would I make this again? Sure! But I think I'll be more careful....maybe wear some gloves.
Would you like the recipe?
You will need:
Diced chicken breast (I used one, but you could buy a pack of pre-diced)
250g pumpkin puree
275g risotto rice
700ml boiling hot vegetable stock
Pinch of red pepper flakes
Fry light
Salt & pepper
heavy pot with lid
1. Spray the bottom of a heavy pot with fry light and add the chicken and cook until the chicken is browned on all sides.
2. Add pumpkin puree and the pinch of red pepper flakes.
3. Add risotto rice and simmer for 2-3 minutes.
4. Add a ladle of stock, and cook for 2 minutes (or until stock is absorbed), stirring constantly.
5. continue to add stock in two minute intervals and continually stir.
6. About 15 minutes later, you should be on the last ladleful. Remove pot from heat, stir in the last ladle of stock, season with salt and pepper, and cover for 3 minutes.
Enjoy!
(and if you're on Slimming World, this Risotto is free on EE!)
***
Please note: Syn values are based on my exact ingredients using the online calculator. Your Syn value may vary based on your ingredients and the size of your baking containers and portions, so use this number as a guide only. Syn values also frequently change, but these values are correct at the time of publication.
The contents of this post, including images are © Rebecca J Lockley and Tim Lockley unless otherwise stated and should not be reproduced without permission. If you are not reading this on http://blog.beccajanestclair.com, my facebook page, Networked Blogs, the RSS feed(s), or through an e-mail subscription, please notify me.
DISCLAIMER: I do not work for Slimming World, I am not affiliated with Slimming World beyond being a paying customer/member, I get no personal benefit from writing this post other than the joy of sharing.
[LJ readers reading this on the LJ RSS feed: Please click on the link at the top of the entry to go directly to my blog to leave a comment, as comments left on the LJ RSS do not get seen by me. Facebook users reading this from my Networked Blogs link can either comment on facebook or on my blog. If you are reading this through an e-mail subscription, you might need to go directly to my blog to view videos and images.]
For full Copyright and Disclaimer, please read http://www.blog.beccajanestclair.com/copyright/
No commentsMy Visa Journey Part 3: Citizenship
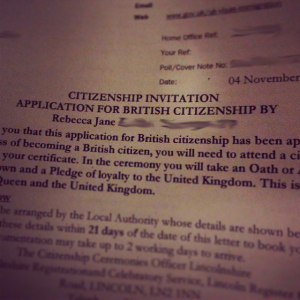 I became eligible for my UK citizenship in January 2013 after three years of residency, but we did not submit my application until September 2014. At the time I submitted my application, I was quoted as it taking 3-6 months to process, but closer to six….so imagine my surprise on Saturday when I got my acceptance letter! Total time from application being submitted to letter arriving on my doorstep was 6 weeks and 6 days!
The application itself is pretty straight forward. You download it off the gov.uk website. Don’t forget to download the guide and booklet to filling out the application as well as the payment form*! The current fee is £906, but this usually increases every 6-12 months, so it’s a good idea for you to double check with the website. I think the most frustrating part for me was finding the application online as UKBA used to have it’s own separate website and sometime between getting my ILR in 2012 and now, they moved all their files over to gov.uk. Google to the rescue!
You can either send your application in on your own (and send all your original documents) or you can pay £50 to your local council for a Nationality Checking Service. At this appointment, they will photocopy all of your documents and send those so you will not need to send in your originals.
Before you start to fill out the application, you need to get your photograph taken. I went to Snappy Snaps and had 4 photos done for £10. I’ve since used one for my provisional driver’s license and will use the remaining two when I apply for my British passport. You also could use one of those £5 machines in Tesco, Asda, etc. but every time we tried to get mine done the machine seemed to be down. I also preferred having mine done by a person and not a machine, because this ensured my photograph met the exact standards. Photos in hand, I was ready for the second important part of my application: your references.
You need to have two references. Both references need to have known you for at least three years. One needs to fit some very specific criteria** such as being a business owner, and the other reference needs to hold a valid British passport. Your first reference does not necessarily need to be British, by the way and neither referee can be related to you, even by marriage. Fortunately for me, I have been friends with the owner of MediVisas (BTW, an excellent source of advice!) for well over three years and I used one of our local 16mm members who I have known since I was first a visitor in 2008.

Before you sit down to fill out your application, you should first make sure you fit the residency criteria. As the spouse of a British citizen, I was eligible after three years of residency. Even though I waited longer, they are only interested in the past three years. You must have been in the country (not travelling) on the date exactly three years before the date of your application, and in the past three years you must not have been out of the UK for more than a total of 270 days and no more than 90 in the past 12 months. You also will need to know the exact dates you were out of the country (if you didn’t keep track, just go back through your passport stamps). Days spent partially in the UK (date you left and date you returned) do not count. You will need to enter the dates (for the past three years only if applying as a spouse) on page 7. If you run out of space, you can add additional details on page 13.
In addition to needing to know when you were out of the country, you need to list all of your UK addresses for the past 5 (three as a spouse) years. This can prove difficult for people who have moved multiple times. If you are reading this now with an eye to gaining citizenship, start keeping track of your addresses!
If you didn’t need to take the Life in the UK test for your ILR, you will need to take this test before you can apply for citizenship. If you are not from an English speaking country, you also will need to take an English language tests. Details for both of these can be found on the website. Hopefully, you kept hold of your LitUK test result paper, because you will need to send it with your application. If you don’t have it, you will need to take the test again, as they do not re-issue pass certificates.
You also will need to know your parents full names (including maiden for mother), birth date, nationality, and birth place, as well as all of this information for your spouse.
If you book a Nationality Checking Service appointment, you will need to bring:
-Your current passport and your passport with your current visa (if it’s in an expired passport)
-Your expired passport if it shows dates you were out of the country in the past 3 years***
-Your birth certificate
-Spouse’s current passport
-Spouse’s birth certificate
-Marriage certificate (the certified one, not the pretty one)
-Life in the UK Test pass certificate
-English language test results (if applicable)
-Proof of current address+
-Any other documents showing a change in identity (examples: adoption certificates for you or your spouse, divorce papers if either of you were previously married)
-Any other travel documents as issued by the Home Office. If you have a biometric card, bring it (I don’t have one).
-£50 to pay for the Nationality Checking Service (My council only accepted cash)
-Completed Application
-Payment slip for citizenship plus payment (No cash accepted. Card or Cheque only)
Please note that if any of your documents are in a language other than English, you will need to get them translated.
My Nationality Checking Service appointment was on a Wednesday morning. I did not need to bring my spouse along with me, but I did need to bring his documents. My appointment took about 15 minutes because I had organized everything ahead of time in a document folio in the exact order it would be needed. The woman who did my review praised my organisation….I couldn’t imagine doing these things without keeping my paperwork organised! As we went through my application, she had a checklist of documents and after we made the stack, she left the room to photocopy everything and returned all of my original documents to me. If you do not use the checking service, you cannot send copies and would need to send your originals.
At the appointment, I was told I would hear from them in about 2 weeks letting me know the payment had been taken, and then I wouldn’t hear again for 6 months as that was how long it was taking to process applications. Well, I must be lucky as my letter arrived this weekend — what a perfect fifth anniversary present for us!
First thing Monday morning (today!) is ringing up the county council office to schedule my citizenship ceremony! Unfortunately, I can’t apply for my British passport right away as I am travelling to the US in January and I do not think I would have my passport back in time, but at least I will have my new passport before my trip to the US in May! (and yes, I will keep my blue US one too! I get to be a dual citizen!)
***
*When I went to my appointment, they had copies of the payment form, but to be on the safe side I would print one out.
**The guide claims there is a “list on our website”, but I could never find it. However, the full list if acceptable referees can be found here.
***If you have travelled to a country that is part of the CTA (such as Ireland) it’s a good idea if you have copies of your boarding cards if you flew or took a ferry to show the dates you entered and left. I’m not sure if this was a requirement, but I submitted the information as I listed Ireland on my dates out of the UK.
+This is not listed as a requirement, however I was asked for this at my appointment. Fortunately, I had with me the letter I recieved with my ILR that listed my current address, although she did tell me it would have been okay if I didn’t.
The contents of this post, including images are © Rebecca J Lockley and Tim Lockley unless otherwise stated and should not be reproduced without permission. If you are not reading this on http://blog.beccajanestclair.com, my facebook page, Networked Blogs, the RSS feed(s), or through an e-mail subscription, please notify me.
[LJ readers reading this on the LJ RSS feed: Please click on the link at the top of the entry to go directly to my blog to leave a comment, as comments left on the LJ RSS do not get seen by me. Facebook users reading this from my Networked Blogs link can either comment on facebook or on my blog. If you are reading this through an e-mail subscription, you might need to go directly to my blog to view videos and images.]
For full Copyright and Disclaimer, please read http://www.blog.beccajanestclair.com/copyright/
No comments[Recipe] Pumpkin Pie Tarts [Slimming World Friendly]
 My Slimming World group had a taster evening right before Halloween and I decided to bring an American-style treat. I knew I wanted to make something with pumpkin, since it’s the season for pumpkin everything in the US, and so I came up with these tarts based on my mince pie tarts from Christmas. Because pumpkin is a vegetable, it’s free no matter what you do to it so you only need to syn the pastry, in this case two of these little tarts come in at 1.5 Syns. The filling and pastry are egg-free, and I’m sure you could substitute in gluten free flour (but please recalculate your syns!) to make a gluten free treat.
[DISCLAIMER: I do not work for Slimming World, I am not affiliated with Slimming World beyond being a paying customer/member, I get no personal benefit from writing this post other than the joy of sharing.]
This will make 38 tarts. If you follow this recipe exactly, your Syn value is .75 per tart, or two tarts for 1.5 Syns.
[Please note: Syn values are based on my exact ingredients using the online calculator. Your Syn value may vary based on your ingredients and the size of your baking containers and portions, so use this number as a guide only. Syn values also frequently change, but these values are correct at the time of publication.]
You will need:
For the pastry:
225g wholemeal flour (I used Alinson’s)
100g Flora light (blue container)
pinch of salt
water
(if you prefer a sweeter base, add some sugar substitute)
For the filling:
400-500g pureed pumpkin (you also can use tinned pumpkin)
1/4C sugar substitute (I used Truvia)
1/8 tsp nutmeg
1/8 tsp ginger
1/4 tsp cinnamon
1/4 tsp mixed spice
tart pans
biscuit cutter
fry light
1. Combine flour and salt and rub Flora until crumbs are formed.
2. Add a little water until dough sticks together and form into a ball.
3. Refrigerate pastry for 30 minutes.
4. While the pastry chills, combine all filling ingredients and set aside and pre-heat the oven to 180C.
5. Roll out your pastry as thinly as possible and use the middle-sided biscuit cutter to cut out 38 rounds.
6. Spray a tart pan and gently press the rounds of pastry into the cups, shaping it up the sides. Fill with approximately 1TBS pumpkin filling. (I eyeballed it)
7. Bake for 20 minutes or until tart bases are firm and slightly browning. Filling will not be solid.
8. Turn out onto a cooling rack for about 10 minutes before serving.
Enjoy!
I can’t wait to make these for Ex-pat Thanksgiving!
***
The contents of this post, including images are © Rebecca J Lockley and Tim Lockley unless otherwise stated and should not be reproduced without permission. If you are not reading this on http://blog.beccajanestclair.com, my facebook page, Networked Blogs, the RSS feed(s), or through an e-mail subscription, please notify me.
[LJ readers reading this on the LJ RSS feed: Please click on the link at the top of the entry to go directly to my blog to leave a comment, as comments left on the LJ RSS do not get seen by me. Facebook users reading this from my Networked Blogs link can either comment on facebook or on my blog. If you are reading this through an e-mail subscription, you might need to go directly to my blog to view videos and images.]
For full Copyright and Disclaimer, please read http://www.blog.beccajanestclair.com/copyright/
No comments
